Panic, Peas and Pistou

Panic, Peas and Pistou

Hi Friends

Welcome to springtime in the New England! It is 70 degrees today on March 8th in Northwest Connecticut, and in order to mitigate my rising alarm at the wicked respiratory cold they call Covid-19 racing across the globe, I’ve decided to take a break from the news. It’s time to pull on my gloves (the dirt protection kind, not the medical grade germ protection kind) and venture into the garden. Since cold season clearly isn’t over, and the best thing for a bad cold is a bowl of hot soup, I have my favorite spring soup in mind.

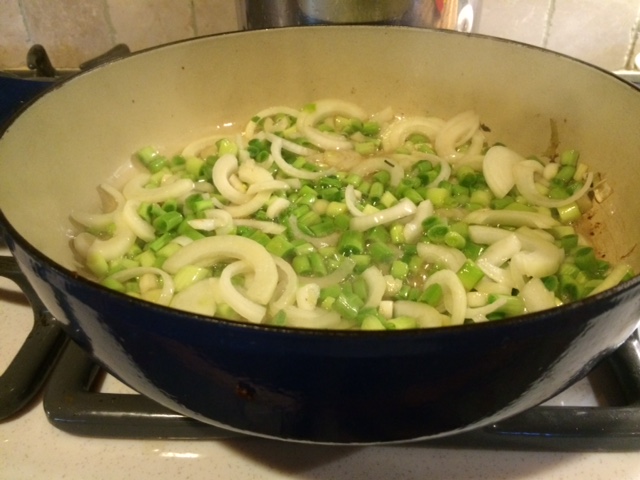
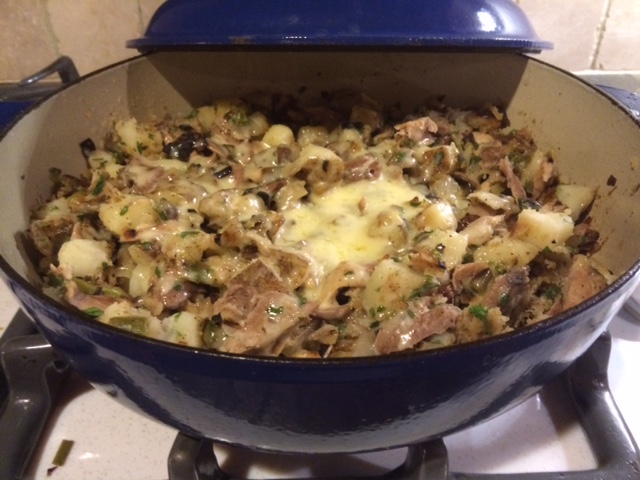
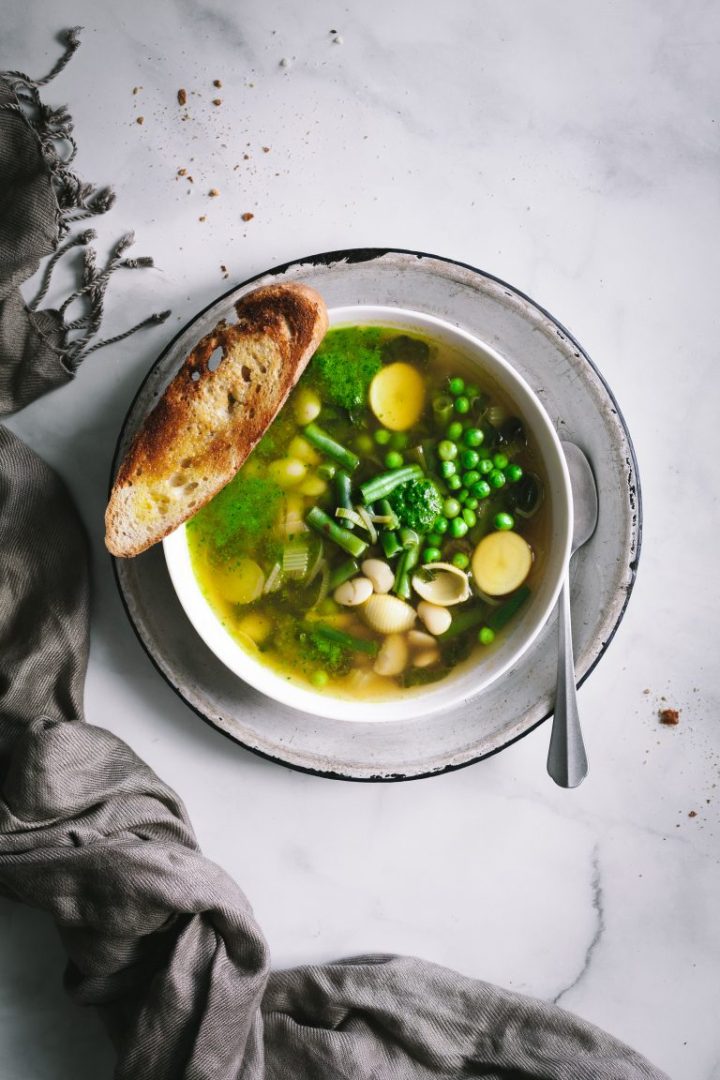
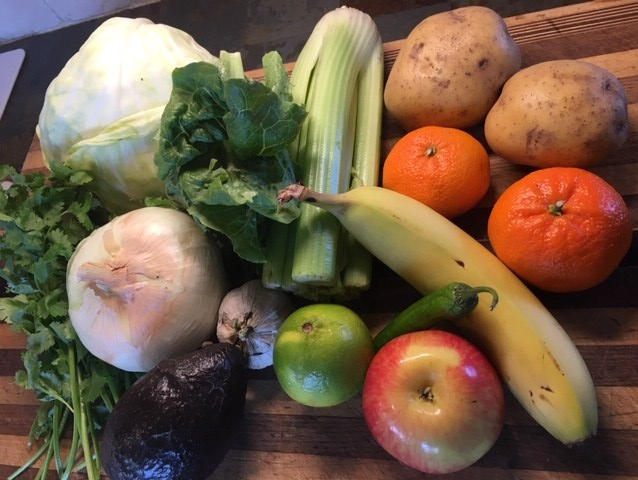
Pistou is a Provencal pesto of sorts, made with basil, garlic and oil. It is used primarily in a northern Italian dish called Soupe au Pistou. When I think Pistou, I don’t think of basil as much as I think of fresh peas, which is one of the necessary ingredients for this light, bright, healthy Mediterranean soup made with pasta, beans and spring vegetables. For Pistou later, I need to plan now. Click on the link under the photo for one of my favorite French versions from The French Barn.

St. Patrick’s day has always been my rule of thumb for the time to plant peas. In this region it is generally the time when the soil can first be worked, and in the past I’d wait for a sunny day soon afterwards. But the times they are a changin’, as they say. Climate change has done away with the regular patterns, and we have to adapt. For my purposes today, the sooner the ground is thawed, the better.

Different pea types to plant

When I chose my peas from Baker Creek Heirloom Seed Company in January, I was, as always, enchanted by the color glossy pictures and delicious descriptions of the vegetables. As always, I couldn’t decide on which varietals to choose, so I chose several. I may be sad when the weather warms and there is no room left in my garden for the tomatoes and eggplant!

Peas are very easy to plant. They love cool weather, they can handle a light frost, and they don’t mind soils in the 30’s. This makes them the perfect spring vegetable for our inclement Northeast weather. Once your soil is loose and has been amended with compost, simply poke them in the ground with your finger to a depth of about 1 inch. Space them 3″ apart in rows at least 24″ apart.

A type of netting for pea trellis

Most peas grow in vines, and need something to cling to as they grow. A trellis of some sort, either a net attached to stakes, such as I use, or a mesh fence or a woven panel will help them grow tall and make harvesting easy. It should be at least 5 feet tall, or higher, depending on the variety. Some peas can grow 10 feet tall! New this year for me is a bush type varietal called Kelvedon Wonder. Topping out at 18″, it needs no staking, and therefore even less work than usual.

Bush type peas varietal

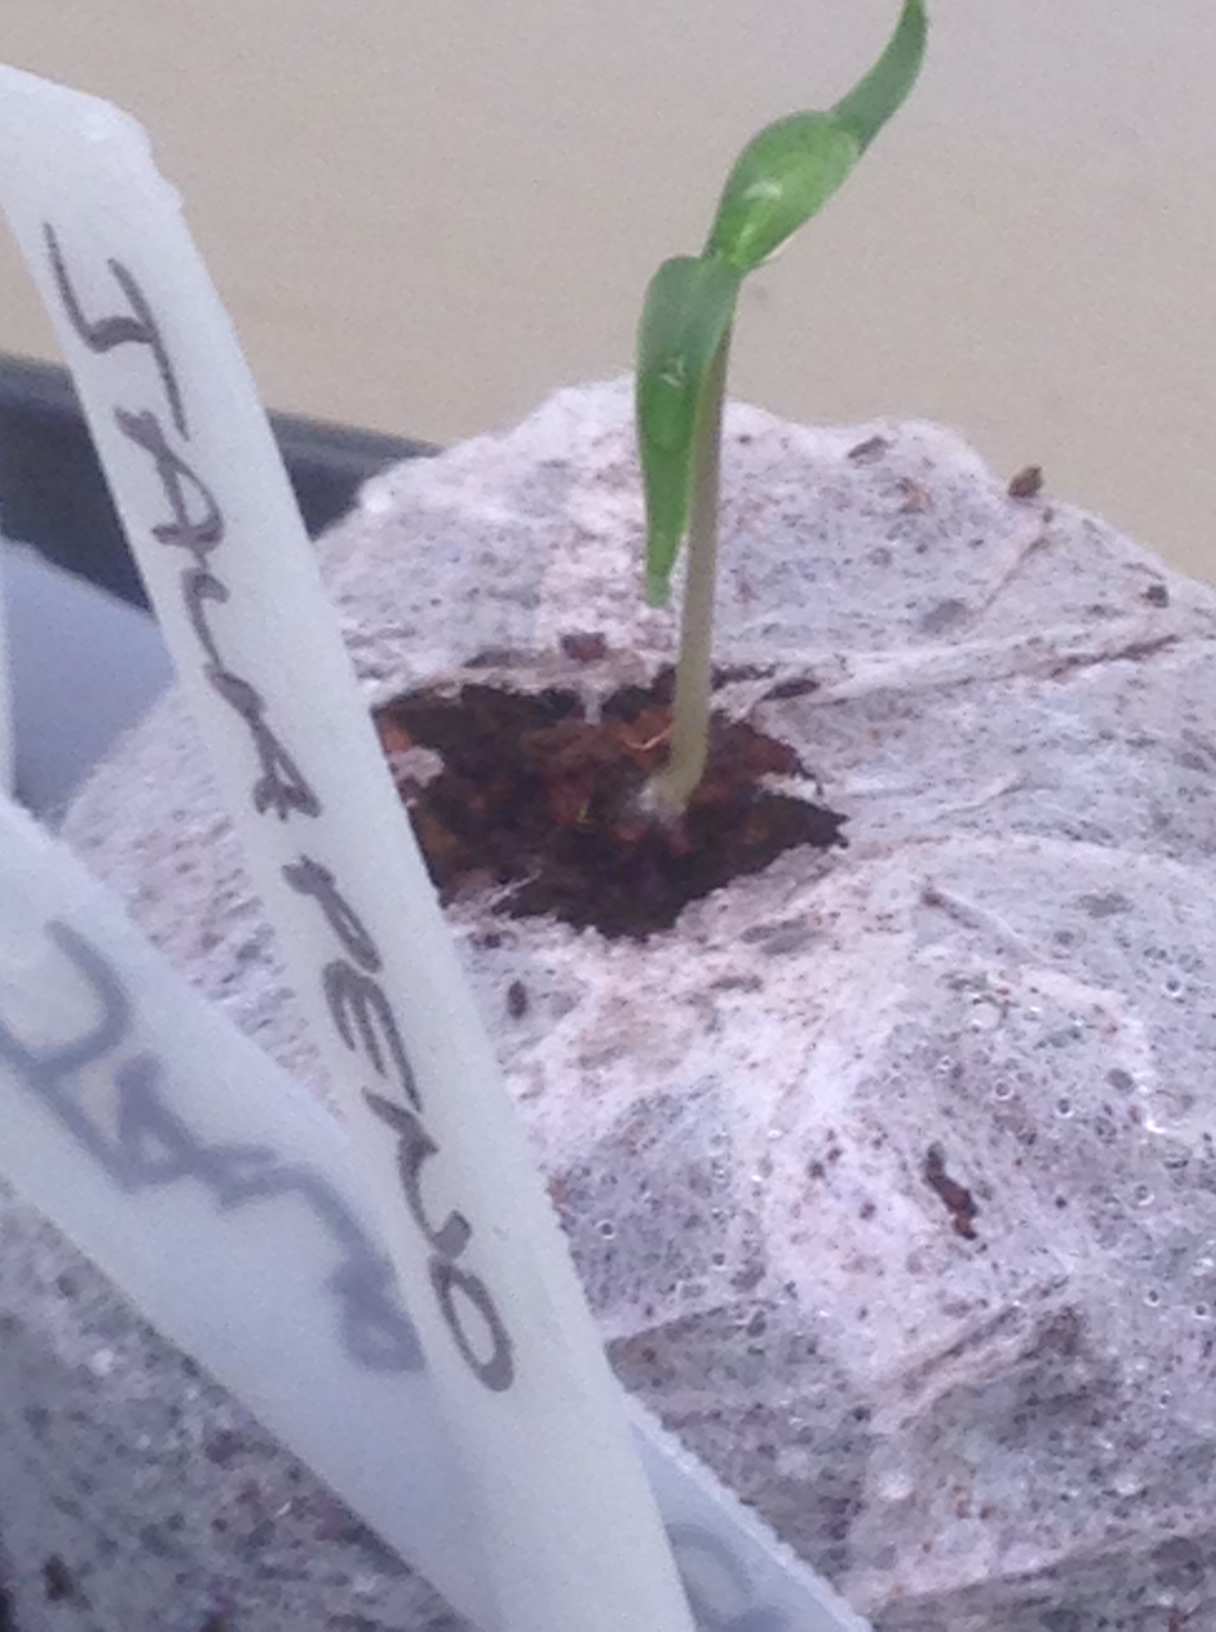
A word of warning: New pea shoots and leaves are a favorite of some songbirds, and if found, they will peck at the leaves until there isn’t much green left for the new plant to photosynthesize. If you find your tiny new leaves are getting eaten, it’s wise to cover them with row cover for protection until they are strong enough to withstand a bit of abuse. A cover is also in order if a heavy snow is expected.

Deliciousness!

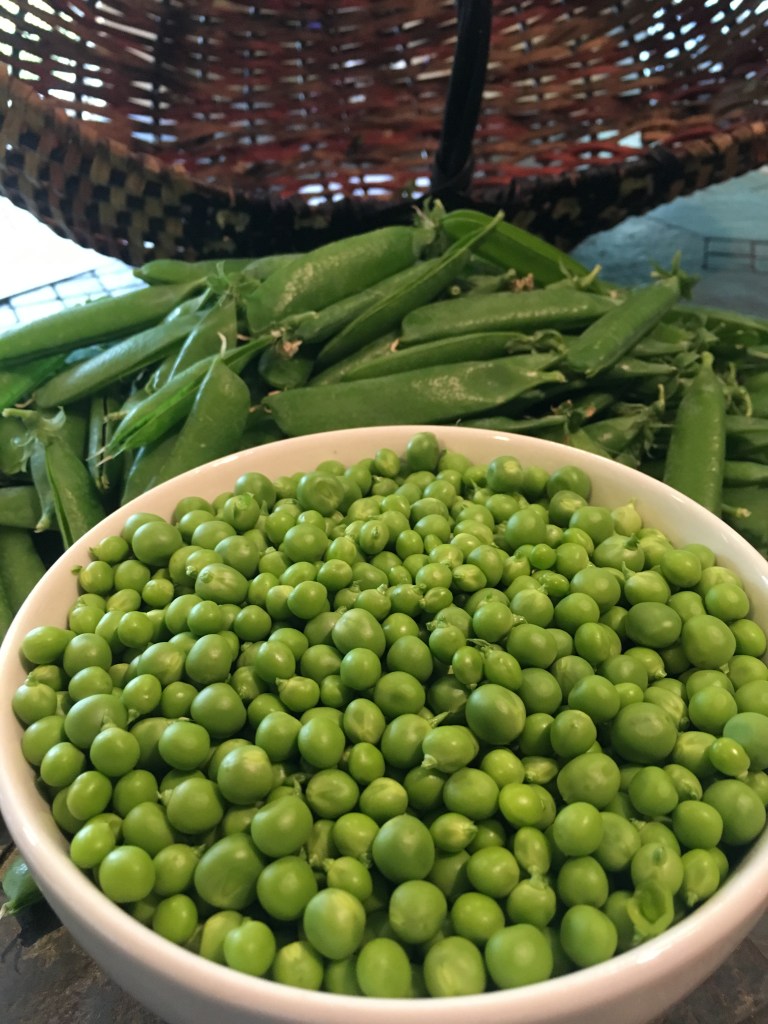
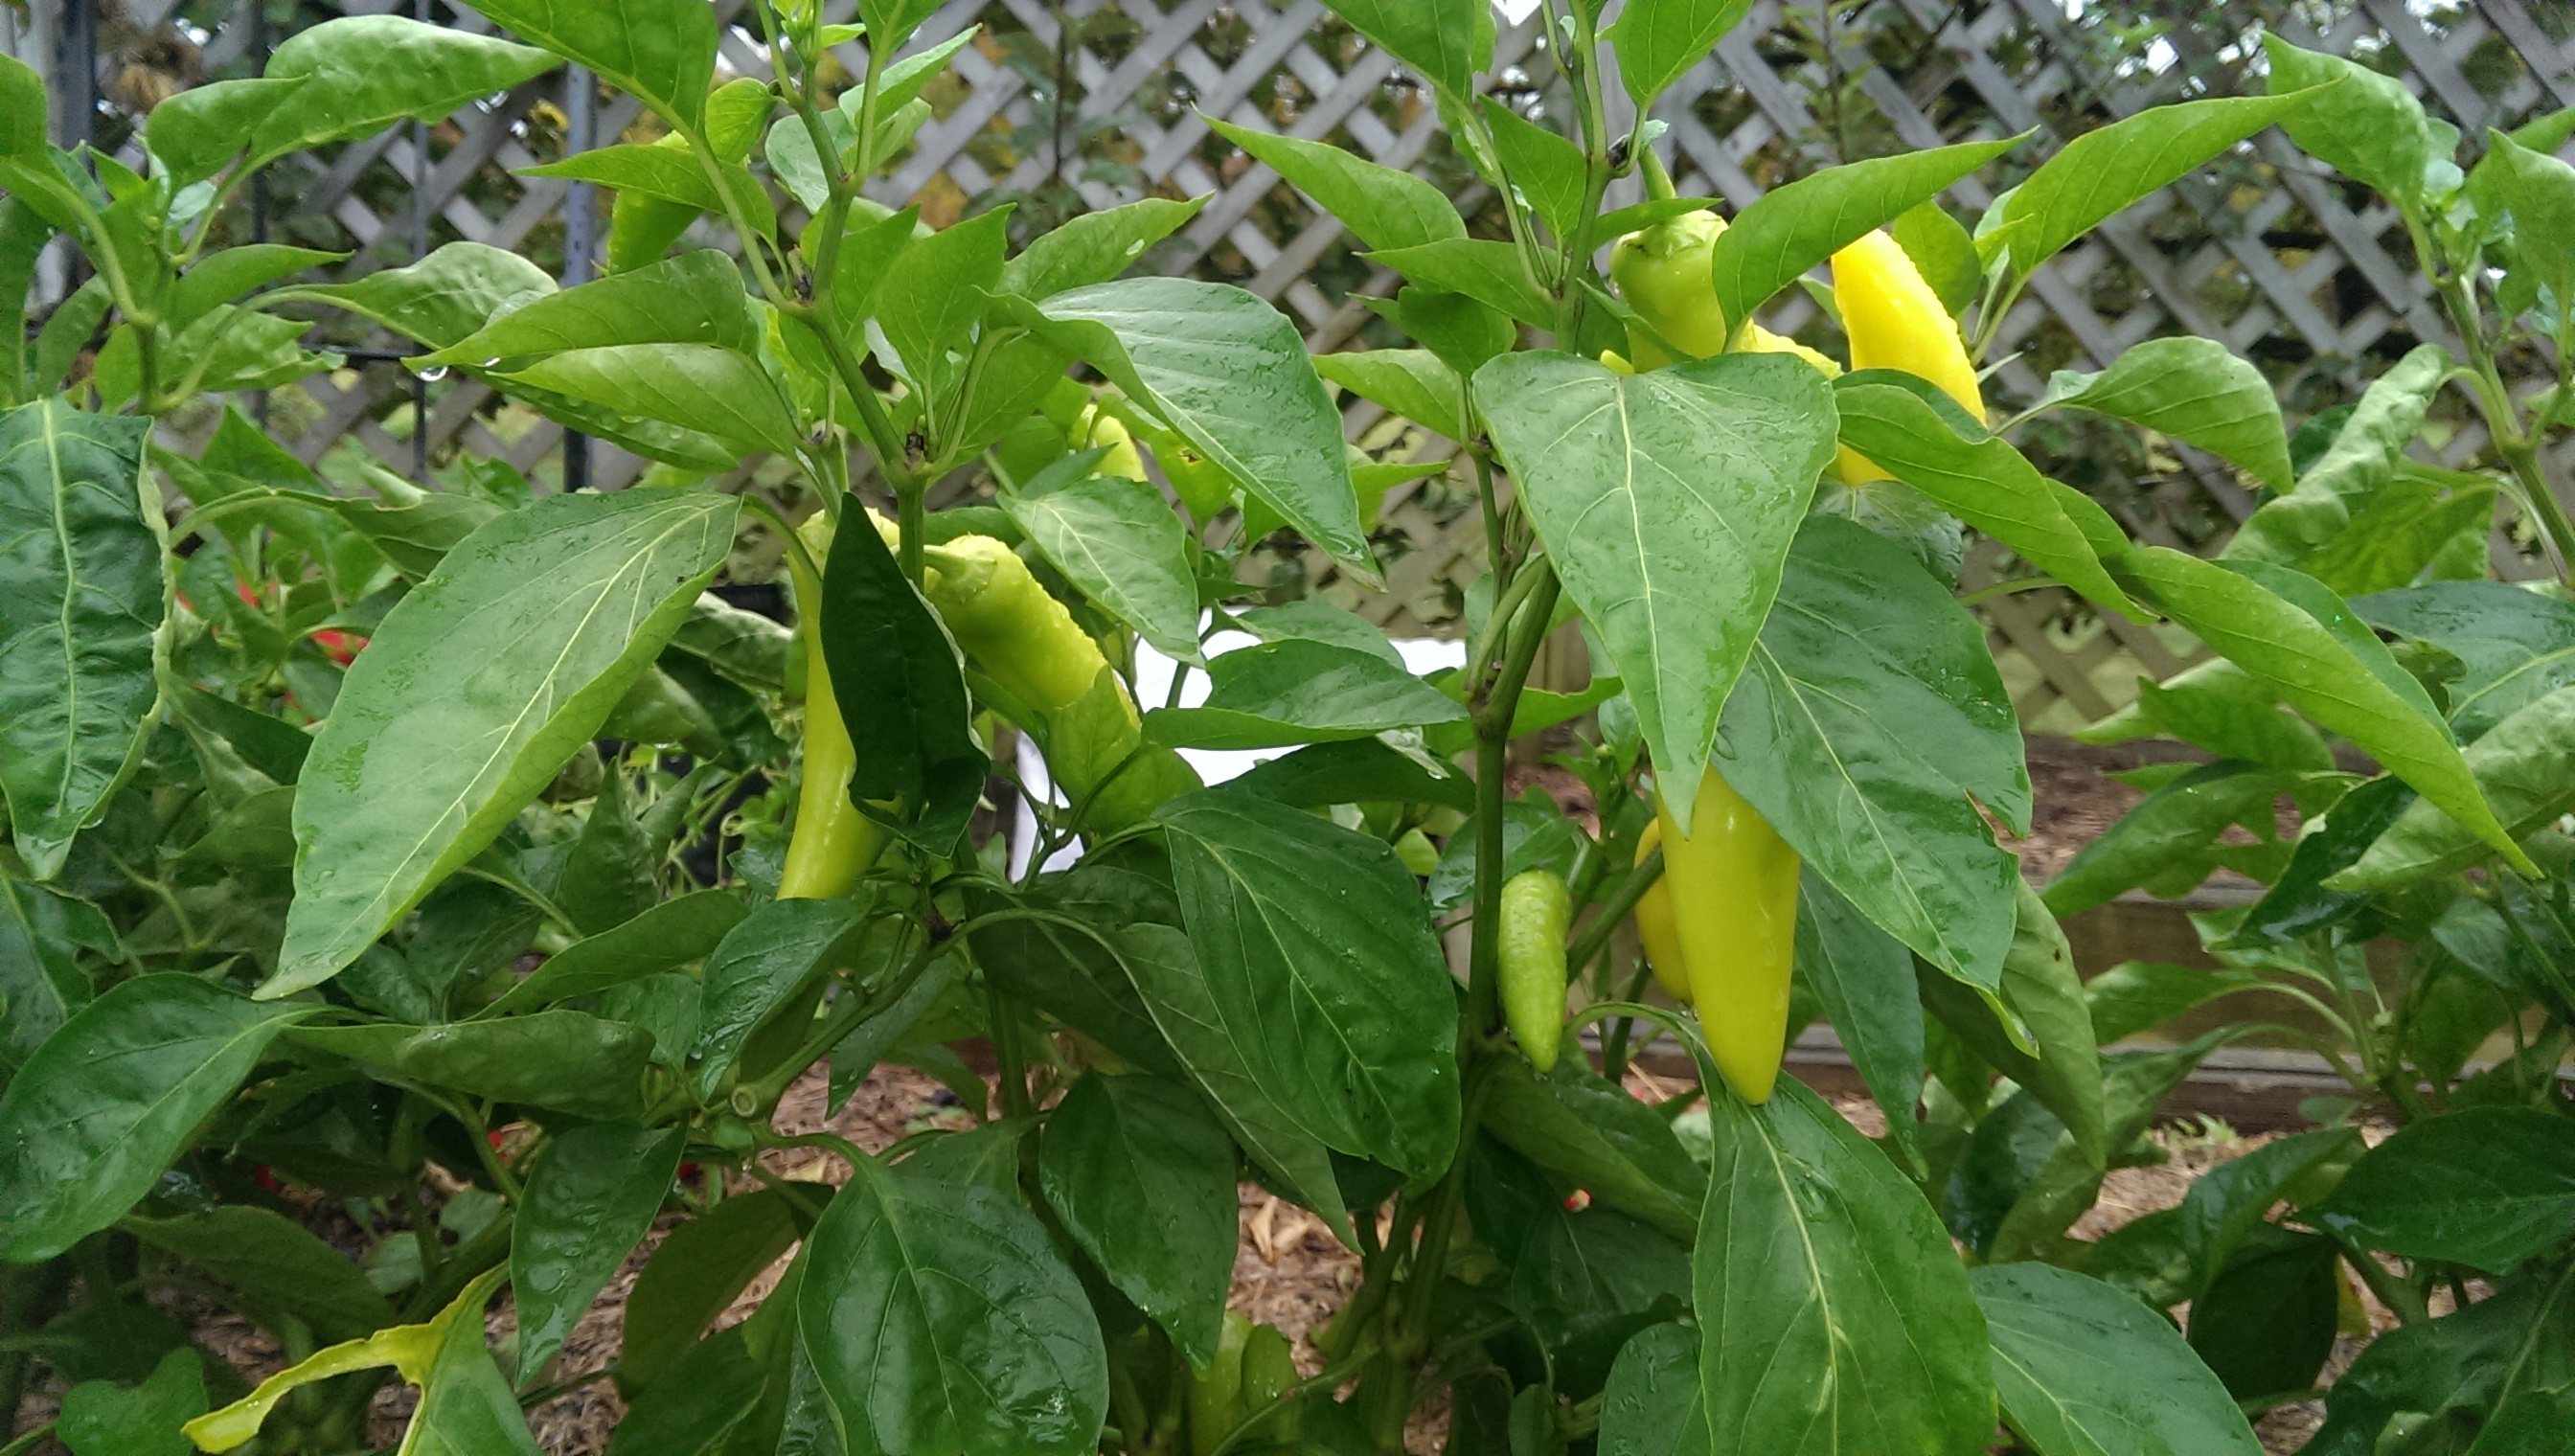
When I think of those first fat pods of sugar snaps dripping off the vines, and then lightly sauteed snow peas in butter, and finally thumb-sized shelling peas bursting with flavor to store for the winter, I’m ready to get them started. It’s easy to sit inside and panic, to worry and watch the numbers and listen to the talking heads squawk fear and discord, anger and accusations. Panic is antithetical to the gardener. If a gardener falls into the mindset that the world is ending and all is lost, he/she/they will no longer garden; hence they cease to be a gardener. Without a future, there is no point in a garden. The act of gardening is an act of hope. In fact, gardening is the natural response to fear and panic. It provides stability, a plan, future security and a firm foundation in a hope for better things. Let’s focus on what is important. Try to stay home. Try to stay healthy. Eat soup. Plant peas. Sow hope. Go put some seeds in the ground and see if you don’t feel better about your world. I dare you.

Wild Meat

An average day

How many types of plants do you eat in a day? I tried to count the daily variety of plants in my diet, and the number is on average around 15 a day. I included a couple of pieces of fruit, a salad with 6 vegetables, and a diner that includes 5 more, for example a side dish, onions, garlic etc. I guess if I included spices it would be higher. I didn’t count things like flour or sugar, as those things aren’t really like wheat or cane anymore. So lets call it 20 on a good day.

Recently I’ve been reading about things like polyphenols, curcuminoids, flavonoids and things like food combining for bioavailability. Spell check doesn’t even contain these words yet, because they are new terminology for new things no one even knew about 3 years ago, and they go way beyond your daily vitamins. You won’t find them on your USDA food plate. Suffice it to say, there is a whole lot going on behind the scenes when it comes to our relationship with food and health. My take away so far is….we don’t know the half of it.

What I do know is that in almost every instance, a variety of things is healthier than a whole bunch of only one thing, in the garden, in the kitchen, in life. I know that things grown in a natural manner are healthier than things grown artificially. I know that, when we eat something, our bodies take on the benefits of that thing, in the form of nutrients and energy and satisfaction, and, I’m certain, in ways we have yet to discover. So wouldn’t it stand to reason that eating a wide variety of foods, the widest possible variety, would give you the broadest spectrum for health and wellness?

A wild ruminant can consume over 200 species of plant life in a day. 200! And they eat tons of things that you couldn’t even chew, let alone digest, like lichen and tree bark. Imagine what unknown flavonoids could be lurking in those funny red berries you saw in the woods last fall (that you should never eat without properly identifying!) Maybe the deer will eat them.

I think we really have no idea what’s going on at all when it comes to our food relationships.

That said, I’m going to stagger my odds and try to capitalize on those 200 plants. I’m going to eat the deer that eats them.

Below you will find many other healthful reasons to eat venison. If you are wondering where to get some, ask any hunter. We love to share! Don’t know a hunter? Go to a gun store and ask. Believe it or not, hunters are really friendly people.

On the table is Corned Venison, in honor of St. Patrick’s day next weekend. I poached this recipe directly from honest-food.net, my favorite wild game chef. Thank you Hank Shaw!

Corned Venison

Prep Time 20 mins, Cook Time 3 hrs, Total Time 3 hrs 20 mins 

1/2 gallon water

1/2 cup kosher salt

1/3 cup sugar

1/2 ounce Instacure No. 1 (sodium nitrite) Don’t leave this out! You can order if from Amazon

1 tablespoon cracked black pepper

1 tablespoon toasted coriander seeds

6 bay leaves, crushed

1 tablespoon mustard seeds

1 tablespoon dried thyme

1 teaspoon caraway seeds

1 cinnamon stick

5 chopped garlic cloves

A 3 to 5 pound venison roast

Instructions

  1. Add everything but the roast to a pot and bring it to a boil. Turn off the heat and cover, then let it cool to room temperature while covered. This will take a few hours. Meanwhile, trim any silverskin you find off the roast. Leave the fat. Once the brine is cool, find a container just about large enough to hold the roast, place the meat inside and cover with the brine. You might have extra, which you can discard.
  2. Make sure the roast is completely submerged in the brine; I use a clean stone to weigh the meat down. You can also just flip the meat every day. Cover and put in the fridge for 5 to 7 days, depending on the roast’s size. A 2-pound roast might only need 4 days. The longer you soak, the saltier it will get — but you want the salt and nitrate to work its way to the center of the roast, and that takes time. Err on extra days, not fewer days.
  3. After the alloted time has passed, you have corned venison. To cook and eat, rinse off the meat, then put the roast in a pot just large enough to hold it and cover with fresh water. You don’t want too large a pot or the fresh water will leach out too much flavor from the meat — it’s an osmosis thing. partially cover the pot and simmer gently — don’t boil — for at least 3 hours and up to 5 hours. The meat itself will be cooked in an hour or less, but you want the sinews and connective tissue in the roast to soften and that takes time.
  4. Eat hot or cold. It is absolutely fantastic with good mustard and some sauerkraut on a sandwich.

One final tip: When you are done with the corned venison, leave it in the cooking broth. Store that in the fridge. Why? The broth keeps the venison moist. Without fat, if you leave it out of the brine it can get very dry and even crumbly.

Potty Talk

My dogs love to eat poop.

My dogs especially love to eat frozen poop. Poopcicles.

My dogs love to eat frozen poop and wipe their faces on the back seat of my Subaru.

NAUGHTY!

OK, stay with me people. This actually is about gardening and food and seasonal living. Sort of.

So lets think about poop for a minute. I’m talking about horse poop, although I’m sure they would eat cow poop too, if we had a cow. The horses eat the grass. They digest the grass. That keeps them warm. Then the horses poop out the grass. It goes onto the ground and the worms come to eat it, and they digest it, and they poop too. (yep, Everybody Poops) THAT goes into the ground, making healthy soil, and the grass grows healthier. And the horses eat the healthy grass. The magic that is happening in this very specialized system that I have grossly oversimplified is called …..Drum roll please….Bacteria.


Enter the Dogs. What is actually going on here is the dogs are capitalizing on a healthy system. They are trying to get something they need into their diet by eating the poop of other animals. It’s not because the poop tastes good, although it might. I wouldn’t know. Dogs, being carnivores, don’t have a ton of naturally occurring good bacteria in their guts, but horses do. That’s why we put their poop on our gardens. The dog eat the horses’ poop to get the good digestive bacteria.

This is where it comes from!

Can you see where I’m going with this?

I just finished reading The Mind Gut Connection, by Emeran Mayer. I strongly recommend that anyone anywhere sick with anything read it immediately. Even though I know you all will, I’ll give you a synopsis anyway.

  • The gut is larger than the brain and every bit as complex.
  • The gut has trillions of microbes, including bacteria, in it. The microbes are our personal ecosystem.
  • The Microbes (actually the metabolites they produce), interface with our brains. They control most of our hormones, as well as our immune responses. They can also produce cytokines when they are unhappy, which cause inflammation.
  • Personal microbial stability = good health and emotional wellness.
  • Things that kill our personal gut microbes are bad for us. (pesticides, antibiotics, corn syrup, commercial wheat gluten, emulsifiers etc. etc.)
  • Things that are good for our microbes are good for us. (organic produce, fermented food, wild foods)
  • We must ‘farm’ our microbes to keep them healthy.

I’m not saying we should be eating poop, although that’s fast becoming a treatment for certain illnesses. Just consider, the next time you stop for a doughnut and a caramel mocha latte, what is happening to your gut bacteria. The next time you have to take a Z-pak, realize that it’s wiping out all the good guys along with the bad. No wonder it gives you the runs.

I know we all get sick, and the best treatment for severe bacterial illness is strong antibiotics. But remember that a healthy gut can (and does) wage war on invasive bacteria. Your personal army of microbes, if you keep it strong and healthy, will prevent you from getting sick in the first place.

Once you’re there and you’ve been coughing for weeks, fever of 103, chest x-ray, and you’re gulping down those steroids and antibiotics and sucking on the nebulizer, it’s time to do some serious bacterial rebuilding. If you just plain refuse to eat poop (just kidding!) there are other ways to rebuild your internal microbial army. They are called FERMENTED FOODS.

Kim chi, sauerkraut, pickles, yogurt, fermented cheese, kefir, kombucha, miso, tempeh, sourdough. These are some of the common ones available at the grocery store. Get them and eat them every day. Or ferment your own. It couldn’t be simpler. Put some vegetables in a crock with some salt. Cover them with water. Wait 4 weeks. Eat. It is actually that easy.

So go forth my friends, and colonize your guts with healthy bacteria. Farm your internal microbes. Eat well, live well, be happy.

Just peachy

Life isn’t always just peachy, but on those rare occasions when life goes right, it’s important to celebrate.  Just so seasonal peaches.  The peach harvest isn’t always perfect, and indeed some years are so poor the peaches need to be scrapped altogether.  But when everything goes right, and the Spirits of Fruit bless us with an abundance of perfect peaches, it is our pleasure, nay, our obligation, to enjoy and preserve that gift so we can savor it long into the future.IMG_0787

Peaches are one of my favorite fruits.  Many a summer past I have looked longingly at what is on offer at my local supermarket in June, or even July, and imagine it might be tasty and delicious.  I imagine it’s sugary juice and perfectly ripe density as I bite into it.  I’ll pick up a peach and gently prod its unyielding flesh or bring it to my nose in hope of catching the sweet aroma of summer.  Foolishly, I may even be convinced to pay the outrageous sticker price for one or two with the notion that this time will be different, that these peaches were perhaps allowed to stay on the branch a little longer than most, or better yet were picked nearly ripe.  I’ll gently take the fruit home and set it on the counter to fulfill its natural destiny of becoming delicious.  When it’s stiffness finally yields under my thumb, it smells like actual peaches, and I deem it ripe enough to eat, I bite into its softness and feel tasteless mush coating my tongue like wallpaper paste.  Into the compost they go.  How did I get fooled again?

IMG_0768

The only good peaches are the ones you pick yourself, ripe from the tree.  And not always those.  Years past have given us hard nuggets that never ripen or worse, fall off the tree when they are the size of walnuts.  We’ve seen fruit with thick hairy skin and crunchy flesh, as well as wormy bland fruit that has the consistency of blueberries and leaves a slimy film on the tongue.  Timing and weather play important roles in a successful peach harvest, and only one of those things is within our control.  You make your own luck, my dad used to say.  God helps those who help themselves, my mom’s voice calls out from my past.  Every gardener knows those expressions are only partly true.  If nature won’t cooperate, and inclement weather strikes at in-opportune times, no amount of hard work can fix it.  A frost after the trees blossom will kill a harvest overnight.  Excessive heat, too much rain, blight, insects and many other things can ruin peaches.  But some things are within our prevue, and timing is essential.  Choosing which days to apply horticultural oils to protect the blossoms from egg laying insects, fertilizing the trees at the proper times, deciding when to thin the fruits; all these things can affect the harvest.  Once the fruits are established and ripening it is time to decide when to pick.

If you see a bunch of rotting peaches under the tree, you’re too late.

Start testing the fruit once one or two peaches have dropped on the ground.  If you are impatient, give the tree a gentle shake and see if any fruit falls off.  Once the first fruits drop the time is right to test the peaches for ripeness.  A gentle press with the thumb on the bottom flesh will give you an idea of the readiness of the peach.  If the flesh doesn’t yield, its not ripe.  When the bottom yields under the thumb, check the top of the peach near the branch.  This should just give under the finger.  If it is still firm-not ripe.  If it yields, give the peach a twist.  If it pops off-hurrah, it’s ripe. If the tree gives some resistance, perhaps it’s not ready to give up the fruit yet.  It’s telling you to wait another day.  Accept it.

There is only one reason to pick the peaches before they ripen on the tree and that is if the birds find them first.  Once the crows and their cronies get a taste of those lovely peaches, it’s all over.  They have an maddening way of pecking only the ripest part of the fruit, usually where the sun hits it, and leaving the harder unripe side intact.  They go from peach to peach and ruin each one, leaving the unprotected flesh open for fruit flies, ants and other pests to crawl in and spoil the fruit.  If you don’t want to share with your feathered friends I suggest that at the first sign of beak marks, you pick the fruit that’s unblemished and mostly ripe.  A few days on the counter, covered by cheesecloth to protect it, will eventually ripen the fruits.  Better yet, net the trees to protect from the birds.  IMG_0773

Once the fruits start to ripen on the tree, they come like a wave.  At first there are just a few ripe ones to tempt the appetite, eaten just rinsed in the sink, or grilled. As the days pass they ripen by the basket full, and soon the counter is covered with fruits in various stages of ripening, too many to eat each day.  Soon fresh peaches are a part of every meal, and the pies and kuchens and cobblers feel more like an obligation than a treat.   It’s time to put up the abundance so that when colder breezes blow, a mouthful of sweet deliciousness will recall to us the sun and warmth of humid August days.

All the ways to preserve the harvest start with the same first steps.  Jammed, jarred, frozen, liquored, candied, dehydrated, or even salsa-fied , the peaches must first be relieved of their fuzzy skin.  This is done by blanching the peaches in boiled water for 1 minute, and then plunging the peaches into cold water.  One minute.  Time it.  Longer and the peaches will begin to cook and become mushy, and then your only choice is jam.  Less and the skins won’t slip off.  You can tell during this first step if your peaches are indeed perfectly ripe because if they are, the skins will slide off leaving smooth peachy flesh underneath.  If they are a bit under-ripe, the skin will peel off taking some of the flesh with it, and the peach will be nubby looking.  See the difference in the picture below.


Once they are blanched there are endless choices for using or saving them.  If I have too many to process and not enough time, my first choice is to freeze them sliced into quart bags.  This is fast and easy, and allows for more creative uses when I have more time to spare.  Take care to fill the bags only partway full or they won’t stack well in the freezer.  To minimize the mess, I roll the top of the bag over to fill it.  Freezing the peaches does not require the use of citric or ascorbic acid to protect the color, but if you might want to jar them at a later time I suggest using it prior to freezing.  When they thaw out the bright peach color will tend to brown slightly, and pretty jars lined in the pantry look so much better if the peaches have been rinsed in a bit of acid first.  I use Ball brand Fruit-Fresh.

IMG_0784

Canning is another way to keep them safe for months to come, but it does require more effort, and some specialized equipment.  While you don’t need a pressure cooker for canning peaches, it does shorten the processing time. I can my peaches in a very light syrup if they were allowed to ripen on the tree.  I want to taste peach, not sugar, when I open the jar.  IMG_0795

If you are not patient enough to grow your peach trees, or don’t have the space, don’t despair.   Take a trip to a pick-your-own orchard, find a farmers market, or as a last resort, buy some from your market when it is peach season in your area.  Ask the provenance of the fruit and if it is local, give it a try.  Smell is the best way to judge ripeness in market fruits.  If you can find good fruits, it’s wise to invest now for a payout later.  Buy a bushel. Winter peaches are worth it.

If you have an interesting way to preserve peaches, or a receipt to share, post it here.

Which season is this, anyway?

IMG_1781I bought myself a new pair of galoshes.  I love that word, galoshes.  It brings to mind yellow rubber duckies and chubby kneed toddlers jumping in puddles.  Purple umbrellas, rain streaking down window panes, and good books.  So I have a new pair.  Sleek, navy blue and mid-calf, with a bright orange lining, they are my new favorite shoes.  Partly because I get to wear them every day, morning and evening, and sometimes in between.  They are made by a company called Hunter, the Rolls Royce of rubber boots.  The last pair I had were made by Hunter too, although I cheaped out and bought them slightly used on Ebay.  I got  what I paid for, by the way.  They must have been more than “slightly” used, because they only lasted a few seasons.  After a few weeks of doing my chores in wet socks this spring I broke down and bought a new pair directly from the company.  And not a moment too soon.  The pretty box lined in bright orange with the fancy Hunter logo gave me almost enough gratification to justify the price.  At least they are getting a good workout.  IMG_0747

It’s been a wet summer here in the northeast.  Wet and hot.  A wet summer following a cold late spring.  Following a weird winter.  But no one needs me to tell them that the weather is out of whack, all you have to do is look out the window, or better yet look at your garden.  I’ve got tomatoes splitting open on the vine before they ripen, peppers dropping all their leaves and huge eggplant bushes with no blooms on them.  My carrots are two inches tall and as fat as sausages, the watermelon, winter squash and pumpkins have no fruit at all, and the raspberries mold before I can pick them.  I have cabbage spitting open like hatching eggs and basil plants with leaves as brown and slimy as pond scum.  Things are composting before I can harvest them.  It’s wet.

IMG_0749

It’s in my nature, sadly, to point out the tragic and flawed first.  When someone comes for a tour of the garden, or is just walking through, I’ll delightedly complain about all the garden failures.  Maybe it’s my way of deflecting blame, as if I’m somehow responsible for the weather.  I need everyone to know that despite all my efforts, things are not perfect, and I recognize it.  I make them note the worst so they know that I know the flaws exist.  That I’m not proudly displaying what is obviously not the way it should be.  It’s a terrible way to behave, and not very self-serving.  Most times, not only would they not have recognized the not-perfectness of things, but it robs them of the desired delusion that things really are perfect, and just the way they should be.  They leave thinking either I’m a downer, or just not very good at what I do.  Or worse, they feel the need to reassure me, and make me feel better for my multitude of failures. Ridiculous.

So, now that you’ve heard the worst, both practically and subconsciously, I’ll tell you the good news.  Onions the size of softballs.  Leeks that are three feet tall.  Abundant parsley, mint that is overflowing (isn’t it always) and cucumbers that just keep coming.  The garlic harvest was successful, fat white and purple heads drying on racks in the garage. The kohlrabi, while a bit tough on the outside, was none the less plump and crunchy.  And the summer squash.  Oh, the summer squash.  I’m reminded of Barbara Kingsolver’s book Animal Vegetable Miracle where she informs her children that they lock the car doors in summer not to deter someone from stealing the car, but to prevent neighbors from dropping off  bags of calf sized zucchini on their back seat.   Lock your doors folks, it’s that kind of year.

IMG_1799

And I can’t forget the flowers. Almost everything was abundant, tall, vibrant and with enormous blooms.  My ‘Dinner Plate’ dahlias are actually the size of dinner plates.  It’s the best year I’ve seen for poppies, and the Sunflowers are 10 feet tall.  Of course the weeds are 10 feet tall too.  Some of the grasses growing in my flower beds have become ornamental.  I’m trying to go with it and resist loudly declaiming to whomever will listen that I didn’t plant it there, and I haven’t gotten around to pulling it out yet, and if it weren’t for all this blasted rain you wouldn’t notice it.

IMG_0730

IMG_0729

I’ll let out a little secret.  We harvested about 6 gallons of honey from our two hives last week.  This is big news for all the folks to whom we give honey as a Christmas gift.  While a few of them no doubt have jars of honey stacked in the back of the pantry, I know for a fact the majority can’t wait for their Christmas bag of goodies from the Winter Pantry, the honey being the golden prize.  This years honey was pale, golden and sugary, redolent of clover blossoms, honeysuckle and apple.  Much different from previous years, when we’ve seen honey that has been almost molasses-like, dark amber and thick.  The weather makes a difference for the bees, too.

Not being a bee person didn’t stop me from helping this year.  Helping is a misnomer, really, but I was there, standing several yards away and trying to breathe deeply and radiate calm normality.  As if that’s my natural state.  Ha.  Only once did I do what I had promised myself not to; shreek, hop, and swat hysterically at my hair in an attempt to dislodge one furious lady trying in vain to defend her home.  Of course my husband, who is a bee person and for whom calm normality is a way of life, came to my rescue, and plucked the poor thing from my head before she could sting me and ruin both our lives.   He had repeatedly picked the angry things off his arms and neck without a peep, lifting out the heavily laden frames with calm aplomb.  Different nature, I guess.

And I must mention the fruit. The abundant rain and humid weather has certainly been a blessing for all the fruit setting plants.  Fat yellow plums are dripping off our diminutive trees and for some strange reason the birds haven’t yet discovered them.  Perhaps they are thrown off by the color?  It is wonderful to harvest so many unblemished fruits.   The downside being that they don’t spoil as fast, so I’m disinclined to make jam, or even to freeze them.  Sorry friends, no plum jam in the Christmas bag.   Instead they sit in big bowls on the counter and get gobbled down five at a time.  This time of year it’s not unlikely for me to make an entire meal of plums, blueberries and peaches while I stand at the counter dripping juice on myself.  Elegant.


Conclusion?  The weather is weird.  It’s different than last year, different than any other year before.  Science says it’s going to get weirder.  But nature will win out, in the end, I think.  And us gardeners, what can we do in the meantime?  We have to deal with what we get, acknowledge the bad and celebrate the good, and then go forth and try to be more responsible to the planet.  We plant and harvest and eat, we fail and succeed and mostly do the best we can.  It’s in our nature.


Morning Score

This morning, as I walked up the cool dewy driveway to feed the horses, I noticed something in their pasture that hadn’t been there yesterday.  The pasture grows rocks;  I know because I pick them up and toss them over the fence regularly, yet there still seem to be plenty around.  This didn’t look quite like rocks though, or any of the other paraphernalia the horses lose in the pasture, so I walked down to investigate.

IMG_1159

Hooray!  It was what I was hoping they might be…some puffball mushrooms.  They must have blossomed in the field after the hard, much needed rain we had yesterday afternoon. The horse had stepped on some of them, but I managed to salvage some good mushrooms  “for the pot”.  I didn’t have my camera with me, so I can’t show you, but there was clear swath of darker color in the grass where the fungus was growing, like a big comma, and there was a sweep of puffballs, the fruit of the fungus, blooming right down the center.

As I walked back home with my loot I got to reflecting about mushrooms, for which I have a deep fondness.  They often grow in dead or dying material. In other words, they are a product of decay.  It amazes me that nature is structured in such a way  that life flows naturally from death.  Take compost, for instance.  I have a compost pile into which I tossed a rotting pumpkin last year, as well as all my other garden waste.  This year I can’t see my compost pile for the hybrid squash/pumpkin Audrey III growing there.  Abundance from decay.  And yet we still see death as a finality.

IMG_1160

Back in the kitchen putting away the mushrooms, I was chagrined to remember that I have two dozen jalapenos, 10 ripe tomatoes, 4 cabbages, 6 cucumbers, 2 giant zucchini the size of my arm, 3 peppers, a basket of green beans and a watermelon already stuffed in the fridge.  Why can’t I find a score of puffball mushrooms in February, when there is nary a fresh thing in sight?  So I’ll make some hot sauce, roast the tomatoes for the freezer (a yummy trick I learned from my mother-in-law)  whip up  some coleslaw for dinner, jar some pickles, freeze the green beans, and leave the zucchini in my neighbors car, but I am definitely having a mushroom omelet for breakfast.

MUSHROOM OMELET

2/3 cup mushrooms of any kind, diced

2 fresh local eggs (3 if you are hungry)

2 tsp. butter divided

1 oz. goat cheese

Salt and pepper

Heat a nonstick pan on medium low heat.   Crack the eggs in a bowl and scramble lightly with a fork.  Saute the mushrooms in 1/2 the butter until tender and most of the water has evaporated.  If the mushrooms dry out before they are cooked through, add a tablespoon of water to the pan and cook until it’s dry again.  Add the eggs and the rest of the butter and cover for 2-3 min.  When the eggs are mostly cooked, add the cheese to one side and gently fold the eggs onto the cheese. Turn off the heat. Cover again for a few more minutes until eggs are cooked through.

IMG_1163

Pretending, and other stuff.

Hello friends

You may have wondered whatever happened to me and my sometimes blog.  Well, I’ll tell you.  Last spring I was offered my dream job.  I was hired to design, build and manage a teaching garden for the Marvelwood School, a small Connecticut private school that both my sons attend.  I get to spend part of each day planning, organizing and actually digging in the dirt.  It was a very successful first season, and it just keeps getting better.  I was offered the use of a small greenhouse on the campus so I can continue puttering about with growing things this winter.  I’ll tell you a little secret…I’m experimenting with aquaponics too!  I already have 8 little goldfish working hard to produce nitrogen for my sprouts.  Well, they actually produce ammonia that will turn into nitrites that will turn into…that’s a story for another day, though.  Today we’re gonna talk about a freakishly warm December.

It’s freakishly warm, right?  What the heck!  I waited until late late late in November to plant garlic, which I usually plant in the end of October, and still the garlic has sprouted and is 4 inches tall.   Further disturbing evidence of this unusual weather is the fact that my parsley is actually growing.  I have been pulling it in fist-fulls to use in the kitchen, but still it grows.  Hard not to when it’s 60 degrees out.  IMG_0679

I have still been able to plant narcissus bulbs, as the ground isn’t nearly frozen yet, and whenever I hit one that’s already there I find it has sprouted and is trying to pop out of the earth.  My strawberries have actual flowers, for crying out loud!  What gives?  Anyone?  Even I, who loves growing things, am ready for the season to end.  Enough already.

I’m trying to pretend it’s winter.  Despite the fact that they are still green and healthy, I pulled out my leeks today.  IMG_0677They last almost as long in the fridge as in the ground, and I keep telling myself there has to be a hard freeze soon, so I might as well get them out now.  Of course I was wearing a T-shirt while I dug, so it really was pretend.  I could have probably left them in another month.

I decided to make a real one pot winter style meal tonight with some of the leeks and other put-up foods to try to get in the winter mood.  I used the parsley, some potatoes and onions I have in the cellar, and some pheasant leg meat I had left over from a broth I made.  IMG_0682

I also had the good fortune to trade a venison sirloin for some guanciale with my good friend Sarah.  For those of you who are scratching your head (like me the first time I heard of it), it’s a pork jowl.  That’s right…pig cheeks.  and I’m here to tell you that it’s one tasty item!  It’s an Italian specialty food traditionally used in carbonara, and it is super yummy.  More delicate than pancetta, and with a stronger taste than bacon, it ramps up the flavor of any dish.  Here I sauteed it until crisp, removed it with a slotted spoon and cooked the leeks and onions in the fat left in the pan.

IMG_0683

IMG_0684

The potatoes I diced and cooked until soft in salted water, added them to the leeks and fried them until a little crispy.  After that I added the removed guanciale, the parsley, the pheasant, salt and pepper to taste, a pinch of cayenne and finally shredded Havarti on the whole thing, covered it and turned off the heat.  Meanwhile I had a nice winter cocktail to get me in the holiday spirit.  Nothing wrong with rum and eggnog, am I right?

IMG_0685

The final product was a stick to your ribs one-dish meal that made everyone happy.  It’s still about 50 degrees out, but I’m going to go decorate my Christmas tree and pretend.  Happy Holidays!

IMG_0686


Sprouts and Kraut

IMG_0112

Eight days have passed since I tucked my tiny fragile jalapeno seeds into their specially prepared pre-moistened fist sized cloth pods nestled in a self contained semi-hydroponic plastic covered temperature regulated solar nest.   Along with my tucking I did some quick praying to speed their journey toward new life, prolific growth and eventually their ultimate demise in my sauce pan. It sounds a bit hard-hearted when I put it that way.  Today when I ducked under the lights to peak below the plastic I was rewarded with six new pepper sprouts. Hurrah!

IMG_0111

The sad news is that it’s been eight days for my eggplant seeds as well, and not one of the precious babies has responded to my careful attempts to coax  them into existence.  What is it exactly that makes a seed grow into a plant?  I mean, I know all the things a seed needs, as far as moisture, soil, sunlight, etc etc, but what actually makes it have new life?  What mystery is at work that causes some seeds to crack open and begin splitting cells to form the complex structures and mechanisms  for photosynthesis?  This for me, and I dare say for gardeners everywhere, is one of the fascinations of gardening.

But what about those seeds that don’t sprout? Could I have done something differently?  Are they just “bad seeds”?  Who can tell me this?  Instead of worrying about them, I have decided to go against my nature, be patience, have some faith, and wait another week.

On another note, after several failed attempts to set up a lacto-fermentation system for my sauerkraut, (I’m too cheap to purchase a proper crock and weights) I finally settled on a glass jar with a smaller glass inside to act as a weight pressing on a piece of plastic that I cut to fit the jar.  The benefit of glass is that I can monitor the moisture level so that no dangerous bacteria can breach the salted water and spoil the cabbage. Plus it’s fun to watch the bubbles!   The trick is to make sure that all of the food is below the level of the water so no nasty bacteria can land on a stray floater, travel down and spoil the food.  The brine acts like a barrier.  Meanwhile chemistry dictates that the Lactobacillus bacteria, which is on most surfaces already, is changing the sugars into lactic acid, a natural preservative, probiotic and probable anti-carcinogen. (or something like that). If you want to try it yourself, there are plenty of good sauerkraut receipts online.  In 4 to 6 weeks we’ll be chomping away at the heavenly kraut, increasing the beneficial bacteria in our digestive systems and preventing cancer at the same time.  Another Hurrah!

IMG_0113

Fall Harvest, peppers and tomatoes

Wow, it’s been a long time since I wrote!  I had a very busy summer in the garden.  This New England summer was very mild, and the cooler than usual weather made for a lush and productive garden.  It was an exceptional year for tomatoes, and as we head into October I am still picking.  Most of my tomato plants got the blight, as usual, but this year it was so late as to not affect the fruit.  In fact as the days get shorter the plants are having a last comeback and still producing.  To prevent the fruit from splitting on the vine, I pick them under-ripe and mature them on the counter or in paper bags for a few days.  The flavor is a bit tangier than the full sun ripened fruit, but they are still delicious.  I will still have many green ones on the vine when the first frost comes in, so I’ve been perfecting my recipe for green tomato salsa in advance.

Green Tomato Salsa

This time of year is almost as exciting for me as the spring.  It is as much a time of abundance and good eating as the peak of summer.  This may be because I usually plant a garden heavy on fall producing veggies like kale, peppers and potatoes, parsnips, beets and carrots, but it’s also a time for preparing foods for the winter.  I’m spending my days chopping, stewing and freezing tomatoes, roasting hot and mild peppers and making chili sauces to spice up the long winter.  I’ve got quite a few things going on in the kitchen as well as the garden.

The peppers had a nice year.  I planted a mixed variety and like always, quickly lost track of what I planted where.  While this might bother some, I find it exciting to watch the unknown plants grow and see how they eventually reveal themselves.  This year we had a cayenne variety, jalapenos, poblanos, banana peppers, green chilies and regular old green bells.  The mix was great, as some we used for stuffing, some for fresh sauces, some for cooked sauces, some roasted and jarred, and some fresh with dip.  As peppers are perennial, I have even planted some in pots to bring inside and have for the winter. This is a first for me, but I have been reading up on it and I’ll let you know how it goes.

IMAG0460

Another first for me is fermenting cayenne peppers for sauce.  I’ve made plenty of hot sauce over the years, but I’ve never  fermented the chilies before hand.  It is exciting to watch them bubbling away on the top of the fridge.  I have them soaking in a sugary Reisling mixed with 2 % salt.  It can take anywhere from 4 to 6 weeks for the fermentation to be completed, so I just bide my time and watch the process in fascination. I’m making up my own recipe, but there are quite a few good websites on the process, and here’s one I like.  http://talesofakitchen.com/raw/fermented-hot-chili-sauce/

IMAG0462


Remember to always wear gloves when handling hot chilies.  Even the milder chilies can get under rings and nails and cause irritation and burning.  Lingering chili oil can make itself known when you try to take out your contacts.  Never never wipe your face or eyes.  I have learned these lessons the hard way and I always wear the kind of rubber gloves you find in the doctors office.  They fit close and keep the capsasin off the skin.   Also, instead of using a cutting board and knife, try snipping the chilies with scissors right into the bowl.  This will keep the oil out of the cutting board and therefore out of the next thing you cut on it.


One of my favorite things to do with the abundance of peppers is to make green chili sauce.  I first had it prepared by a very good friend and former roommate Rachael Risley (nee. Coulehan), who makes it with a slow cooked pork shoulder.  As it’s very difficult to get organic free range pork of any kind, let alone a shoulder roast, we usually make it with chicken.  Served with cornbread or tortilla chips, it’s a hearty and satisfying dish perfect for the cooler fall temps.  I make the sauce first, pour it over shredded or cubed chicken and bake it with cheese like a casserole.  The trick to really good sauce is to roast the peppers first, skin and seed them and then make the sauce. Chopped and sauteed, they just don’t have the rich flavor that roasting adds. It is an extra step, but well worth the effort.

IMAG0463

Blister the chilies on high heat, flipping once to get both sides.  Put the chilies in a glass bowl, cover with a plate and let cool.  This will steam the chilies and make it easier to remove the skins.  When cool, remove the skin, seeds and ribs, reserving the liquid in the bowl.  Set aside.

Green Chile Sauce

2 tbs olive oil

2 large onions, chopped

2 cloves garlic, chopped

2 tbs flour

2 cups broth

a dozen or so roasted and seeded green chilies, about 2 cups (any variety, but mostly not too hot)

Salt and pepper to taste

In a medium sauce pot, saute the onions in the olive oil until fragrant, about 10 minutes.  Add the garlic and saute two minutes more. Stir in the flour.  Add the broth and cook until thick and bubbly.  Add the chilies and cook for 5 minutes more.  With an immersion blender puree the mixture, leaving some peppers and onions whole.  If you don’t have an immersion blender, add 3/4 of the mixture to a blender, cover with a dish cloth to allow steam to escape and blend on high 1 minute.  Return to pan.  Add salt and pepper to taste.  Serve over chopped or shredded chicken, pork or enchiladas.  Enjoy!


Time to Pick The Garlic

IMAG0368

I use a lot of garlic.  There is nothing like that fragrant allium for flavoring all kinds of dishes, from meats and pastas to vegetables of every sort.  Very easy to grow, it’s planted in the late fall and harvested in the summer.  Not bothered by pests, there is nothing much to it, really.  Unless, of course you forget all about it.  I had so much garlic from the previous year that I forgotten about the garlic patch until it made itself know to me by sprouting again last September as I was putting my garden to bed. Uh-oh.  September is not the time to harvest garlic.  So I left them.  They withered and died and sprouted again the next spring, but this time instead of single stalks from individual cloves, I had many many sprouts from whole heads of garlic. Bushes of garlic.  This year I determined to harvest them at the right time.  Plus I was out of garlic.  

Garlic should be picked when the stalks are still green but beginning to brown.  It’s not rocket science, but it does need to be done.  If you pick it too early, the paper is hard and difficult to peel, and the heads won’t be fully formed.  Too late and you risk the bulbs separating, the paper will be too thin and then they won’t store well.  July is a good time to do it.  Although it’s tempting to grab those sturdy stalks and yank, unless you loosen the ground first they will break and then you’ll be digging around with your trowel and risk damaging the bulb.  I dig a big scoop out of the dirt in front of the garlic, and then bend it toward the loosened earth until it comes free.  Because I had left mine so long in the ground and the bulbs had sprouted close together, most of the garlic was very small.  Perfect for a garlic braid!  I made sure to pick every one; the ones I get next year will be the ones I plant this fall!  

Garlic is excellent fresh, but it must be cured in order to keep.  This is best done out of the sun, in a cool, well ventilated area, and takes a few weeks until the papery stalks dry.  Leave the stalks on for this, and cut them only when you transfer the cured garlic to its storage area.  I keep mine in a basket in our cool basement.  Keep it away from moisture unless you want it to sprout in the basket.  

Last night we had beet greens braised with garlic cloves.  The fresh cloves are much milder than the cured.  It was really delicious and a good way to get in those healthy greens.  

SIMPLE GARLICY GREENS

1 large bunch of beet greens, or whatever hearty green you have to hand, collard, mustard, kale…

1 head of garlic, preferably fresh

1 cup of flavorful broth, vegetable, or chicken


Wash and chop the greens and add them to a large stock pot.  (add as much as will fit.  They cook down to nothing)  Peel and crush, not chop, the cloves of 1 head of garlic.  Add to the greens and pour the broth over.  Cover and simmer 20 min, longer for sturdier greens.  Enjoy!