Sprouts and Kraut

IMG_0112

Eight days have passed since I tucked my tiny fragile jalapeno seeds into their specially prepared pre-moistened fist sized cloth pods nestled in a self contained semi-hydroponic plastic covered temperature regulated solar nest.   Along with my tucking I did some quick praying to speed their journey toward new life, prolific growth and eventually their ultimate demise in my sauce pan. It sounds a bit hard-hearted when I put it that way.  Today when I ducked under the lights to peak below the plastic I was rewarded with six new pepper sprouts. Hurrah!

IMG_0111

The sad news is that it’s been eight days for my eggplant seeds as well, and not one of the precious babies has responded to my careful attempts to coax  them into existence.  What is it exactly that makes a seed grow into a plant?  I mean, I know all the things a seed needs, as far as moisture, soil, sunlight, etc etc, but what actually makes it have new life?  What mystery is at work that causes some seeds to crack open and begin splitting cells to form the complex structures and mechanisms  for photosynthesis?  This for me, and I dare say for gardeners everywhere, is one of the fascinations of gardening.

But what about those seeds that don’t sprout? Could I have done something differently?  Are they just “bad seeds”?  Who can tell me this?  Instead of worrying about them, I have decided to go against my nature, be patience, have some faith, and wait another week.

On another note, after several failed attempts to set up a lacto-fermentation system for my sauerkraut, (I’m too cheap to purchase a proper crock and weights) I finally settled on a glass jar with a smaller glass inside to act as a weight pressing on a piece of plastic that I cut to fit the jar.  The benefit of glass is that I can monitor the moisture level so that no dangerous bacteria can breach the salted water and spoil the cabbage. Plus it’s fun to watch the bubbles!   The trick is to make sure that all of the food is below the level of the water so no nasty bacteria can land on a stray floater, travel down and spoil the food.  The brine acts like a barrier.  Meanwhile chemistry dictates that the Lactobacillus bacteria, which is on most surfaces already, is changing the sugars into lactic acid, a natural preservative, probiotic and probable anti-carcinogen. (or something like that). If you want to try it yourself, there are plenty of good sauerkraut receipts online.  In 4 to 6 weeks we’ll be chomping away at the heavenly kraut, increasing the beneficial bacteria in our digestive systems and preventing cancer at the same time.  Another Hurrah!

IMG_0113

Hope and Gardening: spring planning

February and March may seem like the absolute doldrums for gardeners in the North East, but for me this is really where the fun begins.  Starting in mid January my daily run to the post is enhanced by the plethora of seed catalogs and gardener supply fliers that inundate the more mundane sampling of bills and offers of credit.  These magazines, filled with flawless, sparkling, brightly colored fruits and flowers not only bring the remembrance of springtime just when it seems like winter will never end, but spark the planning and scheming process that every gardener goes through each year.  Moreover, for me they offer not just ideas and choices of what to grow, but actual hope for the delights of spring, and desire for a bountiful garden, in much the same way that ads for fancy skin cream lure us in with the unattainable promise of youth and beauty.  I know it sounds foolish, but there it is.

This winter, when John Scheepers and Gurney’s and Burpee came to tempt me with their seductive photos, I threw them immediately into the recycle bin, and here’s why.  Last fall on my birthday I received a wonderful present from a girlfriend of mine.  It was a gardeners journal, a subscription to Heirloom Gardener, and a seed catalog from Baker Creek.  She knows me well.  I devoured the magazine.  I learned more about GMOs and gardening history in the US, and I vowed that never again would I plant a seed whose origin was questionable.  I saved the seed catalog for February.

.heirloom gardener

The decision to plant a non GMO garden was a big one for me.  While I profess that organic is best, I’m not above sprinkling my soil with a little Seven when I can’t get rid of those pesky ants around my eggplant.  Even thought I detest chain department stores and all they do to wreck local economy,  I’ve been known to buy a tomato plant at Home Depot on impulse. While I tout the values of a nutrient rich, homegrown local and balanced diet, I’m the first one to order pizza when I’m too tired to cook.  So Ok, I’ll admit it, I’m a hypocrite.  But now it’s time to step up to the plate.  Genetically modified food is bad. Bad for us nutritionally, bad for local economy and a just plain bad for the environment.  Get more information on this at www.nongmoproject.org/learn-more

When I plan my garden in the spring I start with a list of what I’d like to grow.  Then I make a map of my garden and, referring to last years map, add each thing where I feel it would grow best.  When I actually do the work my plan often changes, if, for instance, I bought more tomatoes than will fit in the allotted space.  Sometimes I cluster, other years I might mix it up, say putting the carrots in with the beets or planting every other tomato and pepper.  My garden is quite small, so I often cram.  Every year I plant some things from seed, like beets, and beans, and carrots, and some things from plants that I purchase, like tomatoes and squash and melon.  The only things I start from seed indoors myself are pepper plants and this mostly because I have more of a selection than I can find at the greenhouse.  Deciding to choose heirloom and non GMO plants means that I have to either find a source for heirloom plants, or grow them myself.  While there is a local CSA that I believe sells plants in the spring, I didn’t want to limit my choices, and since I have had some luck with peppers, I decided to go ahead and start my entire garden from seed.  That means all the tomatoes, melons, squash, eggplant, cucumber, spices, cabbage and peppers.  Yikes!

Last month I finally made my choices from the Bakers Creek Heirloom Seed Company catalog.  I highly recommend this company to anyone who is a vegetable fanatic.  Their selection is unbelievable and their knowledge extensive. Their website has tons of valuable information and it’s just fun to browse.   Check it out at www.rareseeds.com   After days and weeks of poring over the descriptions and photographs of exotic and divine vegetables (am I the only one who finds vegetables alluring?) I ordered 38 types of seeds.  10 types of tomato alone, with names like Green Zebra and Black Prince. Where I’ll put them is still a mystery.  I made a schedule by counting back in weeks from the average last frost date (May 20th).  I borrowed some growing lamps and purchased seed pots and starter mix.  I rearranged my bathroom and tub area to fit the seed trays.  I planted the onions and the eggplant.

IMG_0069  IMG_0073

While I tell myself that it’s the best thing to do, I remain nervous about starting all the seeds myself.  I’m not a very technical person but I’m smart enough to know that if I was, I’d have a better chance of growing healthy plants.  There is a science to it that I have yet to figure out.  My policy of flying by the seat of my pants and hoping things work out for the best might not serve me so well in this instance.  If I were so inclined, I would spend some time figuring out optimal light cycles, temperatures, nitrogen mixes and hardening practices for different types of plants.  Then again, it’s just nature, after all, and there really is no stopping it.  The worst case scenario is that I have to source the plants after all.  It’s not like I’ll never eat another homegrown tomato if my seeds fail to thrive.  And there is hope!  Even though there is still 2 feet of snow on the ground, my 300 onions are already an inch tall.

I’d love to hear from anyone with any advice or expertise on starting plants indoors.  My set-up is not very complicated, but advice on light times, bulbs, best starter mix, or just about anything would be much appreciated.  Happy growing!

First Out of the Garden

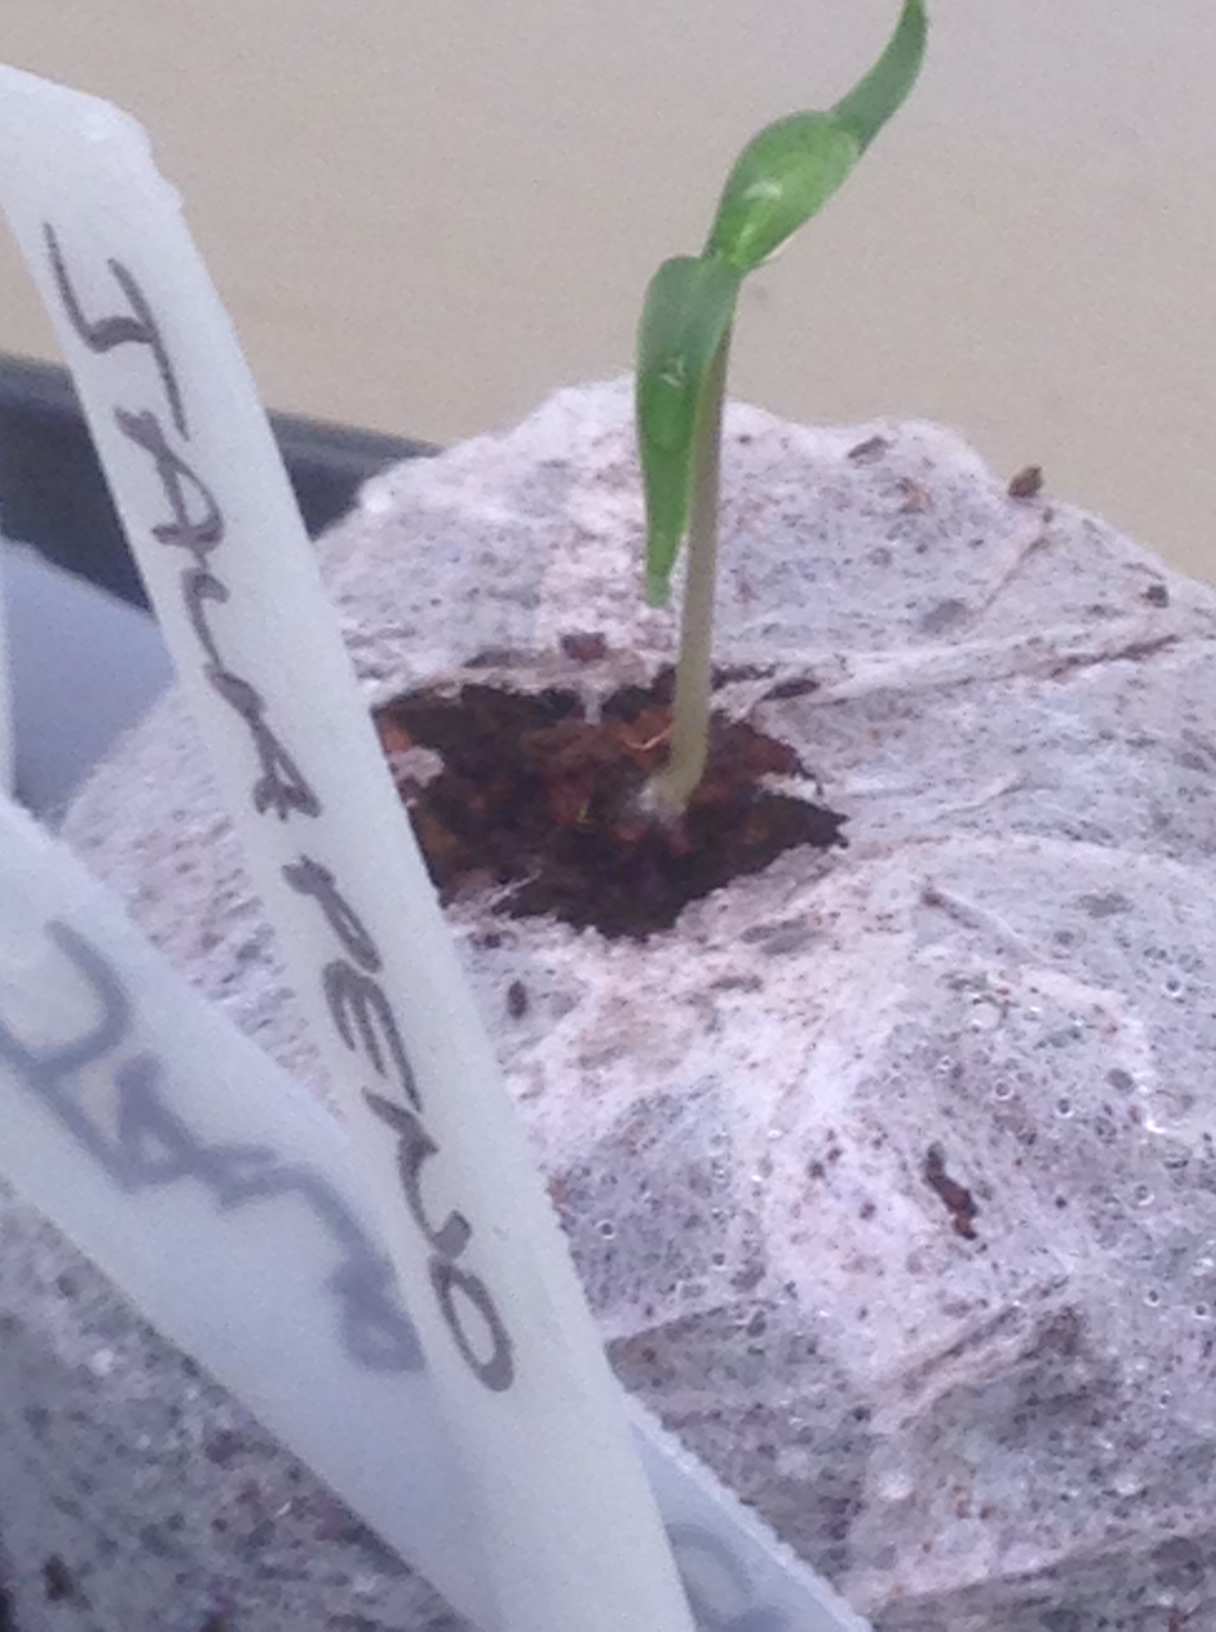
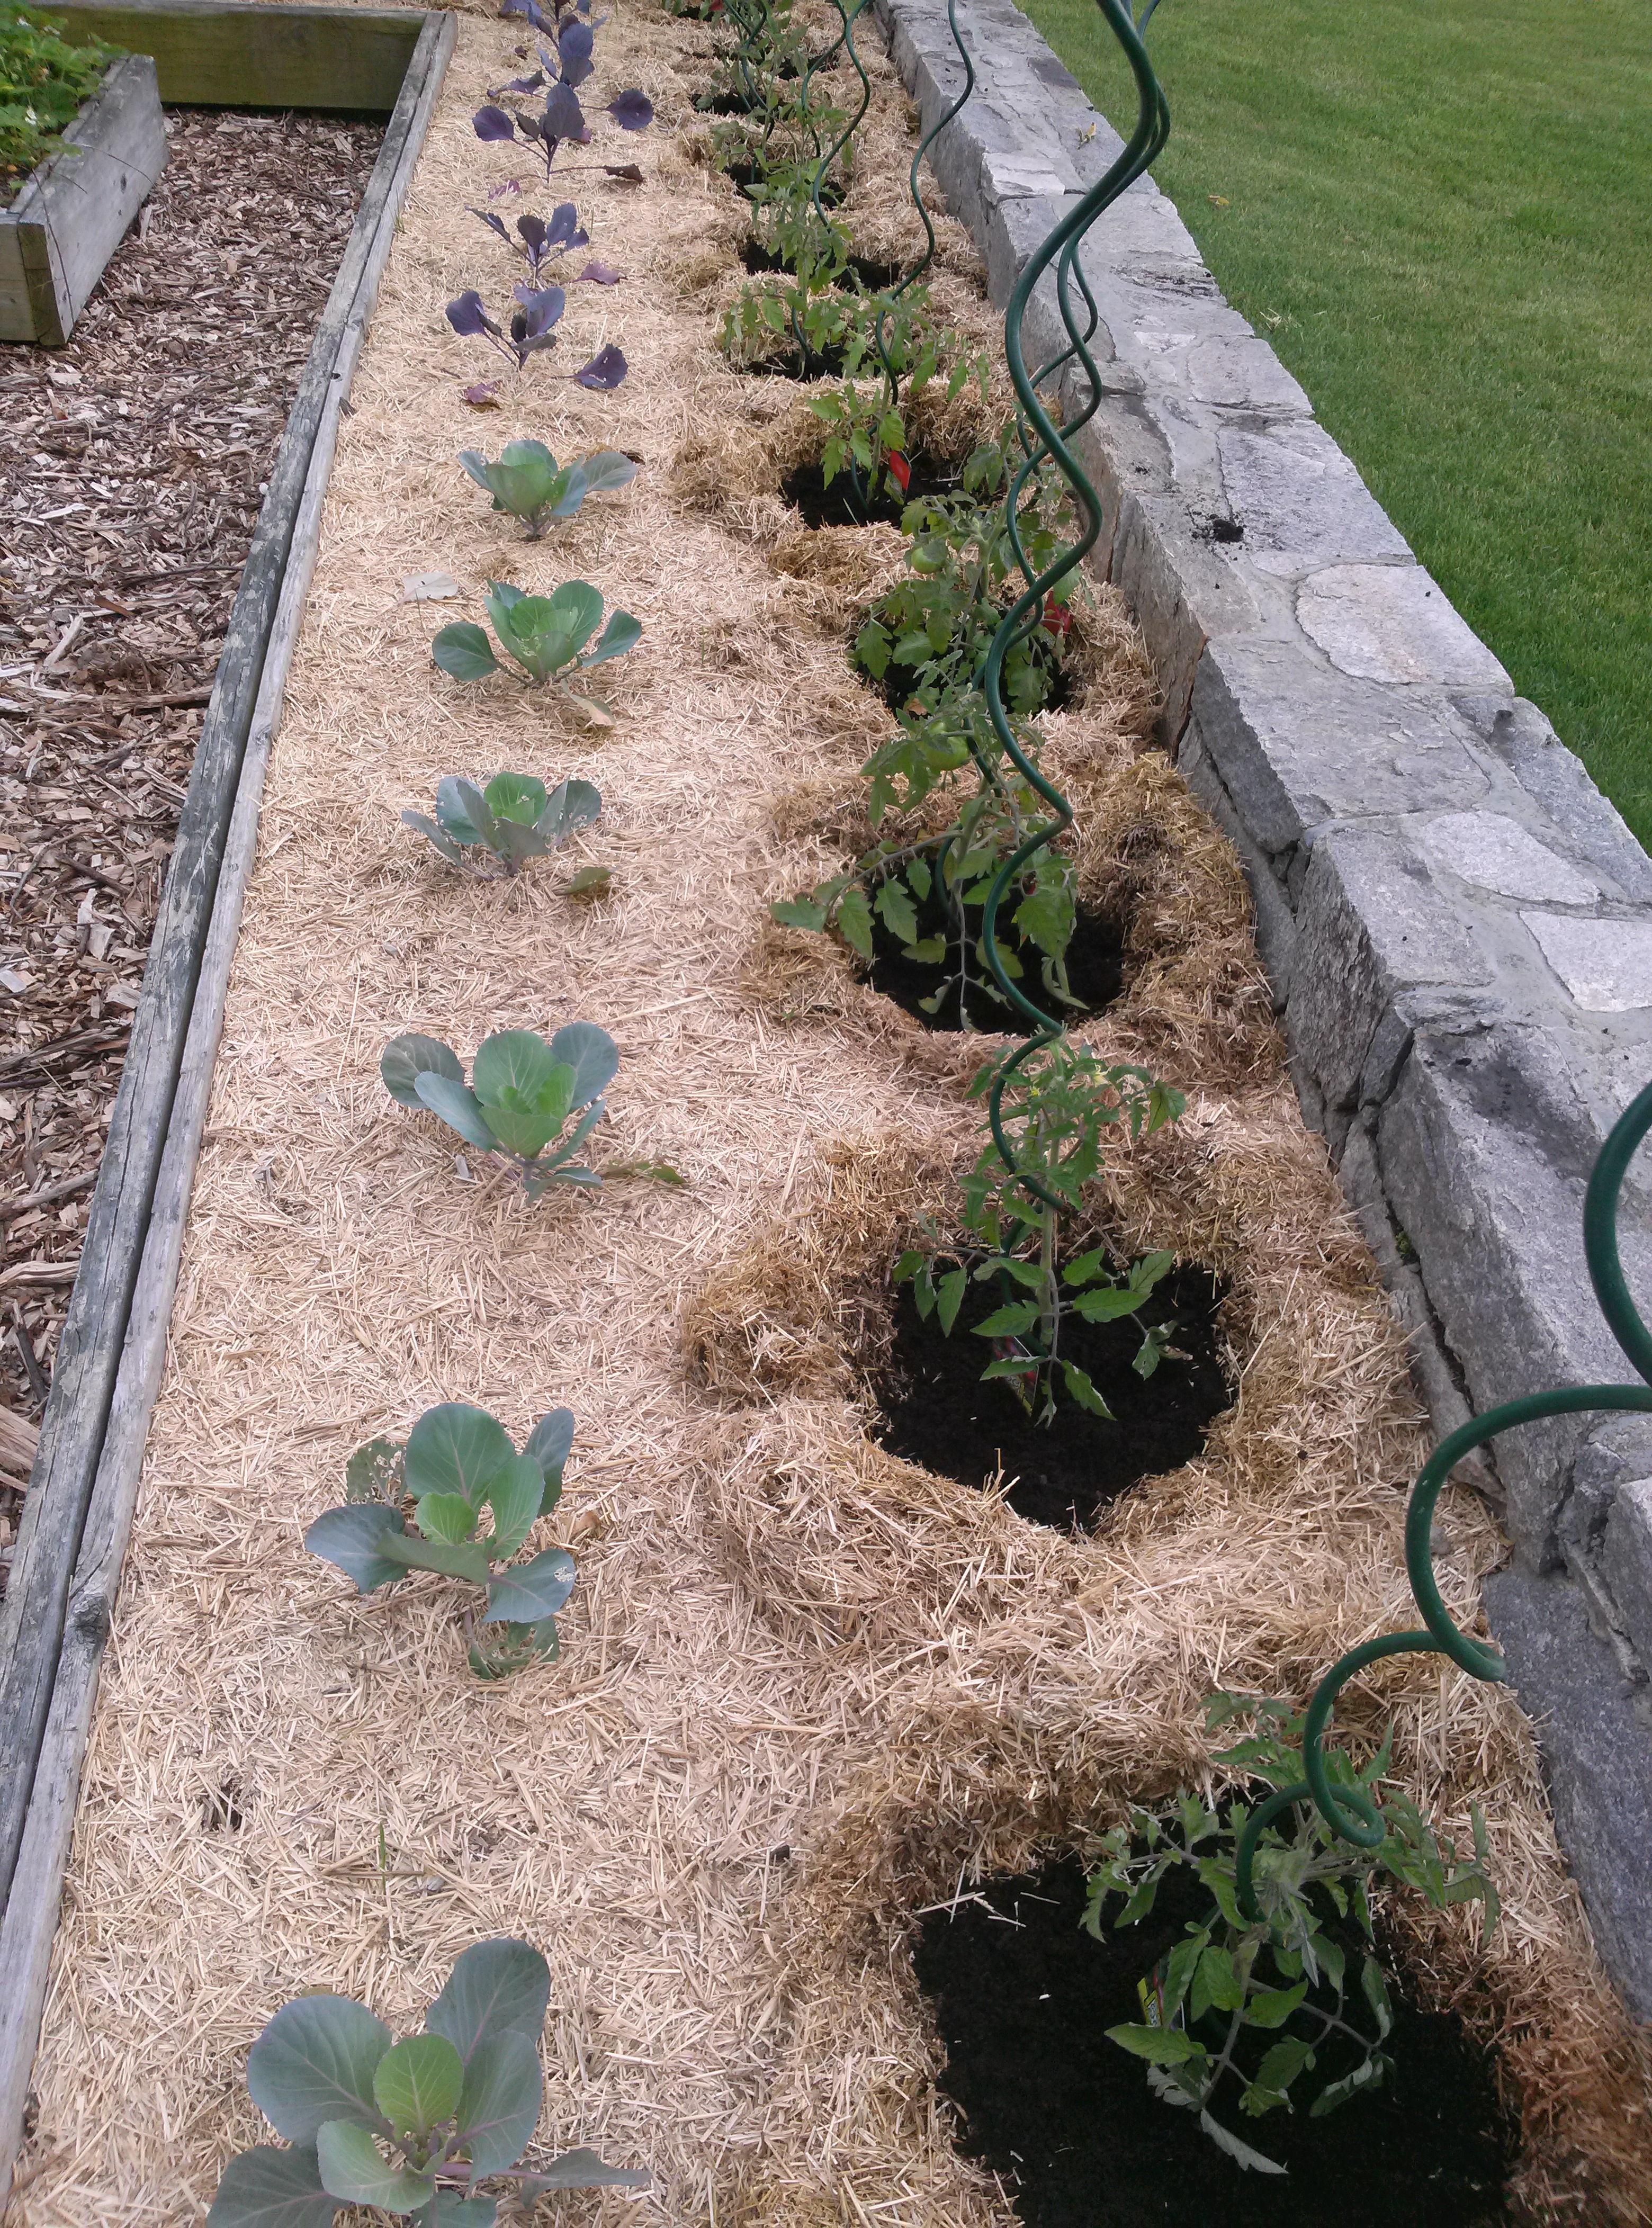
Early June in Connecticut is an exciting time for gardeners.  By now most things are in the ground that are going in, and all the planning and planting are complete.  I usually estimate mid to late may as the time to plant, but after the 15th I keep an eye on the weather and wait for a few days when the night time temperatures stay above 55.  Most plants don’t like to root out in the cold.  Now in early June the new garden, with its tiny shoots of new growth, is just getting itself established, and it’s too soon to count any success or failures.  Those of you who have a greenhouse might be laughing at me, for by now your gardens are lush wonderlands of heavily foliated plants happily bursting with buds and fruit.  Sadly, I only have my little bathtub and a grow lamp for starting seeds, and have relegated it to peppers only, so I start most of my vegetables from seeds right in the ground.

There are a few exceptions of course.  I always buy tomato plants already started, and with those it’s just a matter of money. The more money you pay, the more plant you get.  In early June, for the right price, you can get a plant with fruit already on it, or, if your pocket is not quite so full, at least a 4 to 5 inch healthy looking specimen.  This year my budget for plants was a little short, so I went with the smaller choices.  I try to buy heirloom varieties in most cases, but there is a good argument to be made for the old standbys like Big Boy and Early Girl.  They are reliable producers, are pest and drought resistant and produce nice firm fruits (just like you find in the grocery store!) but the heirlooms for me are much more exciting to grow.  I like the idea of plants that are not genetically modified almost as much as I like the unique fruits themselves, whether they are German green stripe or Purple Cherokee.  Check out Seed Savers, a wonderful source for heirloom seeds and a really great company, to learn more about heirloom and heritage seeds and genetic diversity (or lack of it) in the American food industry.  http://www.seedsavers.org/About-Us/


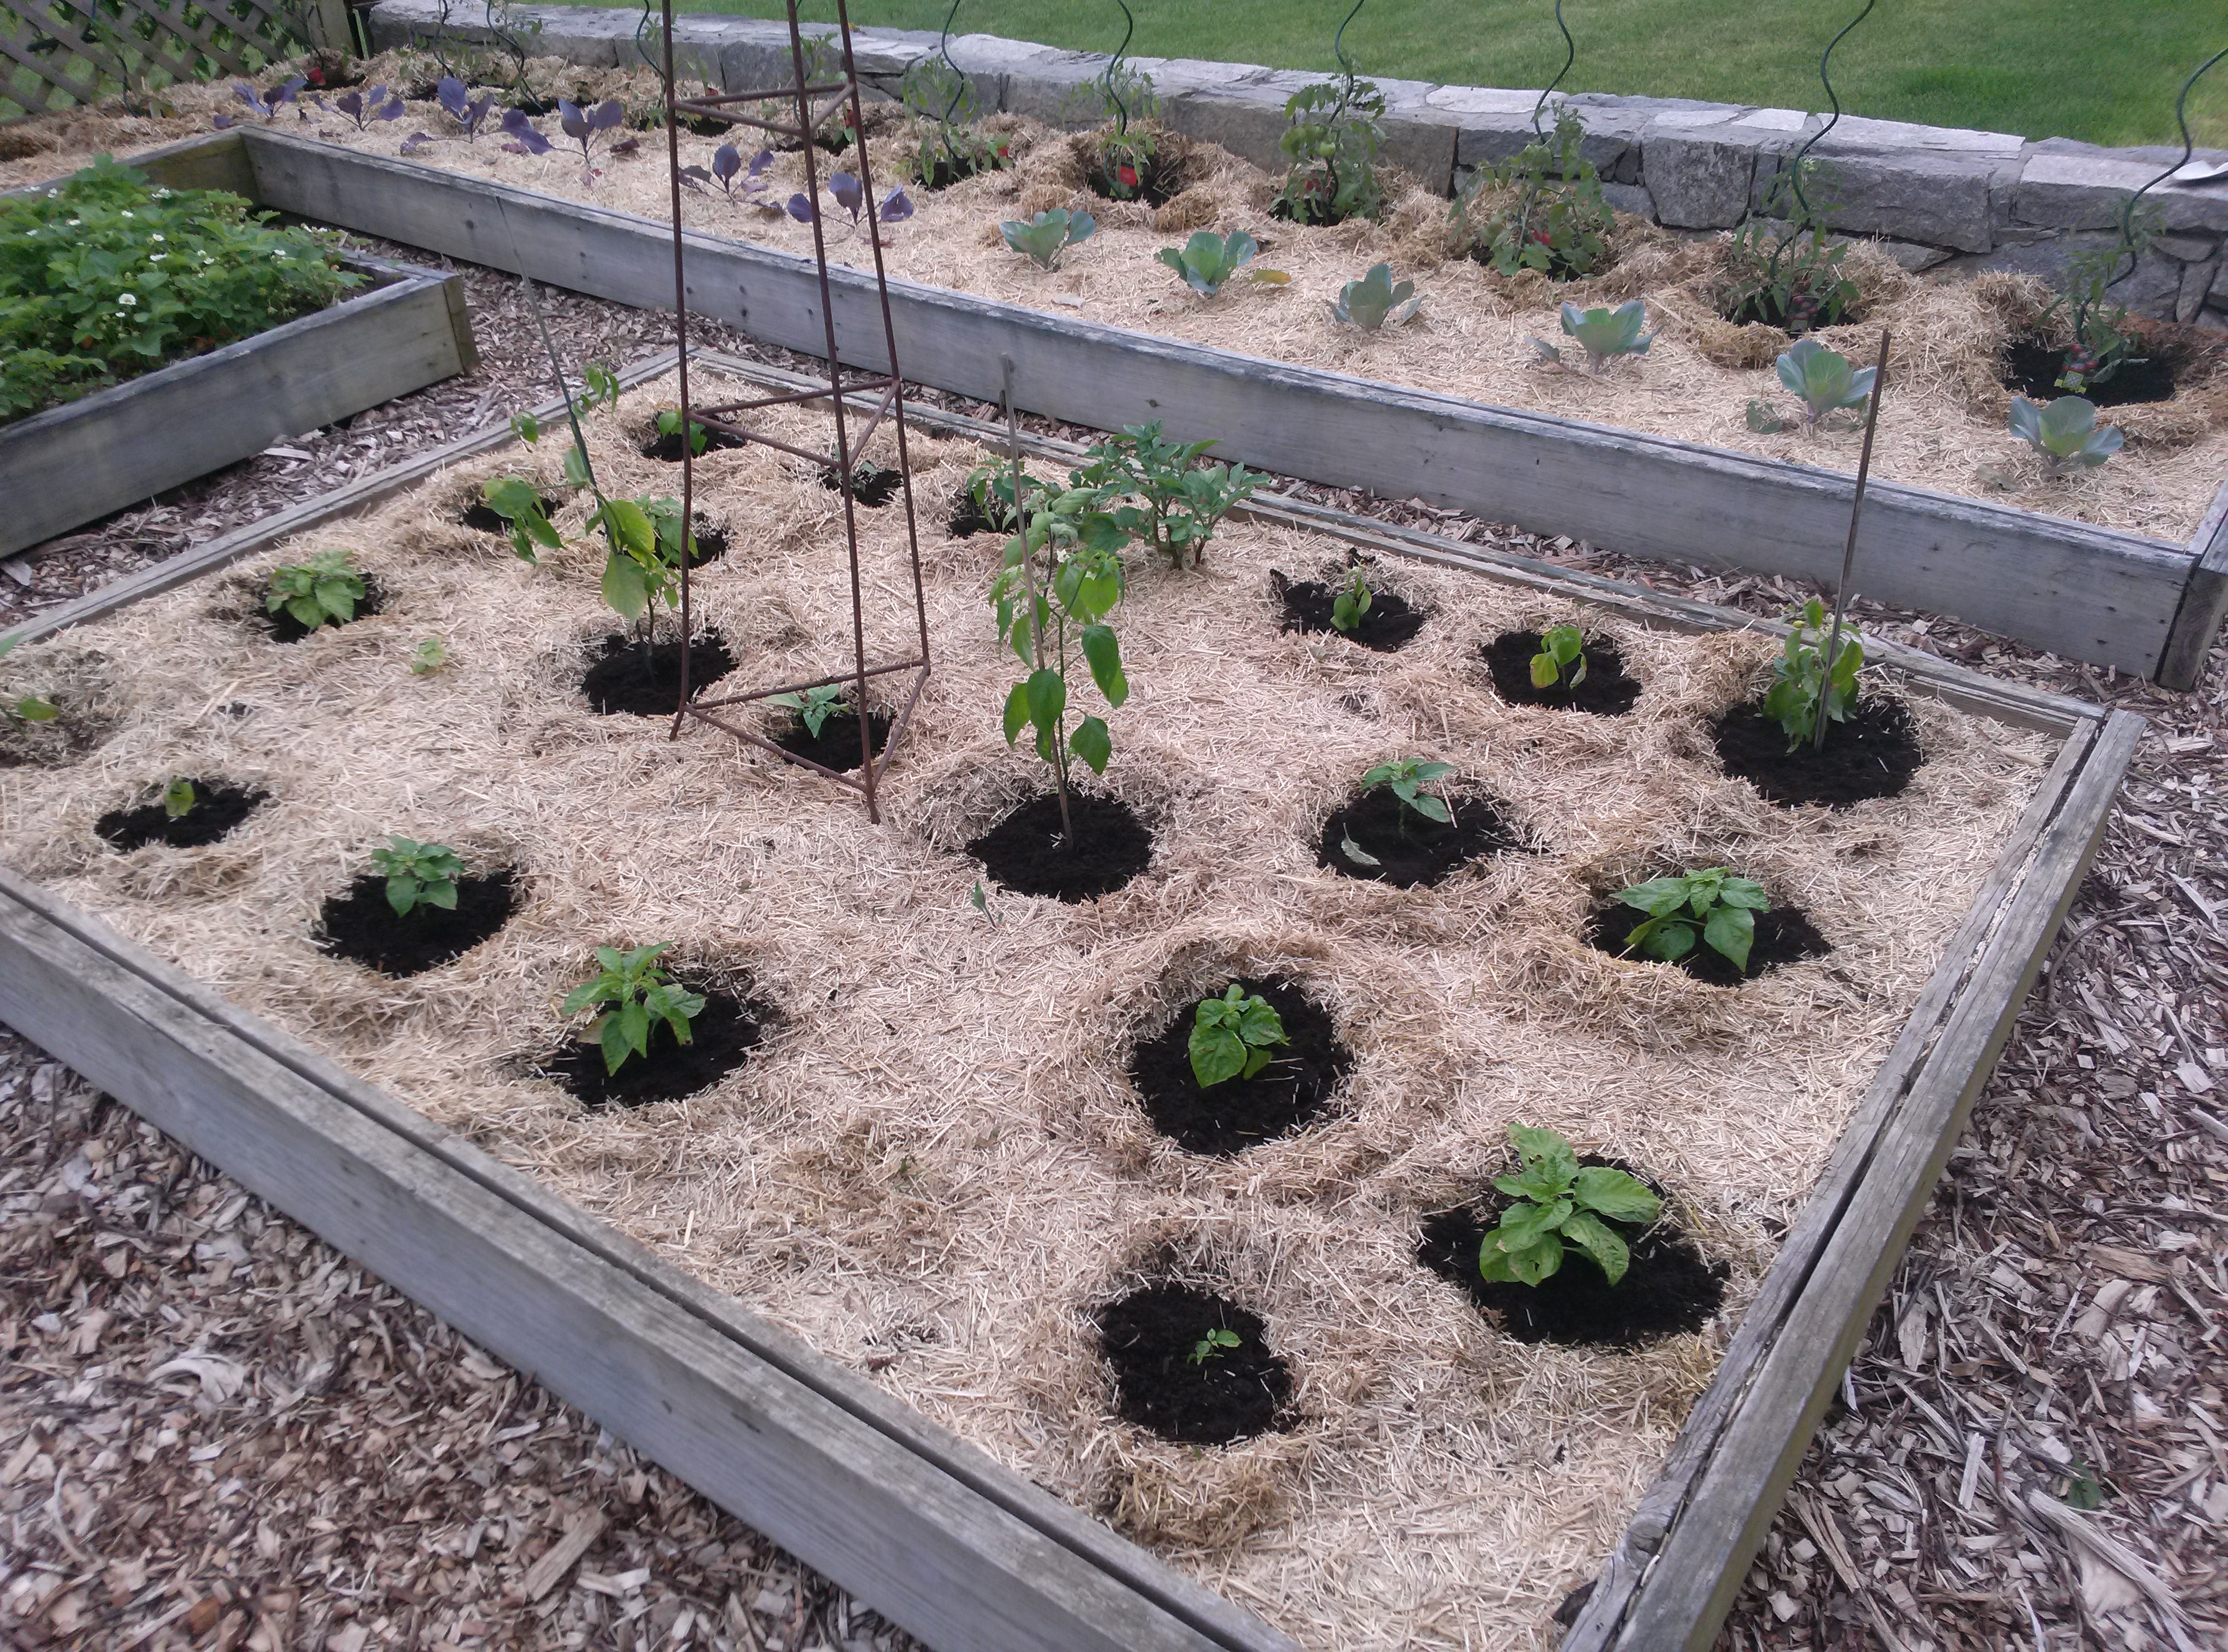
Another plant I buy already started is eggplant.  I have never tried to grow these from seed because I rarely succeed with the plant itself.  I have yet to produce a bumper crop of eggplant of any kind, which might be just as well, as I’m the only one in the family who enjoys it.  I usually plant just two plants, as I have very limited real estate in my garden, but even with constant attention and words of encouragement, they never seem to thrive.  Whether its those damn tiny aphids, blight, rot, or just plain weakness, they always look jaundiced and produce thin tiny fruit.  This year, when I saw my two healthy plants begin to yellow, I went to ask advice from a local gardening expert.  She starts many plants from seed in a greenhouse and sells them to local gardeners like me.  I have never bought from her before, but have heard about her renown with plants of all kinds.  She is the type who looks at gardening through the eyes of a chemist, while I’m more of a hope and a prayer type.  She explained that most people (me) plant eggplant too early, before the soil has warmed sufficiently, and they fail to thrive.  She said that most people (me) fail to protect their plants with a copper fungicide dip prior to planting, and that most people (Not me!) over water and leach the nutrients out.  She recommended the copper fungicide spray, a natural pesticide with soap in it, and a fish emulsion top dress to enrich the roots.  Maybe with these tools, and of course a few good thoughts, I’ll be serving eggplant Parmesan in August!  Oh, and she also gave me three varietals of eggplant that she had left over.  With five plants in the ground, I almost hope they don’t all thrive, or I’ll be eating eggplant by myself every single night!

IMAG0309

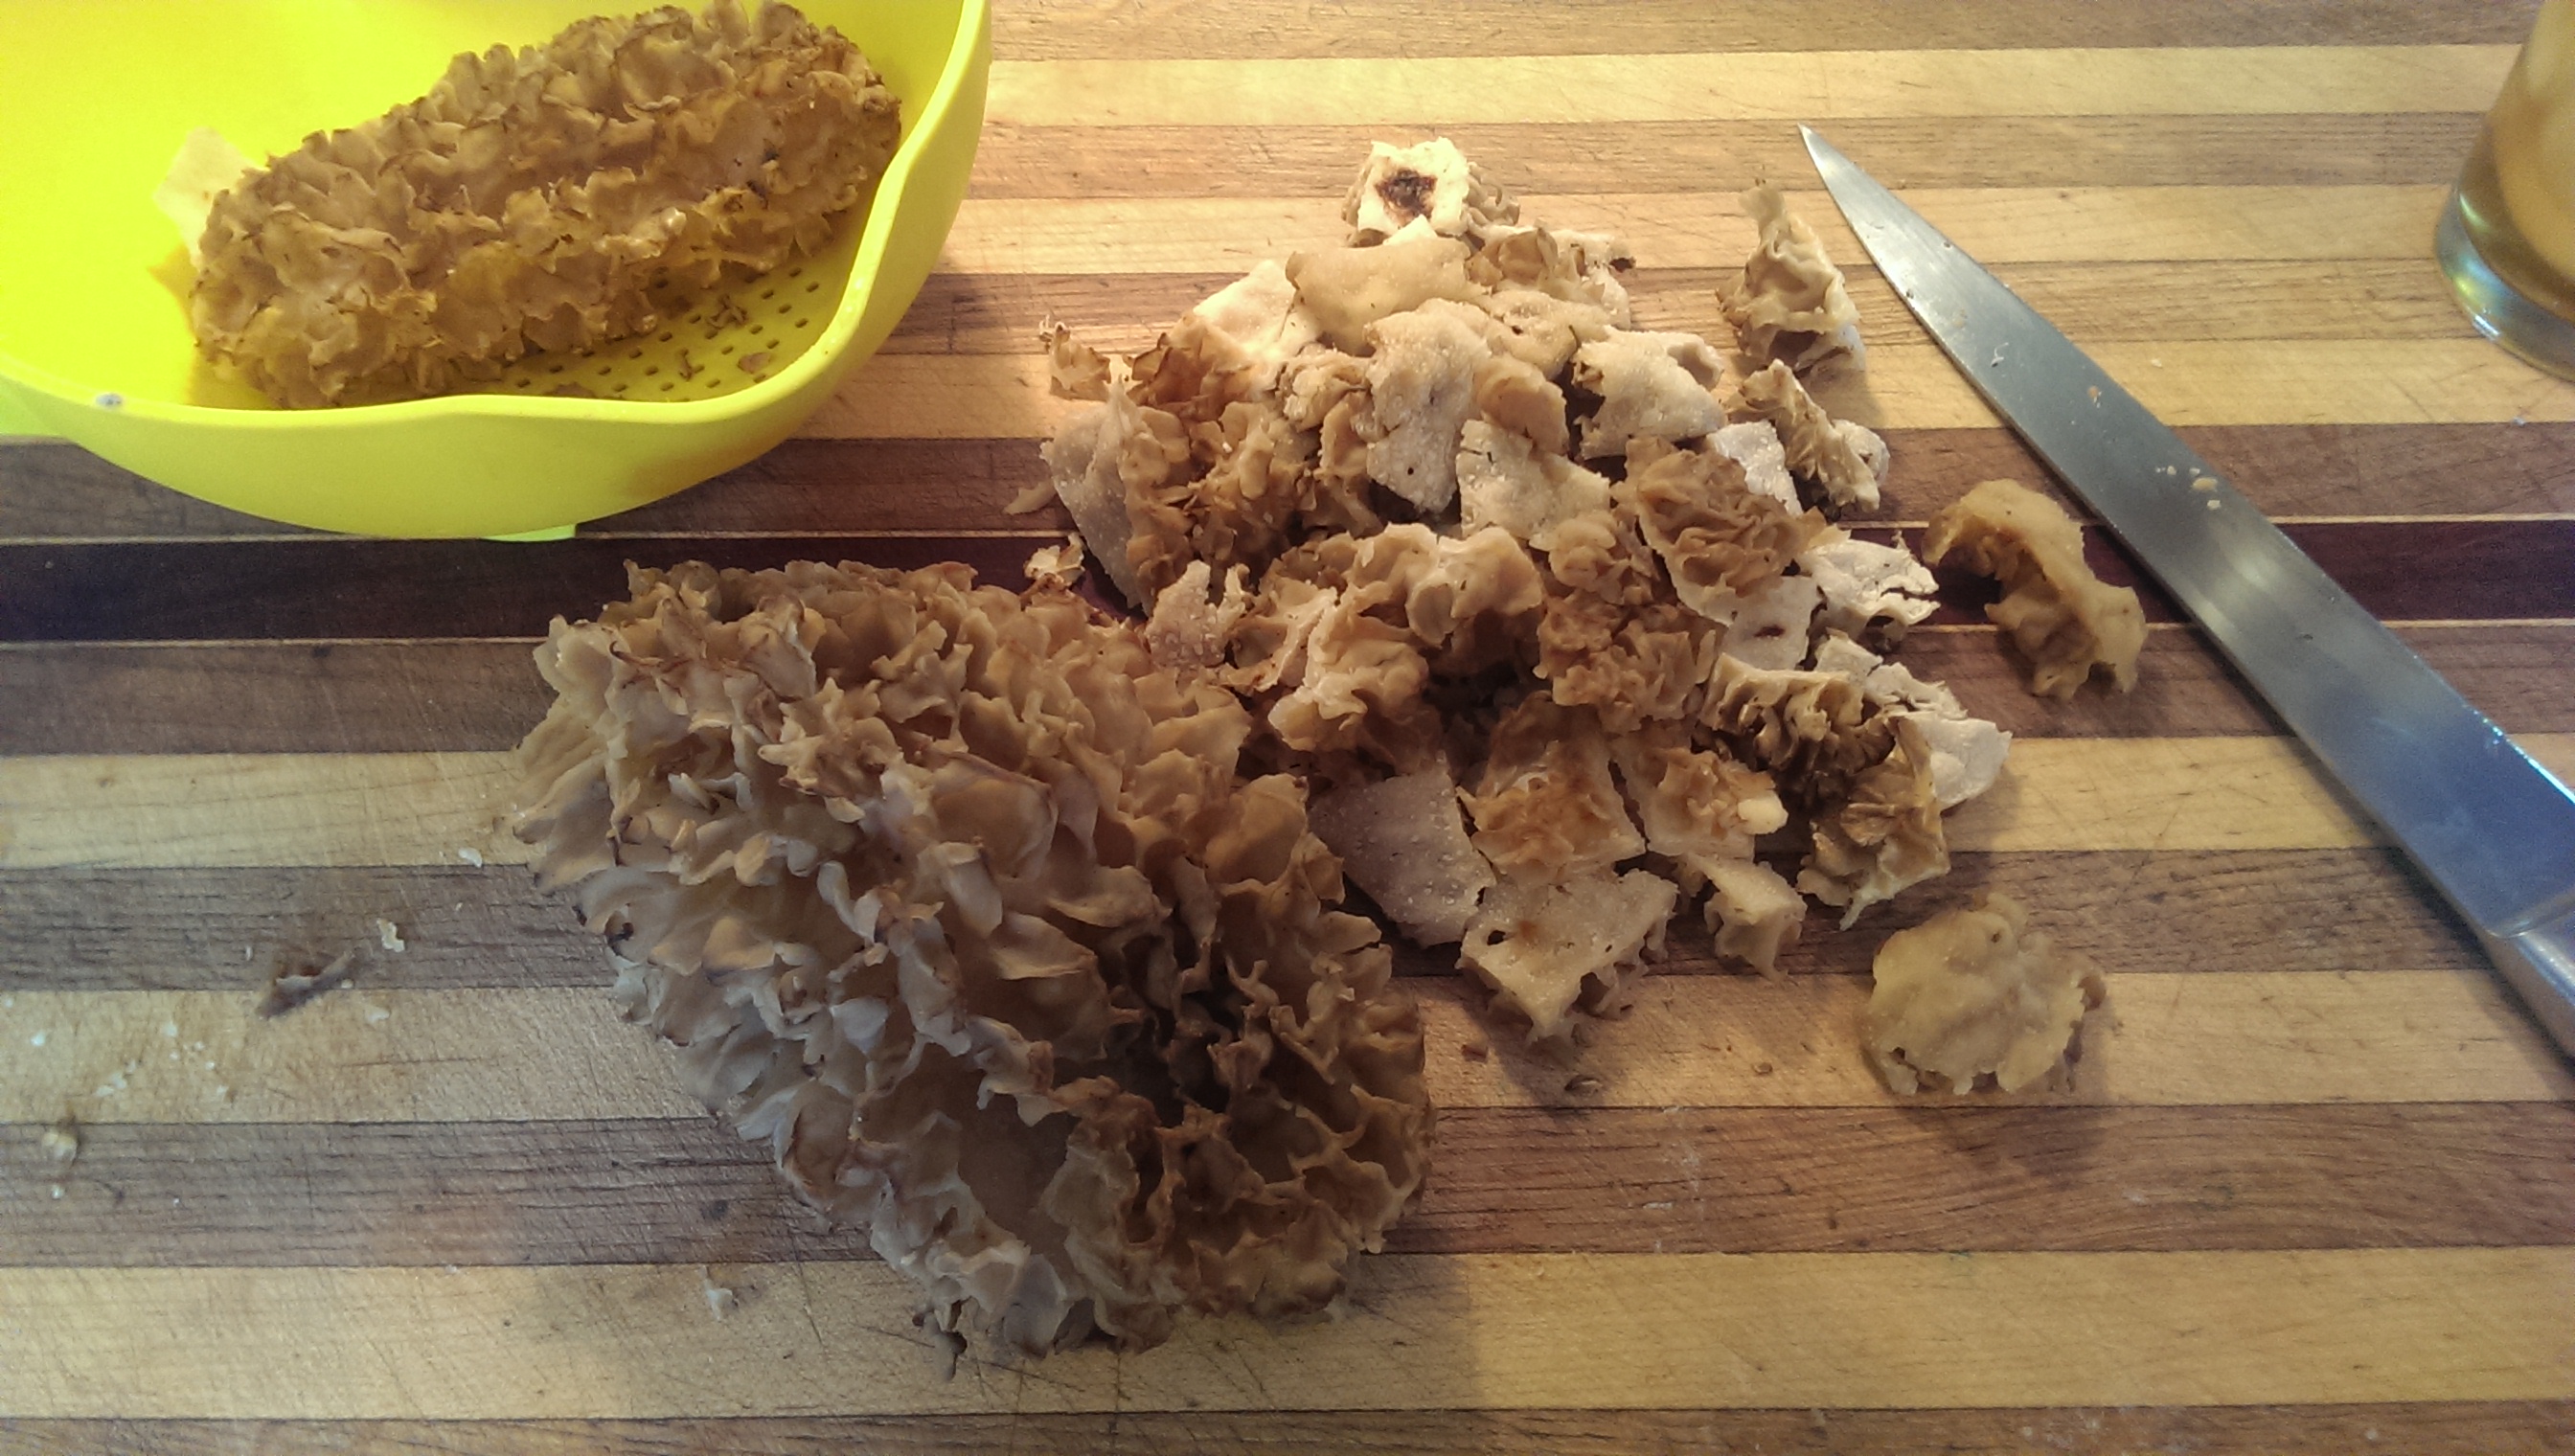
With everything going in, there is not much coming out this time of year, but that’s not to say there’s nothing to eat in the garden.  All my greens are up and we have been feasting on fresh spinach, sorrel, arugula and lettuce for a few weeks.  The radishes are full to bursting and the second planting is already coming up.  I love radish, and usually plant a spicy blend, with all different shapes and colors.  I use radish in a variety of dishes as well as eat them fresh washed out of the dirt.   I like the diversity of flavor and color, whether on a salad or sandwich, or stirred into an Asian inspired soup.  I made just such a soup the other day.  Recipe to follow.

IMAG0327

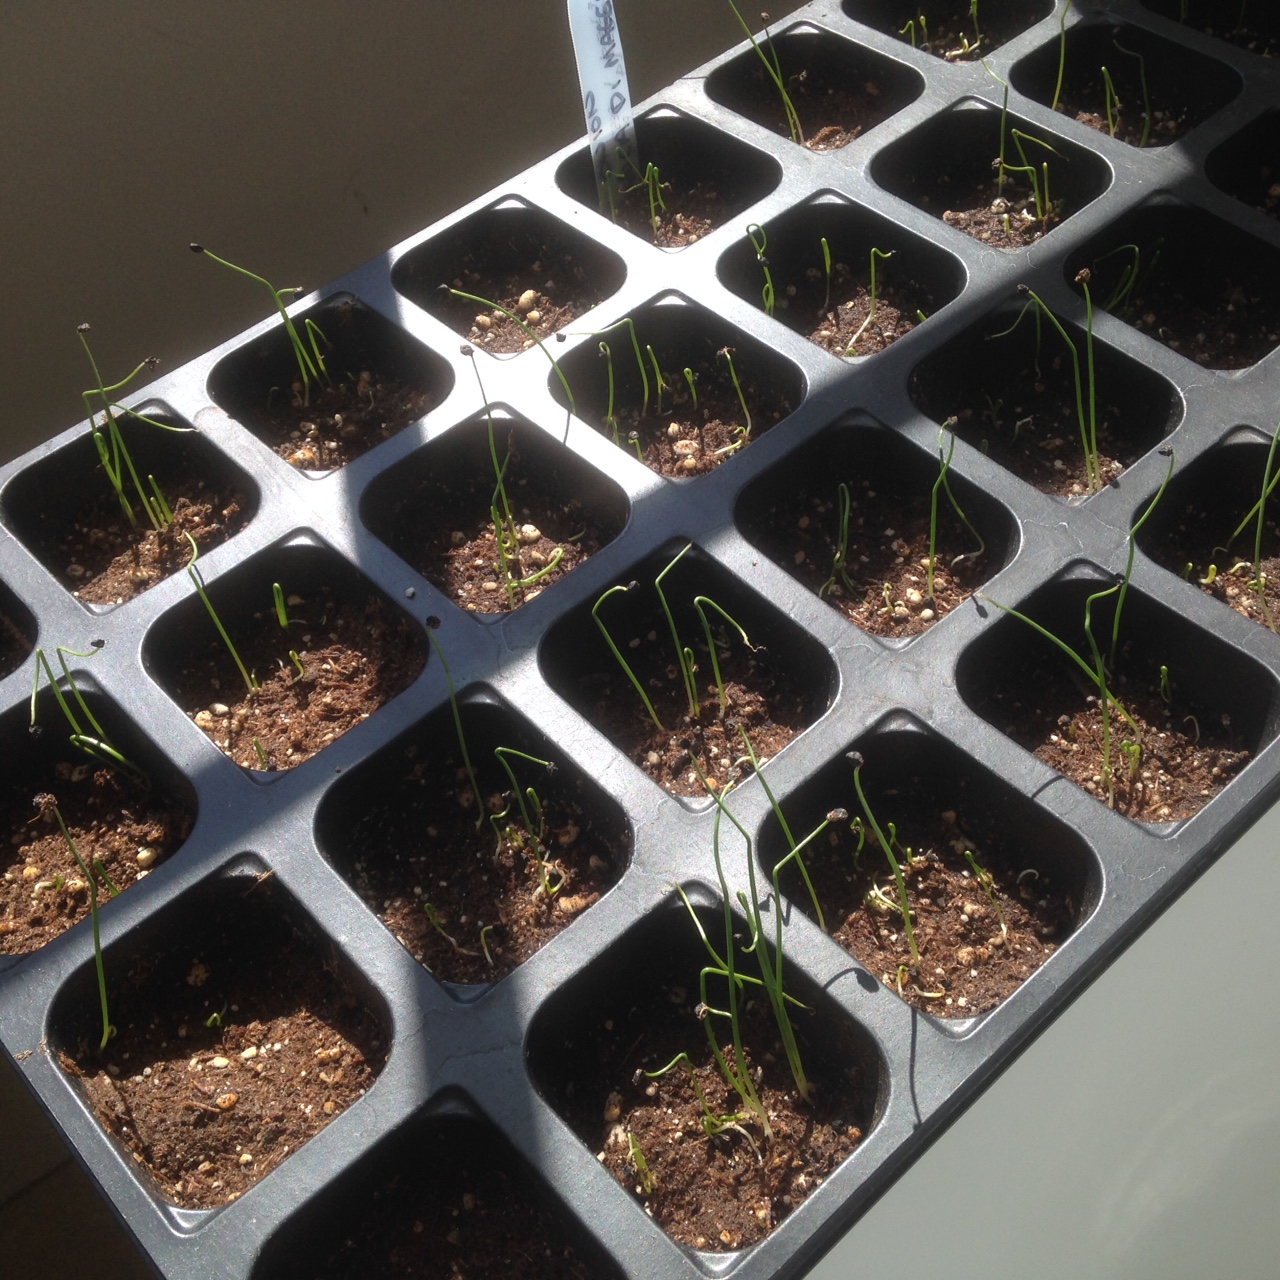
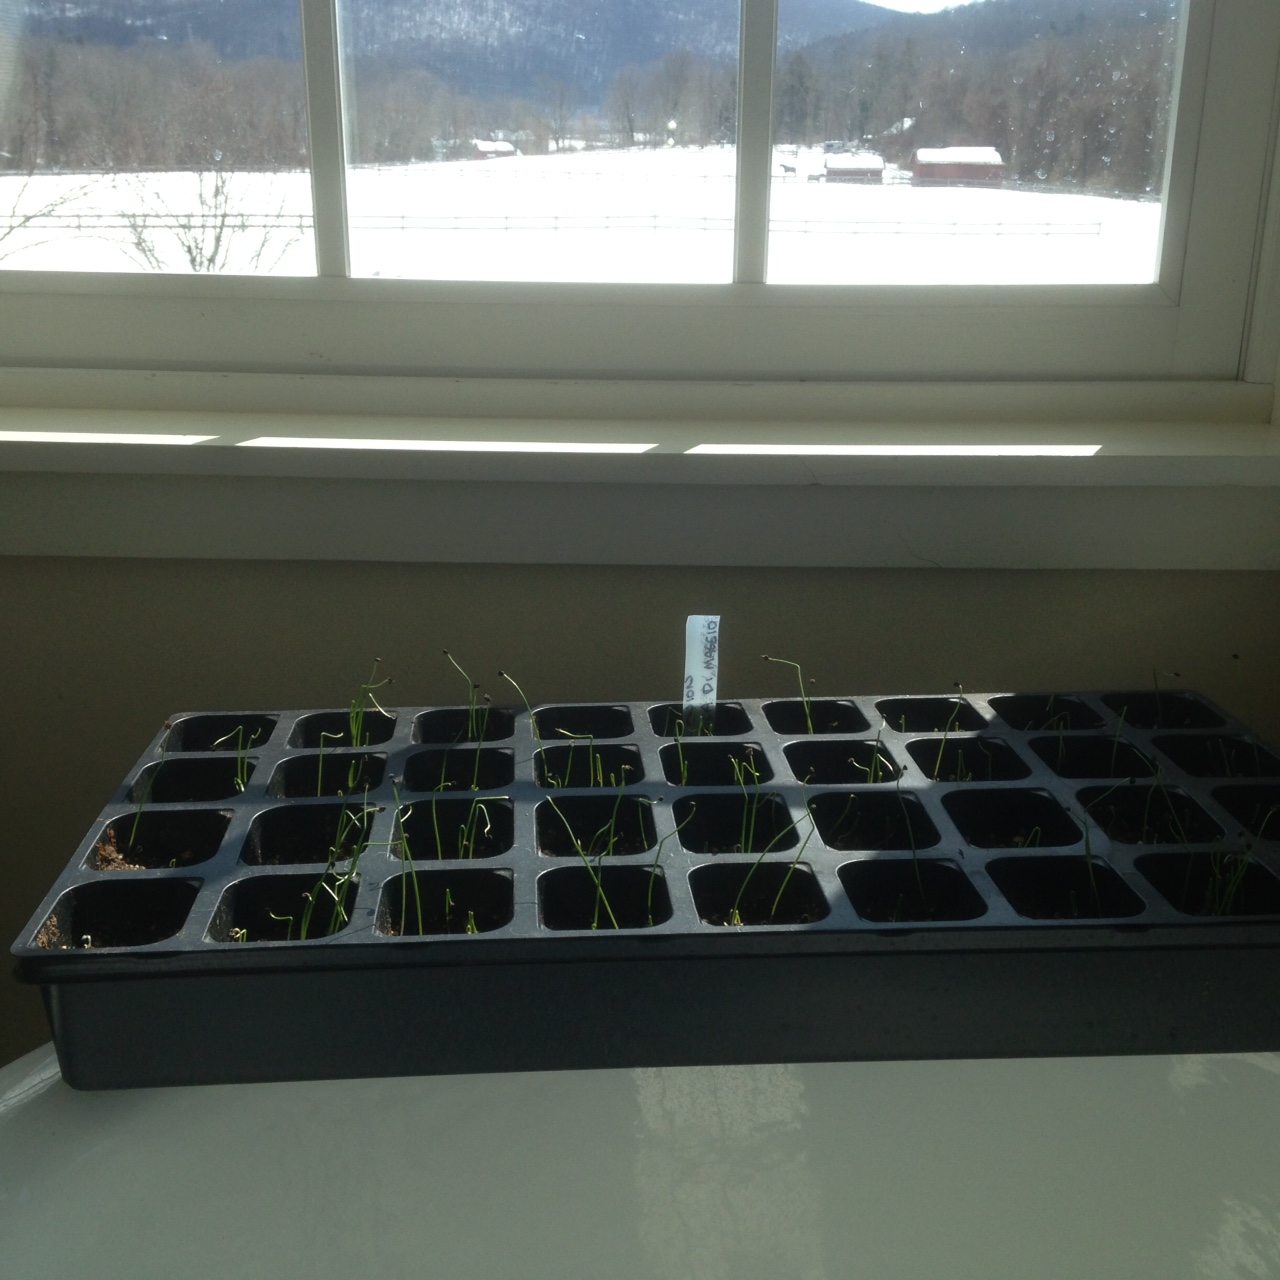
The green onions are ready to be picked, if you can bring yourself to give up a full sized onion later on in the year.  I always have a hard time with this.  While I’m not a patient person by nature, the thought of yanking out those half formed babies for a quick turn on the grill makes me pause.  It’s not that they wouldn’t taste delicious, it’s only that I think of myself trudging to the store in the middle of February to buy some old generic onion instead of plucking one out of the lovely onion basket in the basement, filled with my very own. Instead, I satisfy my taste for fresh onion by snapping off the stems of the onion flowers and chopping or grilling those. They taste just as fine as the whole thing, but I can leave the roots of the onion itself in the ground to fulfill it’s destiny.

IMAG0311

Aside from the radish, greens and onions, we have been eating lots of cilantro, parsley and basil as those plants establish themselves.  The beets are ready to thin and the greens are delicious sauteed or in salads.  The strawberries which I transplanted this spring are a bit behind the curve but are beginning to ripen.  The peas are blooming and the squash are flowering and the tomatoes continue to make suckers and flower.  It’s an exciting time in the garden and lots more to come.


ASIAN NOODLE SOUP

6 cups broth (I used pheasant broth because I had some left over)

3 TBS Mirin

4 TBS Soy sauce

1 TBS sugar


2 cloves garlic chopped fine.

salt and pepper to taste

dash of something hot (chili paste, Tabasco, red pepper)

3 cups cut up cooked chicken (or pheasant)

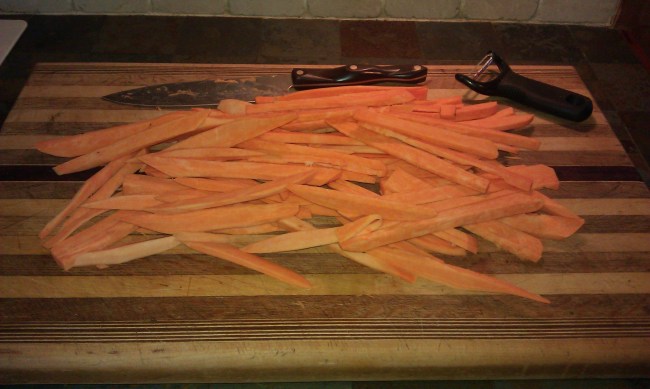
4 cups chopped fresh spring veggies, such as radish, baby carrot, green onion, endive, peas,

1/2 lime


Prepare rice noodles as directed on the package.  Mix the first 7 ingredients and adjust to taste.  Simmer and add the chicken.  When noodles are done add the fresh veggies to the soup and simmer for 5 minutes.  Be careful not to overcook the vegetables or they will be soggy.  Place a serving of rice noodles in a wide bowl and ladle the soup over them.  Squeeze the lime over the soup.  Serve with chopsticks and extra hot sauce.  Enjoy!

IMAG0306

My First…Morel

For those of you mushroom fanatics in the know, and those who desperately wish you were in the know, finding your first morel is about as memorable as your first kiss.  Mushroom hunters spend months and years wandering around in dead fall and through mushy forests in search of these precious gems of the spring, and once found, guard the secret of the location like treasure.  Many’s the time I have engaged mycological foragers in conversation trying to ferret out information about when, where and how they found these fungal delicacies, and never did I get a hint of a reliable clue.  Sure, anyone will give you generalities that you might find in any book on the subject, like look at the edge of the woods near old orchards, or where there are lime deposits, or near dying ash or elm, but disclose their secret spot to an outsider?  Never.

A few weeks ago my husband came back from hunting turkey with a giant brownish fungi that he imagined I’d find interesting.  It was about 5 inches tall, hollow, and had spongy pits all over its “cap”.  Although his hunt was unsuccessful, I was much more delighted with his efforts than if he had brought home a fat tom.  Little did he expect my shrieks of delight and demands that he take me immediately back to the exact location where he had found it.   We agreed to go back and I spent the next half hour poring over my books and through mycology websites to ensure that what he had found was indeed a true morel.  I’m sure I’m not the only newby mushroom forager to worry about poisoning my loved ones!   In fact it was a real morel, albeit an old one, and off we went to see if there were more.

After a short hike through some soggy march and then woodland brambles, we found an old tree with a half dozen large morels under it.  Mushroomers say that in order to know mushrooms you must know trees, so I suppose I’m not much of a mushroomer.  It’s no wonder I haven’t found any myself.  I can’t identify an ash from an elm, so I have no idea what type of tree they were growing under or why.  They were easy to find as they stood 5 to 7 inches tall, and were about 2.5 inches wide.  Morels are best when young.  As they mature they tend to get drier and more brittle, less tender and moist.  We decided to give them a try anyway.  After picking off a few slugs and a good long soak to drown any other bugs inside, I cut them into chunks for a soup. IMAG0293

I decided on a soup for two reasons; they were old, and my sons hate soup.  It’s not that I didn’t want to share, it’s just that they might be less likely to try mushroom soup than something like mushrooms in pastry crust, and therefore I had less of a chance of poisoning them if I had somehow made a mistake in my identifications.  Did I mention I was nervous to eat them?  I sauteed them in some butter and took a nibble.  The flavor was surprisingly good for slightly out of date mushrooms.  Earthy and pungent and very…mushroomy.  I waited a half an hour and didn’t develop stomach cramps so I decided to go ahead.  The recipe that follows is a delicious and decadent way to eat a morel.

IMAG0295

CREAM OF MOREL SOUP

4 to 5 cups sliced mushrooms

3 tbs butter

3 tbs flour

2 cups broth

1 1/2 cups half and half

1 tbs dry sherry

1 tsp fresh chopped thyme

Cut the mushrooms into small pieces and saute over medium heat in the butter until soft and tender, about 5 minutes.  Add the flour and stir.  Add the broth and stir until smooth.  Cook until the broth starts to thicken, about 5 to 10 minutes minutes.  Using a handheld puree tool or a blender, mix until smooth.  (if you like you can leave some chunks for texture)  Add the half and half and the sherry, making sure to keep the heat to a low simmer.  Serve topped with the chopped thyme and enjoy!


Strawberry Fields Forever

Image

June is here and delights are beginning to come in from the garden.  Among the radish and peas, the lettuces and green onion are the strawberries, the most wonderful of all fruits and the one that really makes it feel like summer .  Of all the berries, the strawberries are the earliest and, in my opinion, the tastiest.  At least I say that until early July, when the blueberries are ripening, and then early august when we taste the delectable raspberries and blackberries.  But for now we indulge in the sweet, tangy, indescribably yummy strawberry.

I have a small berry patch that I often think takes up too much real estate in my tiny kitchen garden.  Most of the year it looks stringy and sad, almost as if the plants are dead or dying, but not so.   Come May, out come the shoots and flowers that, ever so agonizingly slowly, turn into hard green fruits and then ripen into luscious berries.  I have everbearing plants, which means they produce fruit all summer, although not as prolifically as they do in June.  Come August, they are growing wild and trying to climb down the sides of the raised beds and into the paths.  They are so hearty and vigorous they can root into the deep pine chips I use as mulch on the pathways.  Each year I cut back the runners and plant some back into the bed in the bare spaces, replace some older plants, and reluctantly throw out the rest.  They are so hearty, in fact, that one year I ripped them all up and, not able to throw them out, kept them in a bag in my garage.  Then, regretting my decision, I replanted half of them back into another bed, where they took, and bore berries the same year.

As hearty as they are, strawberries are a funny plant.  They only produce for a few years, and will shoot out runners that can overtake the garden rapidly.  They use an enormous amount of nutrients and therefore should be moved every 3 years or so to a different spot in the garden. They are best heavily mulched, which both keeps the berries out of the mud,and protects the crowns from cold.  They like water, but not too much, and must be in well draining soil.  Weather will affect the crop and determine ripening times; with warmth and abundant sunshine they ripen quickly, rain and clouds cause some delay.  Some varieties do well in containers, and are a good choice for those with not much space, but they must be watered regularly.

Besides eating them fresh on granola or yogurt, one of our favorite things to do with berries is to make ice cream.  Following is a simple and delicious recipe that can’t be beat.  Image

1 pint fresh berries

1 1/2 cups cream, divided

3 egg yolks

2/3 cup sugar

Wash and crush the berries with a potato masher until pulpy.

Heat 1 cup cream in a saucepan over medium heat until bubbles form on the sides of the pan.

Mix together egg yolks 1/2 cup cream, and sugar in a medium bowl

Add the hot cream to the yolk mixture, whisking constantly, and then return the mixture to the pan.  Over medium low heat, whisk the mixture until it becomes thickened, 5-10 minutes.  DO NOT BOIL.  Allow the mixture to cool completely.

When custard is cool, add to an ice cream churn and follow the manufacturer’s directions.  YUM!

Grilled Fresh trout with onions

Image

As anyone who lives in the North East knows, a few days ago the weather was unbearably hot and humid.  Very unusual for May and, to tell you the truth, it was making me a bit crabby.  With the hot breath of the sun bearing down on us for so long the boys and I decided to see if our favorite neighbor had opened their pool, but no luck.  It was still sealed up tight, with a thick layer of leaves to top it off.  Discouraged, we headed back home, grumbling and moaning, until we remembered our favorite weekday watering hole.  That is not to say our favorite drinking location, but our best dipping pool and trout sanctuary.  We turned the truck around and headed the few miles down the road to Kent Falls.

Kent Falls is a State Park in northern Kent that in the summer is a very popular picnic spot.  In fact it is the most visited State Park in Connecticut, due in part to the fact that it is so very accessible.   It is right off the state road and has lots of parking, a stream and a wide open field for picnicking.  It’s greatest attraction, however, is an incredibly beautiful series of waterfalls that drop steeply into delectably clear pools perfect for bathing.  The water is cold, sparkling and divine.  There are stairs beside the falls that lead up to the top, with a wire fence that declares in multiple places along the route in very clear language “NO SWIMMING”.  Swimming is permitted, although not legally sanctioned, in the two pools nearest the bottom, and on the average summer weekend day the pool is filled to overflowing with frolicking children and their parents splashing around in the cold water.

Image

This is usually not a problem for us, as we almost never go on the weekends.  From Memorial Day to Labor Day the park charges a fee to enter on Saturday and Sunday, so we typically stick to afternoons during the week.   On some occasions, though, we have arrived at the park to find the pool occupied with swimmers, and while my children aren’t averse to swimming, they are first and foremost fishermen.  Kent Falls is not a swimming hole but a designated trout park dedicated to fishermen like my boys, so say the park rules.  This become a problem for us when we have come to fish and others want to swim.  We are usually in the minority.  For many years I have counseled the boys about the necessity to work together with others and to compromise, but how do you explain to a child that they can’t do what they want because others are breaking the rules.  How do you explain that if LOTS of people are breaking the rules, than they have the priority?  It doesn’t seem right.  But then again, if you had driven 2 hours to see the falls, and your children were frolicking in the water with a dozen others, and two boys came with rods and told everyone to clear out because they wanted to fish and the law was on their side, how would you feel?  It is a delicate situation and one we try to avoid.

Regardless of that ethical dilemma, when we arrived at the Falls that day, no one was in the pool, and I got to swim in the wonderfully cold water and lower my  temperature and irritability level at the same time while the boys caught minnows in the stream to use as bait.  While I knit in the shade, they proceeded to catch several beautiful trout in a matter of minutes.  We kept three, all about 13″, thanking them for their lives and cleaning them in the bushes.  Below you will find how I prepared them.

Fresh Trout with Onions. 

3 or more fresh whole trout

salt and pepper

olive oil

1 large onion

1 tbs capers

1/4 cup white wine

1 large lemon

After cleaning the trout, salt the inside flesh to taste.  Wrap each trout in tinfoil and set the grill to medium low.  Place each trout on the grill and cook for about 6 minutes a side.

Meanwhile slice onion in half and into thin strips.  Saute the onions in olive oil until sort and beginning to brown.  Squeeze the lemon onto the onions, add the white wine and the capers and saute until the liquid has evaporated. Salt and pepper to taste.

Remove the trout from the grill and open the tinfoil packets.  With a fork gently lift off the skin of the trout and remove the flesh from the bones.  The flesh should be flaky. Place on a platter and top with the onions.  Serve and enjoy!

Image

The Doctor is in!

This morning I went out to look at my garden, as is my custom most mornings after the bus has come and gone and I have a chance to finish my coffee.  Everything looked in order from afar, but as I honed in for a closer inspection, trying to sneak up on those pesky tomato suckers, I noticed my plants looked in somewhat ill health.  Not exactly sick, but queasy.  Now, I knew I took a risk by planting them in the dirt before Mothers Day, but the forecast looked good for an early planting, and I had been fastidious about hardening them off.  We did get a cold snap last week, but not a frost in our area, and they had looked fine the morning after.  The leaves were sort of yellowish, curling at the edges, with some brown spots on them.   What could it be?  Blight?  Bugs? Too much water? Not enough?  As I fondled each plant in turn, murmuring over them and worrying like the mother of a sick child (I have, after all, nurtured these babies since January!), It occurred to me that I might need some help.

I knew just where to get it, too.  I hurriedly plucked the worst looking of the leaves off pepper and tomato, hopped in my truck and beat feet (My dad’s expression) to the local greenhouse to talk with my good friend who runs the garden center.  She has been a resource for me over years, and one I have come to value and respect.  I knew together we could figure out what ailed my lovelies.  After a trot around the greenhouse with my fistfull of wilted leaves looking for my friend, who turned out not to be working that day, I decided to take a chance and ask someone else.  I found another woman and after a quick inspection she informed me that my plants weren’t that sick at all, but had a case of chill stemming from wet feet.  We had a chat, and she suggested in the nicest of ways that perhaps I had mulched too deeply, or perhaps too close to the stems.  The previous cold, combined with a wet wind and lots of rain has weakened the plants because the roots couldn’t breath.  She prescribed a treatment of kelp and seaweed mulch lightly applied to the area around the roots, and the mulch pulled back 6 inches.  It turns out everyone at that greenhouse knows stuff!  I rushed home to apply her advice.  Below is the result.  I’ll let you know in a week if my darling peppers and lovely tomatoes have recovered their former vigor.  ImageImage

Ah, Springtime. For a minute.

When I moved to Connecticut almost 12 years ago, I came from Crested Butte, Colorado, a western slope former mining town turned fancy with a ski area.  It was at 8800 feet in elevation.  I had a garden, but in it I grew mostly grass.  And I didn’t even mind so much, because it was green.  I did manage some carrots, peas

and some herbs most years, but that was the sum total that my high altitude green thumb could manage.  I tried for 10 years to get a serviceable tomato, but nary a cherry could I produce in that elevated locale.

Then I moved to Connecticut, and the sheer amount of vegetation astonished me.  In fact, by mid summer I was entirely overwhelmed.  I had to cut the grass ALL the time.  And weeding?  Forget it!   I couldn’t stop things from growing, and that first year my cherry tomato vines grew to be over 11 feet long.  I chuckle to remember how delighted I was with my first garden and the 12 or so varieties of vegetable I planted.  Now I have over 12 varieties of tomatoes alone.

Springtime in Connecticut is both a magical and alarming time for me.  The new life clawing up out of the ground and unfolding everywhere happens so fast and forceful that it is almost frightening.  Each year in the early spring I wait expectantly for the growth to start.  It begins with the greening of the grass, and gently blooms into a haze of green on the tips of the trees.  Then I feel as if I’m rushing to catch and appreciate every last brilliant daffodil before the outrageous yellow of the forsythia emerges, but it all too soon blends in with the pinks and whites of the dogwoods and magnolia which give way to the purples and violets of the heavenly scented lilacs.  Before I know it spring turns to summer and the business of hacking back the vegetation that grows uncontrollably everywhere, blocking my view of the oncoming cars at the end of the drive, threatening to overwhelm my perennials.  And then the nasty posion ivy, the multiflora, the nettles.

There is usually a period of ease between these times, a period of calm wherein there is just enough vegetation to feel the world is a gentle place but not enough to feel as if things are out of control.   For me, that time is now.  Onions are beginning to poke out of the moist rich soil, and the first blossoms begin to open on the tomatoes.  The last frost was last night, and tomorrow I relocate my delicate seedlings into their permanent homes.  The lawn looks green, healthy and not too long.  I have to remember to take a deep breath and savor every moment before the deluge of verdancy I know will be coming.   Everything  is a mixed blessing in this delicate  balance we call life.

What’s for dinner in April?

It’s all well and good to say you eat locally in August, when the bounty of the harvest is just falling out of the garden, but when the cool winds blow through the months of spring, and nary a sprout is available at your local farmers market, if it is even open, what do you eat then?  Daffodils?  Grass?  Here I’ll give you some examples of what truly is available that fits the bill for Local, Seasonal, Sustainable, and you can feel good about what you put on the table.

Spring is the season for cod fishing, and if you live on the Atlantic shore, or anywhere in the North East, fish caught off the Connecticut Rhode Island and Massachusetts coasts are considered local, especially if you catch it yourself!  “What?!” You ask?  Relax.  It’s easier than you think.  Many charter boats go out regularly for cod, and provide you with the bait, tackle and knowledge to fish on your own.  A Google search will help you find one nearest you and the times and dates they fish.  The best part is you might come home with many pounds of cod for the freezer or dehydrator, and with luck you’ll have enough for many suppers to come.  Cod freezes remarkable well, and as it is a firm fish, holds its texture and flavor even through vigorous cooking techniques such as stews and casseroles. Try fresh sauteed cod with saffron risotto, or perhaps baked cod with cream, leeks (you might find leeks overwintered) and new spring green onions.  If you look for cod in the supermarket, ask if it is caught locally, and with rod and reel (line caught).

It’s also turkey season in Connecticut, and many a hunter is anxiously awaiting opening day.  This year my husband has to miss the beginning of the season, and my son, an avid pre-hunter, has asked me to take him out.  Having never turkey hunted before, this is somewhat of a daunting request.  We’ll see how it actually goes.  It would be a miracle if I actually got a spring turkey.  Other good protein sources would be chicken, venison, grass fed local beef and rabbit.  The chickens are starting to lay again with the warmer and longer days, so eggs are always a good choice.  A nice quiche is a perfect light spring meal, especially with sauteed garlic scapes.  Scrambled eggs with local goat cheese, roasted garlic and baby spinach would be delicious.

As for dry goods and staples, this morning I had polenta made from cornmeal purchased from Young Farm in East Granby Ct.  It is called Canada yellow flint cornmeal, and it is stone ground the traditional way.  The corn it comes from is New England open pollinated heirloom variety flint, an “antique” corn that has much higher nutritional value than corn harvested with conventional methods as per agri-business in the Midwest.  Young farm is an exceptional company that produces delicious and nutritious, not to mention sustainable and morally acceptable corn and wheat products, as well as vegetables.  Lean more about Young Farm here.  http://www.farmfresh.org/food/farm.php?farm=2752#profile.  The polenta, with a spot of honey and some of last year’s frozen blueberries, was a fabulous start to the day. We eat it with salt, pepper and butter and a sprinkle of Parmesan when we want something savory instead of sweet.

“Vegetables?”, you ask. Not many, to be sure, but some.  I have started a variety of lettuce in my bathtub, so I can add some micro-greens to whatever organic lettuce I buy at the market.  I have had basil growing in pots since January and that always adds a bright spring flavor to any dish.   Kale seems to be always available, as it lasts throughout the winter.  Cabbage and sweet potatoes, carrots and onions are also over-winterers in the root cellar.  Garlic scapes are coming out of the ground now and it’s almost time for the luscious asparagus shoots, the star of spring.  I have frozen peas and spinach and tomatoes from last year’s harvest and even some acorn and butternut squash.  A lovely squash, kale or spinach soup with some flat bread makes a lovely spring meal. IMAG0262.jpg

As for fruit, we have our trusty freezer with its dwindling supplies of frozen blueberries, peaches and strawberries.  Not fresh, but still great for smoothies and the occasional pie.  I can’t say enough about investing in a good chest freezer.  The simplest way to store meat, vegetable, and fruits is to freeze them as soon as possible after picking or harvesting.  It maintains the vitamins and nutrients far more than canning or other methods, and in most cases keeps the food safe for months or even years.  It is the easiest and fastest way to put up a harvest at its freshest, and to store produce for the winter months.  I have a deep chest freezer that I bought new from Sears for about 350.00, and I store thousands of dollars’ worth of fresh meat and vegetables in it every fall to last through the winter and spring months.  If you don’t have one, or can’t afford a new one, there are several on-line sites where you might shop for a used one for much less.  So much of the excess produce from my kitchen garden goes into the freezer right after picking, and it is such a delight to browse the shelves for a cooking idea knowing that my choices are ripe, delicious, healthful, and clean.

Last night we had grilled marinated venison with sauteed onions.  It was simple, and simply delicious.   I used a shoulder roast and just sliced it into half inch steaks, mixed it with salt, pepper, olive oil and good balsamic vinegar, left it in the fridge of a few hours and grilled it over high heat.  Quick and easy.IMAG0260.jpg

IMAG0261.jpg

Contrary to popular myth, venison, if well treated and well prepared, is neither gamy nor tough.  While it has an unmistakable rich flavor altogether different than beef, it is a succulent and delicious addition to our menu.  Miss-treated it can be an awful chore to eat, and I am reluctant to eat venison unless I personally know the hunter and the manner in which it was killed and dressed. More about venison in particular and hunting in general later.  Happy spring!

Baked sweet Potato Fries

Spring is a time when we long for the fresh foods of the summer, but mostly we get the washed out veggies from the supermarket that still have the stink of diesel fumes from the miles they have been trucked to us.  Often we resort to complicated meals full of starches to hide our longing for the taste of summer.  Enter center stage…the sweet potato!  The sweet potato is one of natures super foods.  Packed with nutrients, it acts on our blood sugar in a different, better way than regular white potatoes, and it’s sweet, nutty, rich flavor can be like candy on the tongue.  But sadly, the sweet potato is often regulated to the sad state of boiled down mush mixed with heaps of butter and topped with (yuck!) marsh mellow that we call a Thanksgiving dish.  Who can give thanks for that?  Not your digestive system, that’s for sure.

The sweet potato is easy to store.  Kept in a cool place, like a basement or garage it can last for a very long time, especially if it has been dipped in bee’s wax.  It can be seasonal any time!  The sweet potato is easy to grow.  Put it in a trench, cover it over, and dig it up 3, 4, or even 5 months later.  I have eaten sweet potatoes that have been left in the ground over winter and then dug up before they sprouted in the spring.  They are seasonal anytime!  They are also cheap, delicious and, did I say? Packed with nutrients.  So what do we do with the lowly sweet potato to make it shine like a star?  The simplest thing possible.  Bake it with salt and olive oil.

First get as many sweet potatoes as you need to feed your crew.  Sometimes they are giant and one will feed 3, so gauge your guests, but remember….they taste better than you might think, AND they are especially good cold!  So make plenty.  Peal them of their outer skin.

Set the oven to 500F.

Next, cut them into either wedges or strips.  The thickness will determine the time it takes to bake them.  I like smaller strips, but too narrow and they will burn up.

I made this pile for three of us, with leftovers.

Image

Next, put them in a big bowl and drizzle them with good quality olive oil, and a big pinch of salt.  I always use Morton’s sea salt.  It is thicker ground than regular table salt, and is better for you.  I keep it in a small finger bowl and use my fingers to pinch out how much I need.  A big pinch is about a teaspoon.

Spread the potatoes out evenly on a pan lined with tinfoil.  They tend to stick, and I hate cleanup!

 Image

If you have to, use two pans.  Put them in the 500 oven and cook for a while.  You’ll need to check them regularly because the cooking time depends on the oven and the size of the fries.  If you used two pans, make sure you switch their position in the oven every 5 minutes or so.  Mine took about 20 minutes to cook until they were starting to brown and crispy.  When you take them out of the oven, let them cool a few minutes before putting them in the serving dish.  As they tend to stick, using your fingers to pick them off the tin foil is the easiest, so be careful not to burn yourself!  Next, add a sprinkle of salt and serve!  YUM!Image