Time to Pick The Garlic

IMAG0368

I use a lot of garlic.  There is nothing like that fragrant allium for flavoring all kinds of dishes, from meats and pastas to vegetables of every sort.  Very easy to grow, it’s planted in the late fall and harvested in the summer.  Not bothered by pests, there is nothing much to it, really.  Unless, of course you forget all about it.  I had so much garlic from the previous year that I forgotten about the garlic patch until it made itself know to me by sprouting again last September as I was putting my garden to bed. Uh-oh.  September is not the time to harvest garlic.  So I left them.  They withered and died and sprouted again the next spring, but this time instead of single stalks from individual cloves, I had many many sprouts from whole heads of garlic. Bushes of garlic.  This year I determined to harvest them at the right time.  Plus I was out of garlic.  

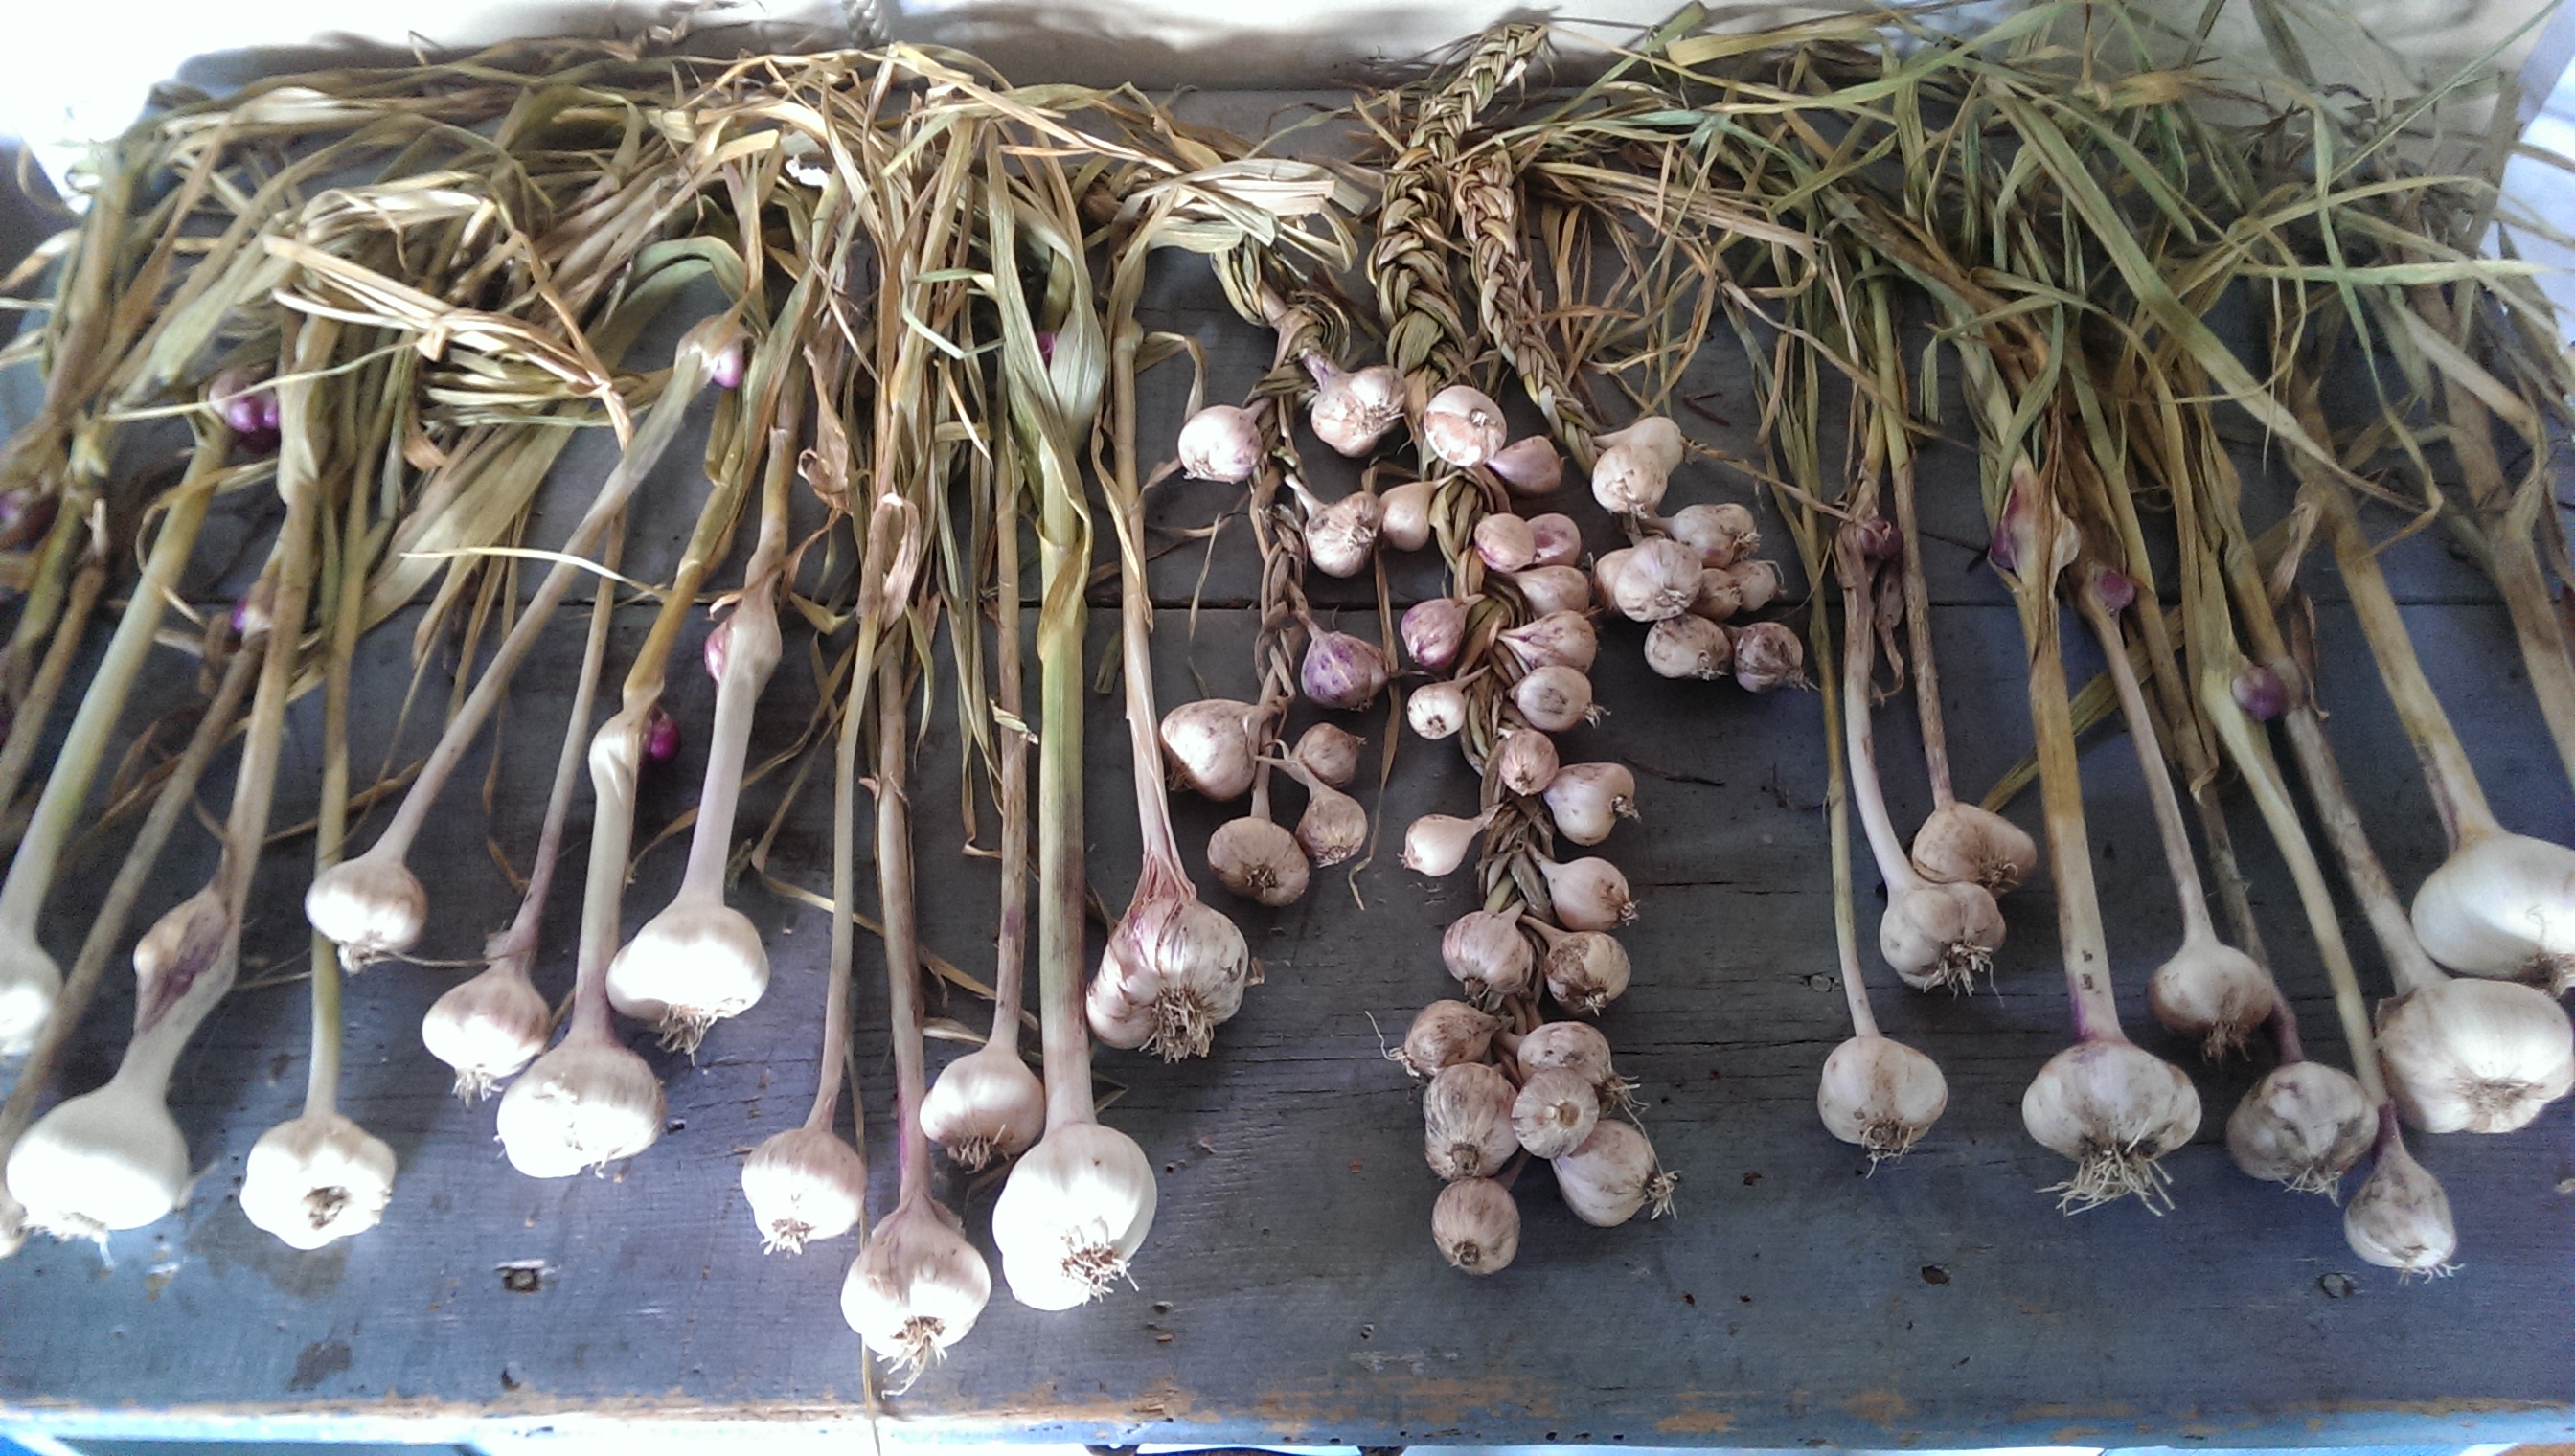
Garlic should be picked when the stalks are still green but beginning to brown.  It’s not rocket science, but it does need to be done.  If you pick it too early, the paper is hard and difficult to peel, and the heads won’t be fully formed.  Too late and you risk the bulbs separating, the paper will be too thin and then they won’t store well.  July is a good time to do it.  Although it’s tempting to grab those sturdy stalks and yank, unless you loosen the ground first they will break and then you’ll be digging around with your trowel and risk damaging the bulb.  I dig a big scoop out of the dirt in front of the garlic, and then bend it toward the loosened earth until it comes free.  Because I had left mine so long in the ground and the bulbs had sprouted close together, most of the garlic was very small.  Perfect for a garlic braid!  I made sure to pick every one; the ones I get next year will be the ones I plant this fall!  

Garlic is excellent fresh, but it must be cured in order to keep.  This is best done out of the sun, in a cool, well ventilated area, and takes a few weeks until the papery stalks dry.  Leave the stalks on for this, and cut them only when you transfer the cured garlic to its storage area.  I keep mine in a basket in our cool basement.  Keep it away from moisture unless you want it to sprout in the basket.  

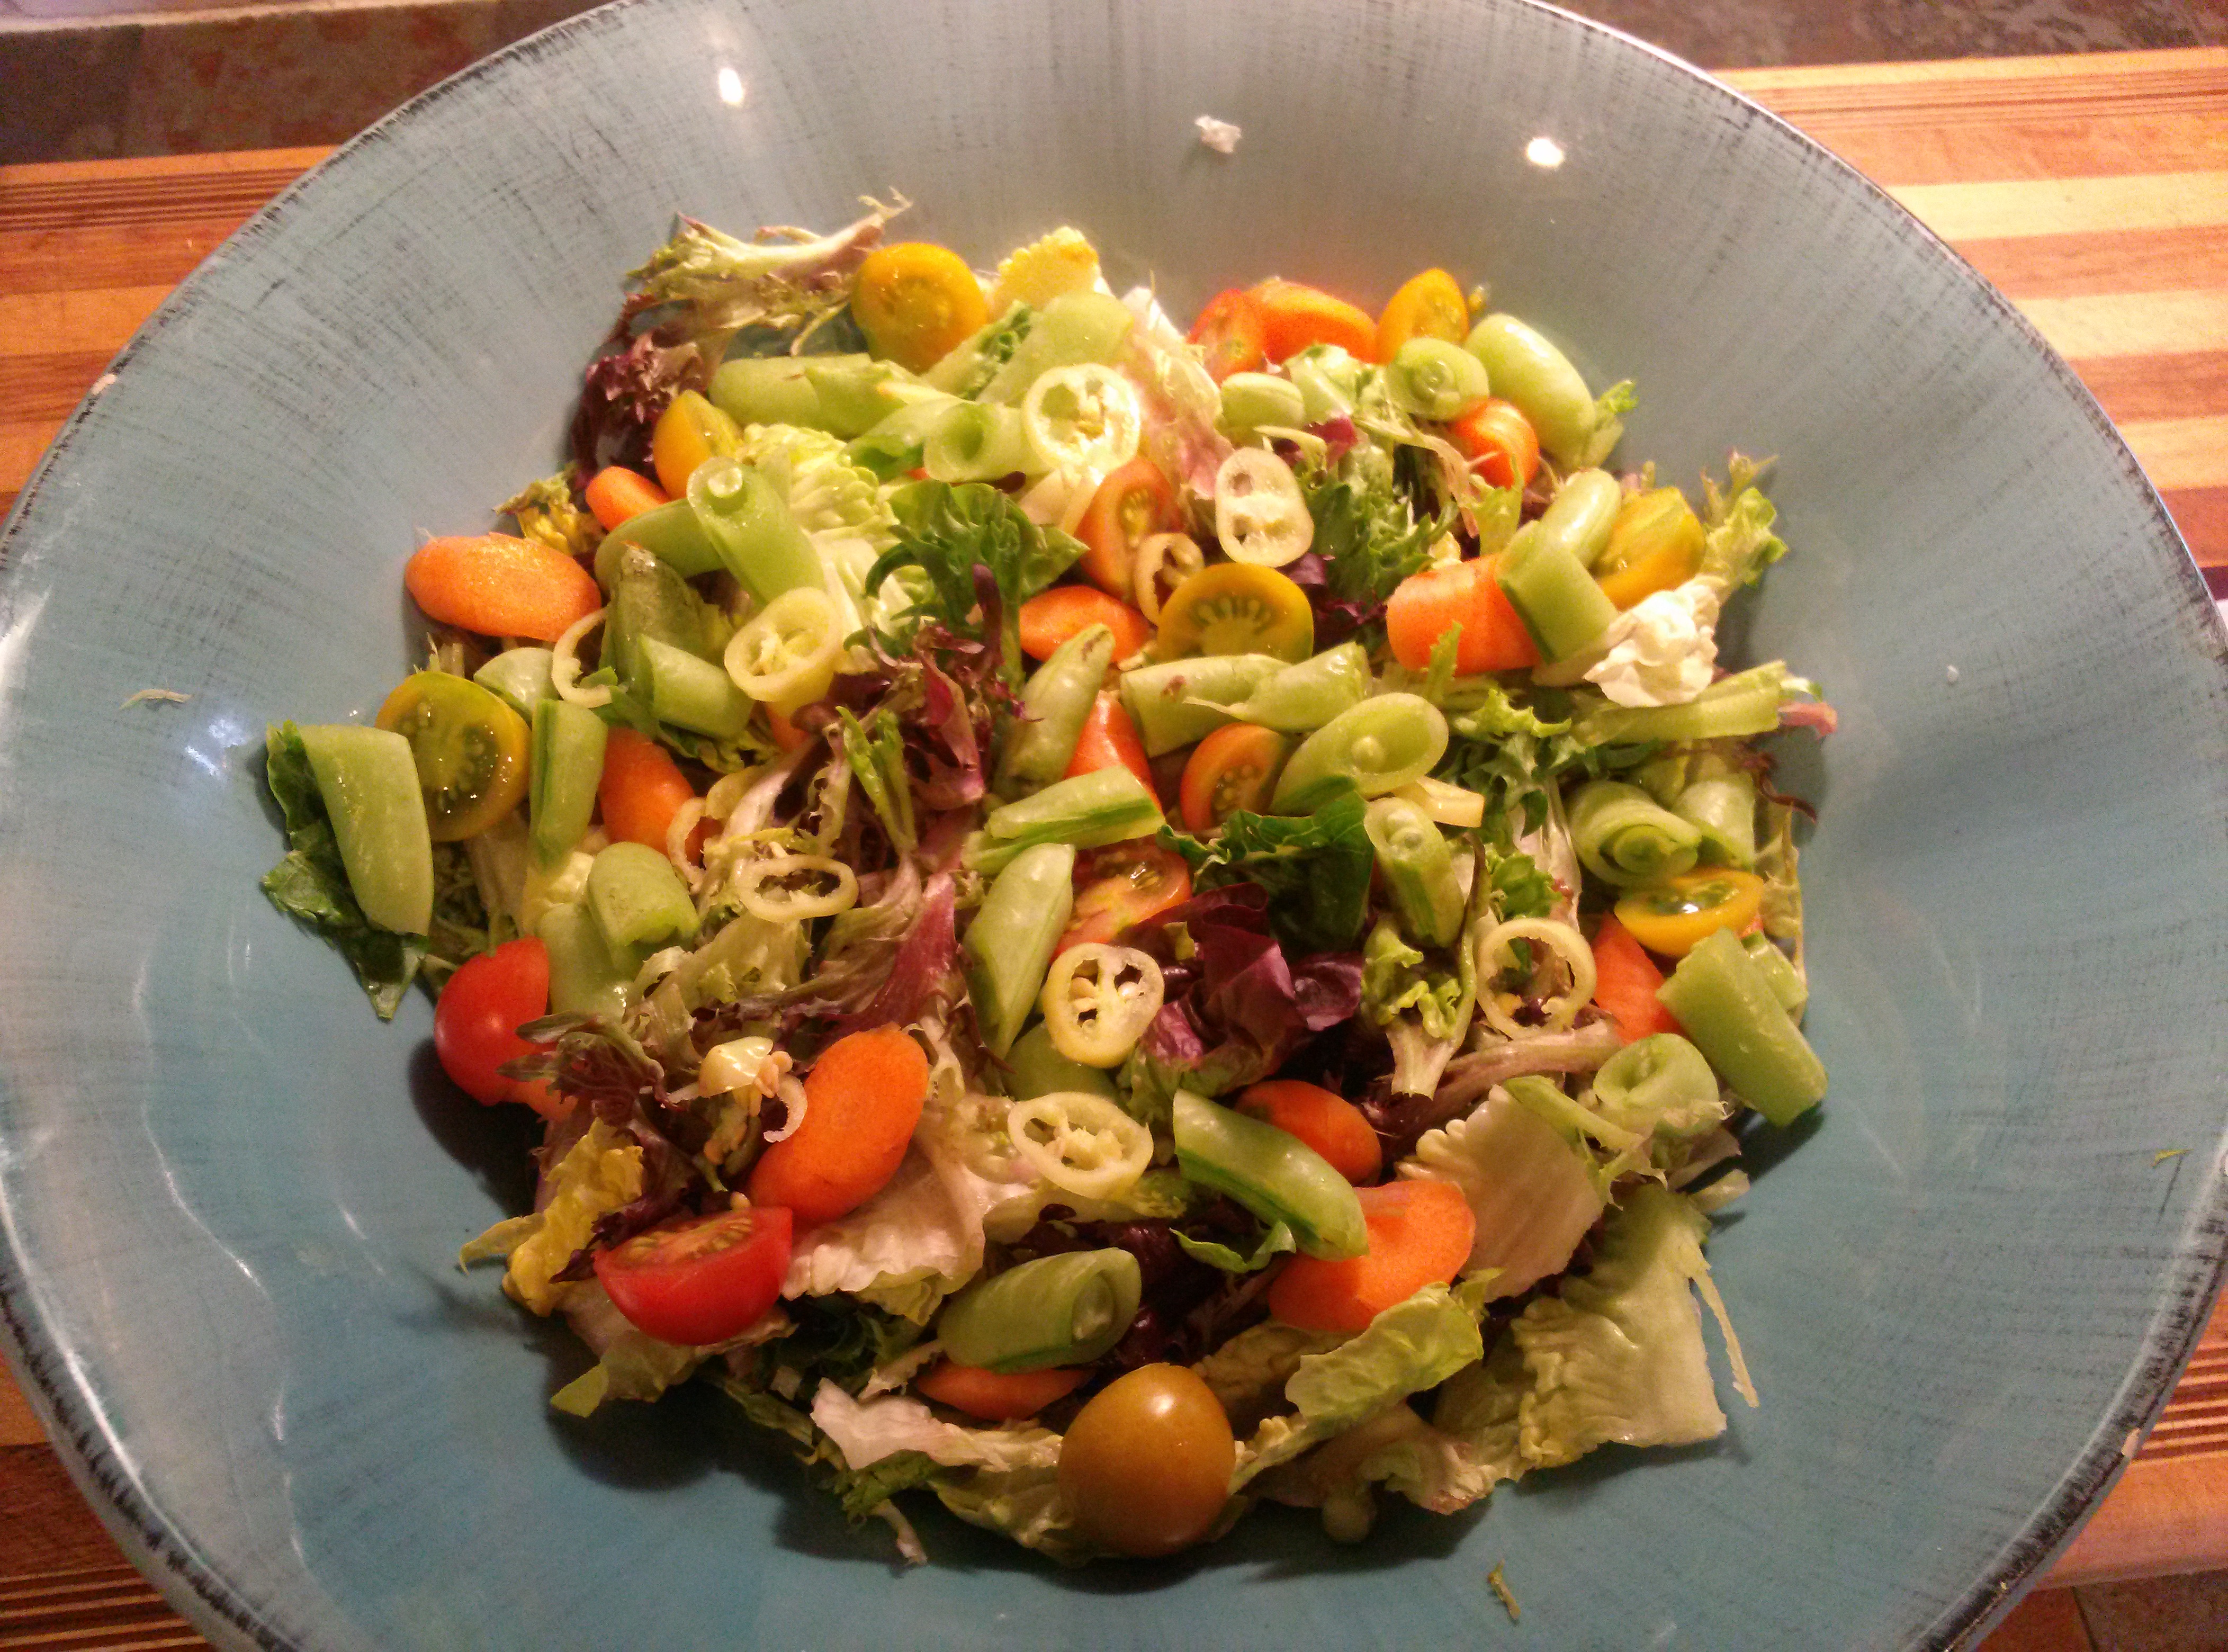
Last night we had beet greens braised with garlic cloves.  The fresh cloves are much milder than the cured.  It was really delicious and a good way to get in those healthy greens.  

SIMPLE GARLICY GREENS

1 large bunch of beet greens, or whatever hearty green you have to hand, collard, mustard, kale…

1 head of garlic, preferably fresh

1 cup of flavorful broth, vegetable, or chicken


Wash and chop the greens and add them to a large stock pot.  (add as much as will fit.  They cook down to nothing)  Peel and crush, not chop, the cloves of 1 head of garlic.  Add to the greens and pour the broth over.  Cover and simmer 20 min, longer for sturdier greens.  Enjoy!


To Pick or Not to Pick; Fried Green Tomatoes

IMAG0367


Everything in the garden has a season.  Most often just when we are entirely sick of one vegetable, another begins to ripen, giving us a change for a while until we are sick of that one too.  Some we never get tired of eating and they are gone all too soon, like peas and strawberries, but others come in hard and fast, in abundance, and we have to eat them, freeze them, pickle or jar them, or just give them away as fast as we can. Take green beans, for instance. We have been eating radishes, lettuces, kale and cucumbers for weeks now, and I have been watching the delicate purple flowers of the beans develop anxiously.  Haricot verts thinner than a cu-tip, lightly steamed and gobbled up with just a touch of salt are simply divine.   But in just a few days of picking I start to notice the ones I missed on the first few rounds are now the size of a pencil, and no longer bright green but dusky and even purplish.  I sweep through the bean patch, picking everything I see, and haul in about 3 gallons of beans.  Some we eat fresh. Some we pickle.  Some we freeze.  The next day….more beans.  Ugh!  But I know there is an end in sight, and I’ll be happy to use the ones I put up in soups and salads throughout the long months of winter.  Today, though, I’m sick of beans.

Not so tomatoes.  I could eat a fresh tomato every day of my life and be a happy person for it. Anyone who has had a tomato fresh out of someones garden, still warm from the afternoon sun, knows there is little resemblance to a store bought tomato.  The abundance of flavor, the fresh tangy sweetness and juicy texture;  It’s as good as a fresh peach, and each summer we wait and wait for the tomatoes to ripen.  We eat the best ones fresh with sea salt, or a bit of good balsamic vinegar glaze, and the rest, the ones marred by bugs, rot, or blemishes, go into the freezer.  We never seem to have enough to last throughout the winter, and each summer, as the beautiful fruits get larger and begin to ripen on the vine I wonder, Should I pick them yet?

The dilemma is this.  If I pick them green, they won’t get to ripen into the luscious red fruits that I love.  If I don’t pick them green, I won’t get to have fried green tomatoes.

Fried Green Tomatoes are traditionally thought to be deeply southern dish and one I had never tried until my (Italian) mother in law decided to grow a garden.  The recipe’s inclusion in cookbooks actually date back to the early 1830’s in the United States and are possibly of Jewish origin, first seen in the Midwest.  In any case they are prepared throughout the US and everyone who has tried them know they are well worth the effort.  In the end, I picked!

IMAG0363

FRIED GREEN TOMATOES

serves 4

4 Green hard tomatoes

1 egg

1/2 cup milk

approximately 1 1/2 cups breadcrumbs or cornmeal, seasoned with salt and pepper

Vegetable oil

Remoulade to serve

IMAG0365

Slice the tomatoes into 1/4 inch thick rounds, slicing off and discarding the top and bottoms (the breadcrumbs don’t stick to them) Mix the egg and milk together with a whisk.  Heat a cast iron skillet to medium heat and add about a 1/4 inch of oil.  Dip the tomatoes in the egg mixture and coat them with the breadcrumbs.  

IMAG0364

Fry the tomatoes in a single layer, flipping once when the breadcrumbs turn nicely brown.  Drain on paper towels and keep in a warm oven.  Serve with a remoulade of your choice.  I made mine from mayonnaise, catsup, lemon juice and tabasco. Enjoy!

IMAG0366

Berry Season

Summer’s heat is upon us, with temperatures climbing towards the 90’s, and with the heat comes the season of the berry. Blueberries and black raspberries are the first out of the gate in early July, changing almost overnight from pale green and rose to deep blue and black, respectively.

Wild black raspberries are one of my favorite summer treats. Of all the things I forage for in the wild, these luscious gems are a truly one of my favorites. Sweet yet tart, they are best eaten right away, or as soon as you can get them home and into a bowl of cream. They are very delicate and don’t hold up well to storage, unless you plan to freeze them. If you intend to make anything other than jam with the frozen ones, it’s best to freeze them in a single layer on a sheet. Otherwise they will end up as juice in a bag.

Picking black raspberries is no picnic, as they say, and this is one treat you have to work for. They mostly grow along hedgerows and by the sides of dirt roads, and are often laced with stinging nettle and Multi-flora rose brambles, neither of which feels good on bare skin. They like shade and the first ones to ripen are often under other plants. Plan your berry picking foray to include boots and long pants, as well as a wide brimmed hat to protect against the ever present gnats. A long sleeved shirt and some bug repellent go a long way toward making it a pleasant experience. Berries ripen over time, so if you want any quantity for jam or jelly, plan on picking every two days while they are in season.

Picking fresh blueberries is somewhat easier, especially if you have a well tended patch, as we do. I was just in the nick of time in getting mine covered against the birds this summer, as the day after I put up the netting they began to turn blue. Experience has taught me that the berries I deem to be “almost ripe” are perfectly edible to the host of birds hovering just over my shoulder waiting for me to leave. We have lost entire crops of the succulent morsels by waiting one too many days to put up the nets. The protective tent only helps so much though; almost every day I shoo out a hungry fellow that has managed to find a hole or sneak under.

Blueberries are very easy to maintain. They don’t require spraying and are not bothered by pests. They need little pruning and seem to winter well. We have not had any problems with the deer eating them. Harvest seems to depend more on the weather than any other factor and this year they are ripening early. Ours have grown slowly over time, but are abundant producers and we average about 5 gallons a year from 10 bushes. Pie, and more pie, is our first choice for stored berries, especially in the winter months. They freeze well, but I can’t tell you how long they keep because they don’t last long!

Berries are one of natures super-foods, and wild berries even more so. Packed with antioxidants, vitamins and fiber, they not only taste delicious but are really good for you. Everyone should save a spot in their garden for a blueberry bush or two, and if you don’t have a garden, try growing them in pots. It’s well worth the effort, for your taste buds as well as your health.

The Season of Bounty

Image

It’s that time of the year when a quick evening browse around the garden with a cocktail yields a colorful basket of produce.  For a little while this early summer, I could get away with gathering into my upturned shirt, but with the warmer days and rainy afternoons, the harvest has begun in earnest, and I try to remember to bring out a basket along with my drink.  Garlic and green onions, early tomatoes, blueberries and strawberries, carrots, early beets, peas and peppers are all coming in by the handful.  I always try to balance my desire for fresh produce with the realization that if I leave it a while longer, it will grow bigger, but there is nothing like the taste of sweet baby carrots and tender beets steamed with a bat of butter on a steamy summer evening.  My favorite dish of the early summer is, of course, a simple salad of fresh newly picked veggies.  The thinly sliced Peruvian white habanero adds a super kick to this tasty dinner.Image

I am surprised to see the blueberries ripen so early this year, as I usually think of late July as blueberry season, but I predicted this to be the year of the berry, and it seems I have called it right.  Even the tangy and delectable wild black raspberries in the hedgerow are beginning to ripen early, and I got a sticky purple handful this morning for my trouble.  Unfortunately, as they grown amongst the nettles, I also got a prickly wrist.

On another note, for those of you who read “the Doctor is in”  I’m happy to report that my pepper plants are all thriving.  Many of them lost all their dark green foliage to the cold snap we had in May, but the smaller, lighter green leaves are beginning to thicken out the plants, and on many there are the first blooms.  Some did better than others and are already fruiting, hence the spicy salad, but most peppers like the heat, and will produce best from late July into early September.  During this pepper heyday, you will find me in the kitchen, gloves on, chopping peppers for hot sauces and salsas as fast as I can.

Strawberry Fields Forever

Image

June is here and delights are beginning to come in from the garden.  Among the radish and peas, the lettuces and green onion are the strawberries, the most wonderful of all fruits and the one that really makes it feel like summer .  Of all the berries, the strawberries are the earliest and, in my opinion, the tastiest.  At least I say that until early July, when the blueberries are ripening, and then early august when we taste the delectable raspberries and blackberries.  But for now we indulge in the sweet, tangy, indescribably yummy strawberry.

I have a small berry patch that I often think takes up too much real estate in my tiny kitchen garden.  Most of the year it looks stringy and sad, almost as if the plants are dead or dying, but not so.   Come May, out come the shoots and flowers that, ever so agonizingly slowly, turn into hard green fruits and then ripen into luscious berries.  I have everbearing plants, which means they produce fruit all summer, although not as prolifically as they do in June.  Come August, they are growing wild and trying to climb down the sides of the raised beds and into the paths.  They are so hearty and vigorous they can root into the deep pine chips I use as mulch on the pathways.  Each year I cut back the runners and plant some back into the bed in the bare spaces, replace some older plants, and reluctantly throw out the rest.  They are so hearty, in fact, that one year I ripped them all up and, not able to throw them out, kept them in a bag in my garage.  Then, regretting my decision, I replanted half of them back into another bed, where they took, and bore berries the same year.

As hearty as they are, strawberries are a funny plant.  They only produce for a few years, and will shoot out runners that can overtake the garden rapidly.  They use an enormous amount of nutrients and therefore should be moved every 3 years or so to a different spot in the garden. They are best heavily mulched, which both keeps the berries out of the mud,and protects the crowns from cold.  They like water, but not too much, and must be in well draining soil.  Weather will affect the crop and determine ripening times; with warmth and abundant sunshine they ripen quickly, rain and clouds cause some delay.  Some varieties do well in containers, and are a good choice for those with not much space, but they must be watered regularly.

Besides eating them fresh on granola or yogurt, one of our favorite things to do with berries is to make ice cream.  Following is a simple and delicious recipe that can’t be beat.  Image

1 pint fresh berries

1 1/2 cups cream, divided

3 egg yolks

2/3 cup sugar

Wash and crush the berries with a potato masher until pulpy.

Heat 1 cup cream in a saucepan over medium heat until bubbles form on the sides of the pan.

Mix together egg yolks 1/2 cup cream, and sugar in a medium bowl

Add the hot cream to the yolk mixture, whisking constantly, and then return the mixture to the pan.  Over medium low heat, whisk the mixture until it becomes thickened, 5-10 minutes.  DO NOT BOIL.  Allow the mixture to cool completely.

When custard is cool, add to an ice cream churn and follow the manufacturer’s directions.  YUM!

Boozing in the Garden

Image

As much as I like my cocktail hour, I’m not talking about me here!  I’m talking about slugs, and how they love beer.  I went through two bottles last night alone filling up my little plastic dishes in order to attract those nasty little slimers that sneak around and gobble up anything they can climb on.  They had gotten into my cabbage, my strawberries, my beets and peas, my radishes.  All those telltale blemishes on my delicate veggies!  If you don’t put a stop to them, they multiply, but you never notice cause they are hard to see and mostly come out at night or in the rain. They don’t like direct sunlight.  But suddenly they are everywhere and most of the vegetables have either holes in their leaves or pieces gnawed out of the fruits.  Fortunately, there is a simple way to knock them out, literally.  Just place some shallow dishes of beer around the garden and the slugs flock to them, suck up that frothy concoction and pass out, drowning themselves.  You don’t even need good beer; save the microbrew for yourself and pick up a six pack of PBR for the slugs.  They aren’t choosy when it comes to drinking.

Image

The Doctor is in!

This morning I went out to look at my garden, as is my custom most mornings after the bus has come and gone and I have a chance to finish my coffee.  Everything looked in order from afar, but as I honed in for a closer inspection, trying to sneak up on those pesky tomato suckers, I noticed my plants looked in somewhat ill health.  Not exactly sick, but queasy.  Now, I knew I took a risk by planting them in the dirt before Mothers Day, but the forecast looked good for an early planting, and I had been fastidious about hardening them off.  We did get a cold snap last week, but not a frost in our area, and they had looked fine the morning after.  The leaves were sort of yellowish, curling at the edges, with some brown spots on them.   What could it be?  Blight?  Bugs? Too much water? Not enough?  As I fondled each plant in turn, murmuring over them and worrying like the mother of a sick child (I have, after all, nurtured these babies since January!), It occurred to me that I might need some help.

I knew just where to get it, too.  I hurriedly plucked the worst looking of the leaves off pepper and tomato, hopped in my truck and beat feet (My dad’s expression) to the local greenhouse to talk with my good friend who runs the garden center.  She has been a resource for me over years, and one I have come to value and respect.  I knew together we could figure out what ailed my lovelies.  After a trot around the greenhouse with my fistfull of wilted leaves looking for my friend, who turned out not to be working that day, I decided to take a chance and ask someone else.  I found another woman and after a quick inspection she informed me that my plants weren’t that sick at all, but had a case of chill stemming from wet feet.  We had a chat, and she suggested in the nicest of ways that perhaps I had mulched too deeply, or perhaps too close to the stems.  The previous cold, combined with a wet wind and lots of rain has weakened the plants because the roots couldn’t breath.  She prescribed a treatment of kelp and seaweed mulch lightly applied to the area around the roots, and the mulch pulled back 6 inches.  It turns out everyone at that greenhouse knows stuff!  I rushed home to apply her advice.  Below is the result.  I’ll let you know in a week if my darling peppers and lovely tomatoes have recovered their former vigor.  ImageImage

Ah, Springtime. For a minute.

When I moved to Connecticut almost 12 years ago, I came from Crested Butte, Colorado, a western slope former mining town turned fancy with a ski area.  It was at 8800 feet in elevation.  I had a garden, but in it I grew mostly grass.  And I didn’t even mind so much, because it was green.  I did manage some carrots, peas

and some herbs most years, but that was the sum total that my high altitude green thumb could manage.  I tried for 10 years to get a serviceable tomato, but nary a cherry could I produce in that elevated locale.

Then I moved to Connecticut, and the sheer amount of vegetation astonished me.  In fact, by mid summer I was entirely overwhelmed.  I had to cut the grass ALL the time.  And weeding?  Forget it!   I couldn’t stop things from growing, and that first year my cherry tomato vines grew to be over 11 feet long.  I chuckle to remember how delighted I was with my first garden and the 12 or so varieties of vegetable I planted.  Now I have over 12 varieties of tomatoes alone.

Springtime in Connecticut is both a magical and alarming time for me.  The new life clawing up out of the ground and unfolding everywhere happens so fast and forceful that it is almost frightening.  Each year in the early spring I wait expectantly for the growth to start.  It begins with the greening of the grass, and gently blooms into a haze of green on the tips of the trees.  Then I feel as if I’m rushing to catch and appreciate every last brilliant daffodil before the outrageous yellow of the forsythia emerges, but it all too soon blends in with the pinks and whites of the dogwoods and magnolia which give way to the purples and violets of the heavenly scented lilacs.  Before I know it spring turns to summer and the business of hacking back the vegetation that grows uncontrollably everywhere, blocking my view of the oncoming cars at the end of the drive, threatening to overwhelm my perennials.  And then the nasty posion ivy, the multiflora, the nettles.

There is usually a period of ease between these times, a period of calm wherein there is just enough vegetation to feel the world is a gentle place but not enough to feel as if things are out of control.   For me, that time is now.  Onions are beginning to poke out of the moist rich soil, and the first blossoms begin to open on the tomatoes.  The last frost was last night, and tomorrow I relocate my delicate seedlings into their permanent homes.  The lawn looks green, healthy and not too long.  I have to remember to take a deep breath and savor every moment before the deluge of verdancy I know will be coming.   Everything  is a mixed blessing in this delicate  balance we call life.

A Note about Honey

Honey is, as they say, the nectar of the Gods.  It is an amazingly complex, not to mention delicious substance that has not only pharmacological properties but preservative ones as well.  When I was a child, my mother kept a jar in the cupboard filled with garlic cloves soaking in honey.  The honey kept the cloves from spoiling, and the garlic subtly flavored the honey.  When we had a cough or sore throat, out came the honey pot and in went a teaspoon of the “medicine”, which was both helpful and delicious.  Some people claim that raw honey will alleviate allergy symptoms.  It has anti-microbial, anti-bacterial and anti-biotic properties, and contains several known anti-oxidants.  It has been used topically for thousands of years in the treatment of wounds and ulcers.  As a preservative, honey can keep foods from spoiling for many years if kept in a dry and cool environment such as a root cellar.

We keep two small hives that provide us, on a good year, with several gallons of delicious honey that we use both in the kitchen and as gifts during the holidays.  Family and friends tell us they wait anxiously for Christmas, hoping for a new jar of the sweet nectar for their pantry.    Keeping bees is not difficult to learn.  With a good book and, if you are lucky, the advice of an experienced apiarist, it is fairly easy to purchase everything you need online, including the bees themselves.  Now is the time to order hives and get started for a good honey crop in the fall.  Once the initial investment is made, they don’t take up much space and only require a minimum of time.

Although I believe honey to be a healthful and natural sweetener, it should be always used in moderation.  It is primarily made of simple sugars, and creates an immediate biochemical release of insulin, as well as the resulting “sugar crash”.  Think of our ancestors before the advent of agriculture.  How often did our wandering predecessors come across a hive filled with wild honey?  Use honey as if it were as valuable and precious as gold.  Furthermore, honey is not suitable for infants, as it can contain yeasts and bacterium not suited to the newborn digestive system.   It’s best to buy honey from a local source, preferably wild.  Look for it at your farmers market.  When shopping for honey in a grocery store, look for raw honey that has not been pasteurized or blended.

Baked sweet Potato Fries

Spring is a time when we long for the fresh foods of the summer, but mostly we get the washed out veggies from the supermarket that still have the stink of diesel fumes from the miles they have been trucked to us.  Often we resort to complicated meals full of starches to hide our longing for the taste of summer.  Enter center stage…the sweet potato!  The sweet potato is one of natures super foods.  Packed with nutrients, it acts on our blood sugar in a different, better way than regular white potatoes, and it’s sweet, nutty, rich flavor can be like candy on the tongue.  But sadly, the sweet potato is often regulated to the sad state of boiled down mush mixed with heaps of butter and topped with (yuck!) marsh mellow that we call a Thanksgiving dish.  Who can give thanks for that?  Not your digestive system, that’s for sure.

The sweet potato is easy to store.  Kept in a cool place, like a basement or garage it can last for a very long time, especially if it has been dipped in bee’s wax.  It can be seasonal any time!  The sweet potato is easy to grow.  Put it in a trench, cover it over, and dig it up 3, 4, or even 5 months later.  I have eaten sweet potatoes that have been left in the ground over winter and then dug up before they sprouted in the spring.  They are seasonal anytime!  They are also cheap, delicious and, did I say? Packed with nutrients.  So what do we do with the lowly sweet potato to make it shine like a star?  The simplest thing possible.  Bake it with salt and olive oil.

First get as many sweet potatoes as you need to feed your crew.  Sometimes they are giant and one will feed 3, so gauge your guests, but remember….they taste better than you might think, AND they are especially good cold!  So make plenty.  Peal them of their outer skin.

Set the oven to 500F.

Next, cut them into either wedges or strips.  The thickness will determine the time it takes to bake them.  I like smaller strips, but too narrow and they will burn up.

I made this pile for three of us, with leftovers.

Image

Next, put them in a big bowl and drizzle them with good quality olive oil, and a big pinch of salt.  I always use Morton’s sea salt.  It is thicker ground than regular table salt, and is better for you.  I keep it in a small finger bowl and use my fingers to pinch out how much I need.  A big pinch is about a teaspoon.

Spread the potatoes out evenly on a pan lined with tinfoil.  They tend to stick, and I hate cleanup!

 Image

If you have to, use two pans.  Put them in the 500 oven and cook for a while.  You’ll need to check them regularly because the cooking time depends on the oven and the size of the fries.  If you used two pans, make sure you switch their position in the oven every 5 minutes or so.  Mine took about 20 minutes to cook until they were starting to brown and crispy.  When you take them out of the oven, let them cool a few minutes before putting them in the serving dish.  As they tend to stick, using your fingers to pick them off the tin foil is the easiest, so be careful not to burn yourself!  Next, add a sprinkle of salt and serve!  YUM!Image