Hope and Gardening: spring planning

February and March may seem like the absolute doldrums for gardeners in the North East, but for me this is really where the fun begins.  Starting in mid January my daily run to the post is enhanced by the plethora of seed catalogs and gardener supply fliers that inundate the more mundane sampling of bills and offers of credit.  These magazines, filled with flawless, sparkling, brightly colored fruits and flowers not only bring the remembrance of springtime just when it seems like winter will never end, but spark the planning and scheming process that every gardener goes through each year.  Moreover, for me they offer not just ideas and choices of what to grow, but actual hope for the delights of spring, and desire for a bountiful garden, in much the same way that ads for fancy skin cream lure us in with the unattainable promise of youth and beauty.  I know it sounds foolish, but there it is.

This winter, when John Scheepers and Gurney’s and Burpee came to tempt me with their seductive photos, I threw them immediately into the recycle bin, and here’s why.  Last fall on my birthday I received a wonderful present from a girlfriend of mine.  It was a gardeners journal, a subscription to Heirloom Gardener, and a seed catalog from Baker Creek.  She knows me well.  I devoured the magazine.  I learned more about GMOs and gardening history in the US, and I vowed that never again would I plant a seed whose origin was questionable.  I saved the seed catalog for February.

.heirloom gardener

The decision to plant a non GMO garden was a big one for me.  While I profess that organic is best, I’m not above sprinkling my soil with a little Seven when I can’t get rid of those pesky ants around my eggplant.  Even thought I detest chain department stores and all they do to wreck local economy,  I’ve been known to buy a tomato plant at Home Depot on impulse. While I tout the values of a nutrient rich, homegrown local and balanced diet, I’m the first one to order pizza when I’m too tired to cook.  So Ok, I’ll admit it, I’m a hypocrite.  But now it’s time to step up to the plate.  Genetically modified food is bad. Bad for us nutritionally, bad for local economy and a just plain bad for the environment.  Get more information on this at www.nongmoproject.org/learn-more

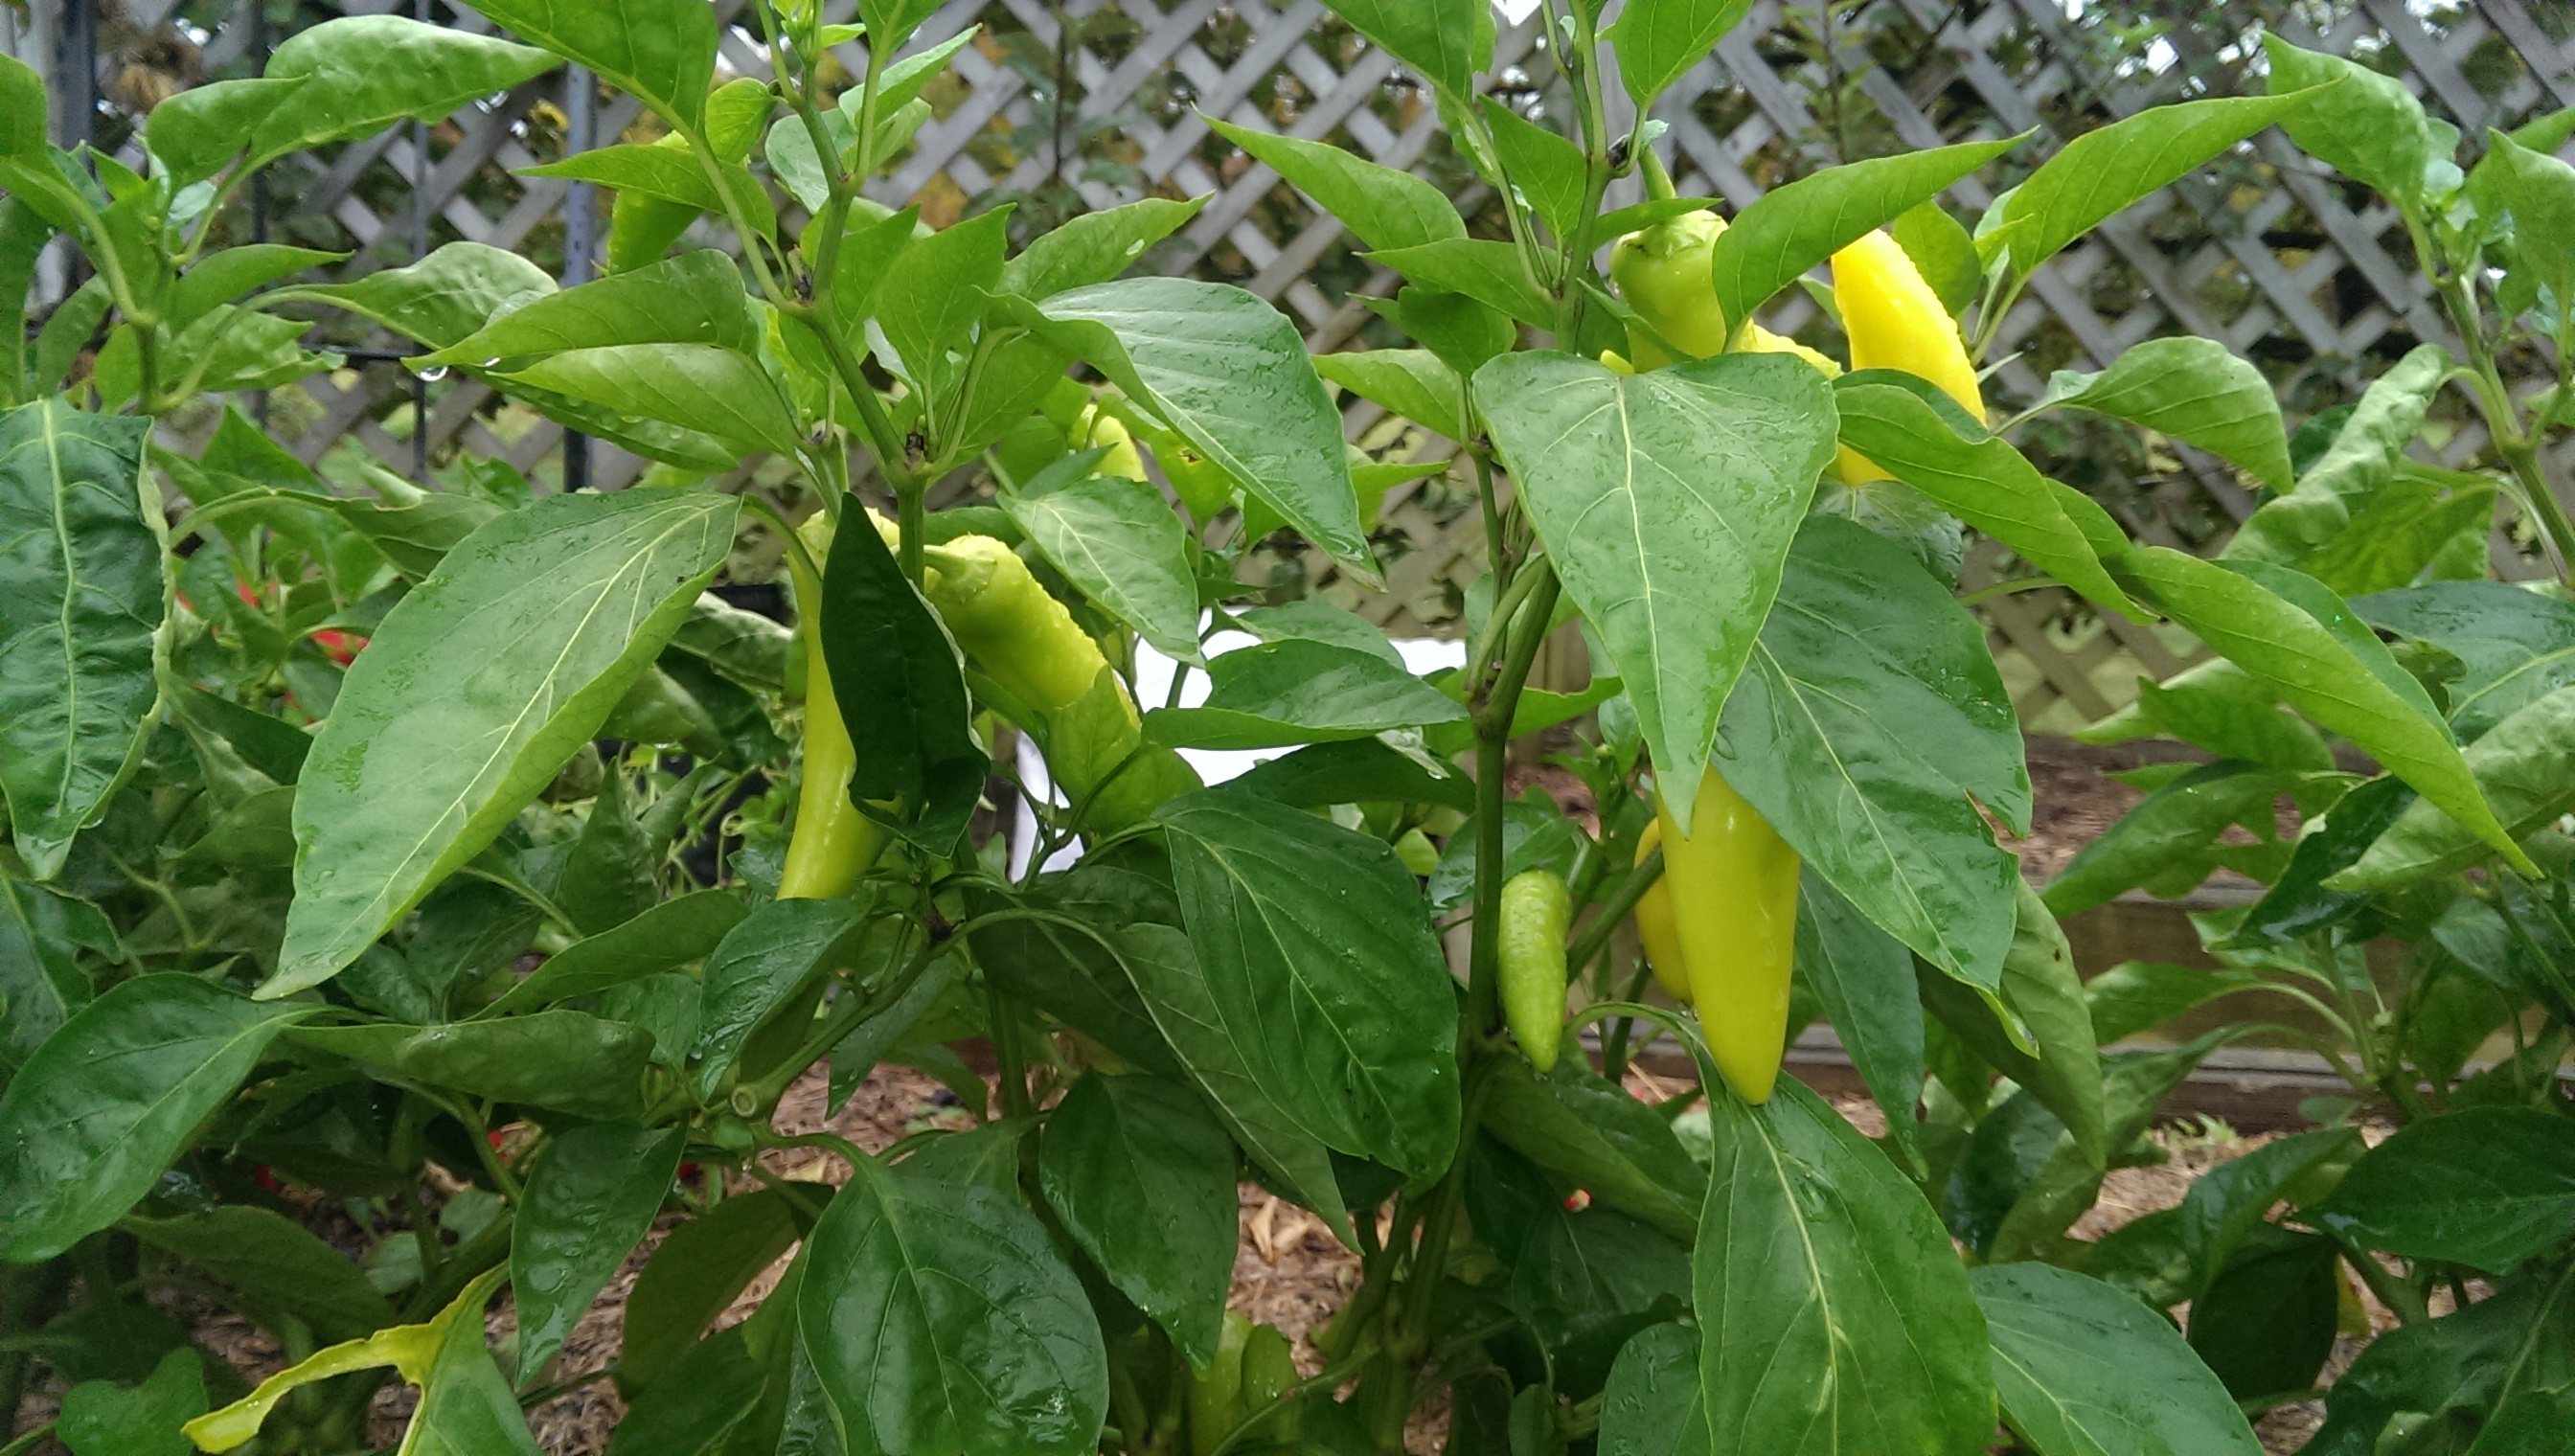
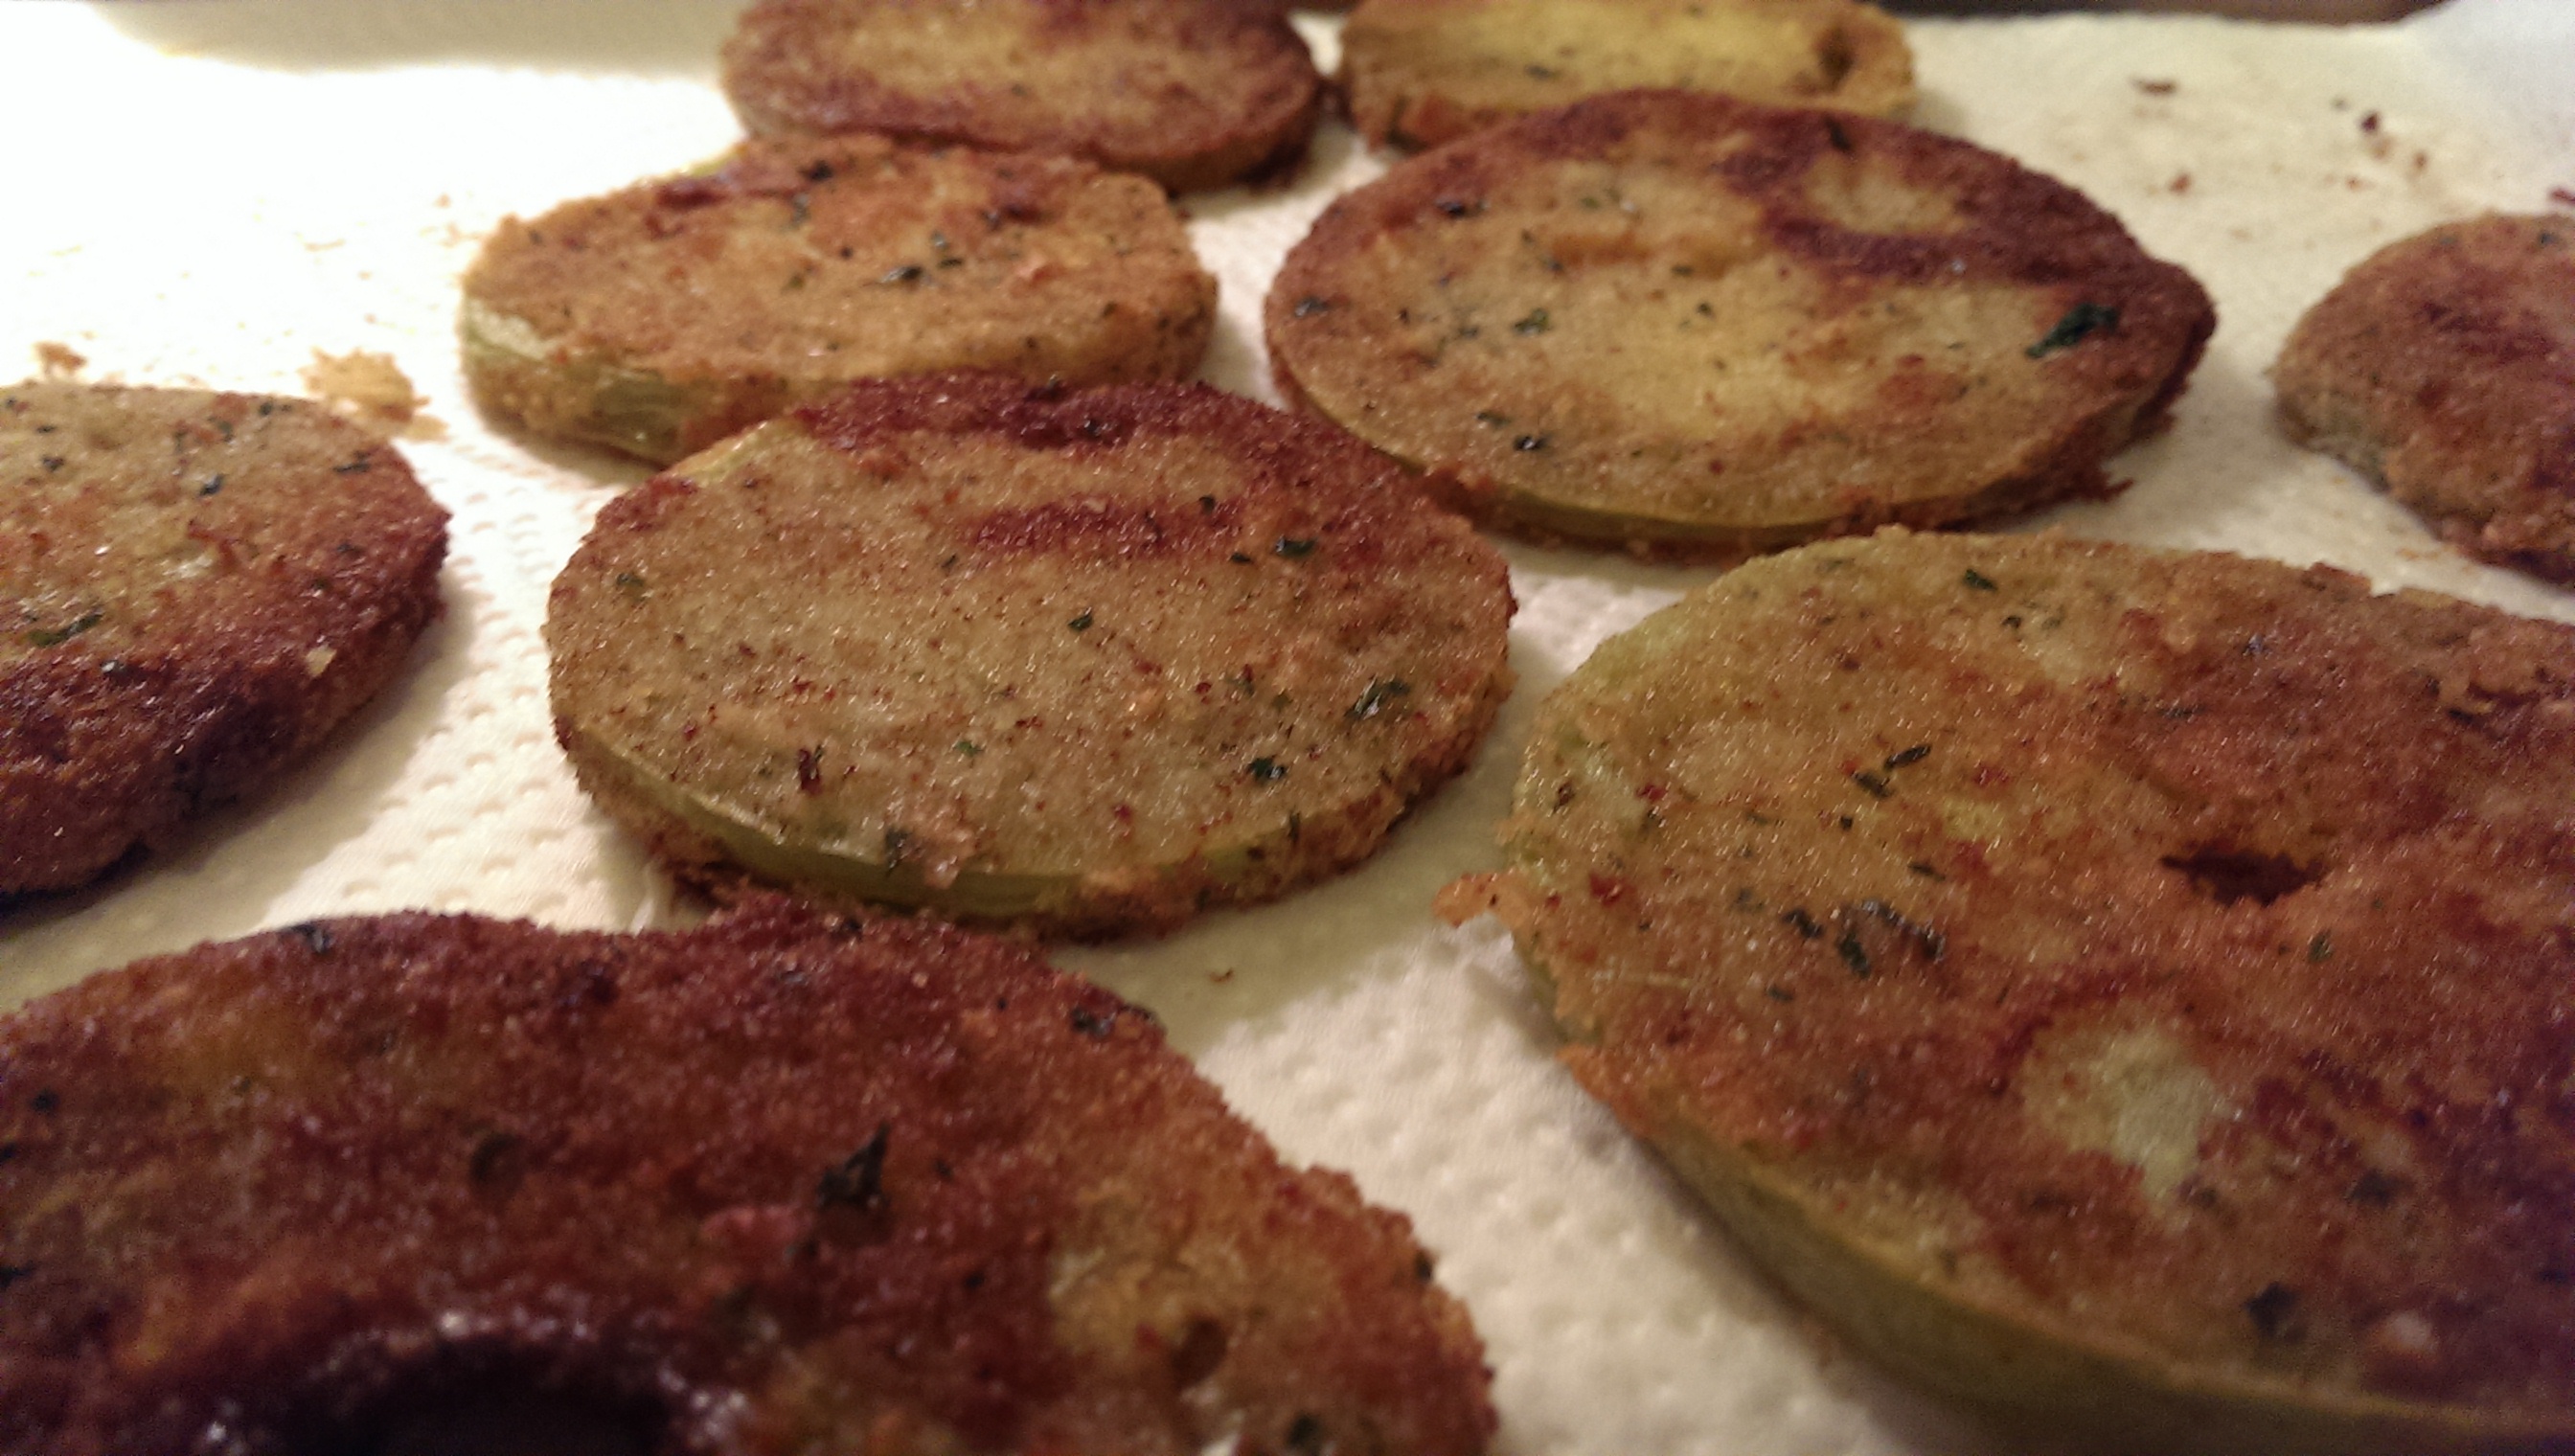
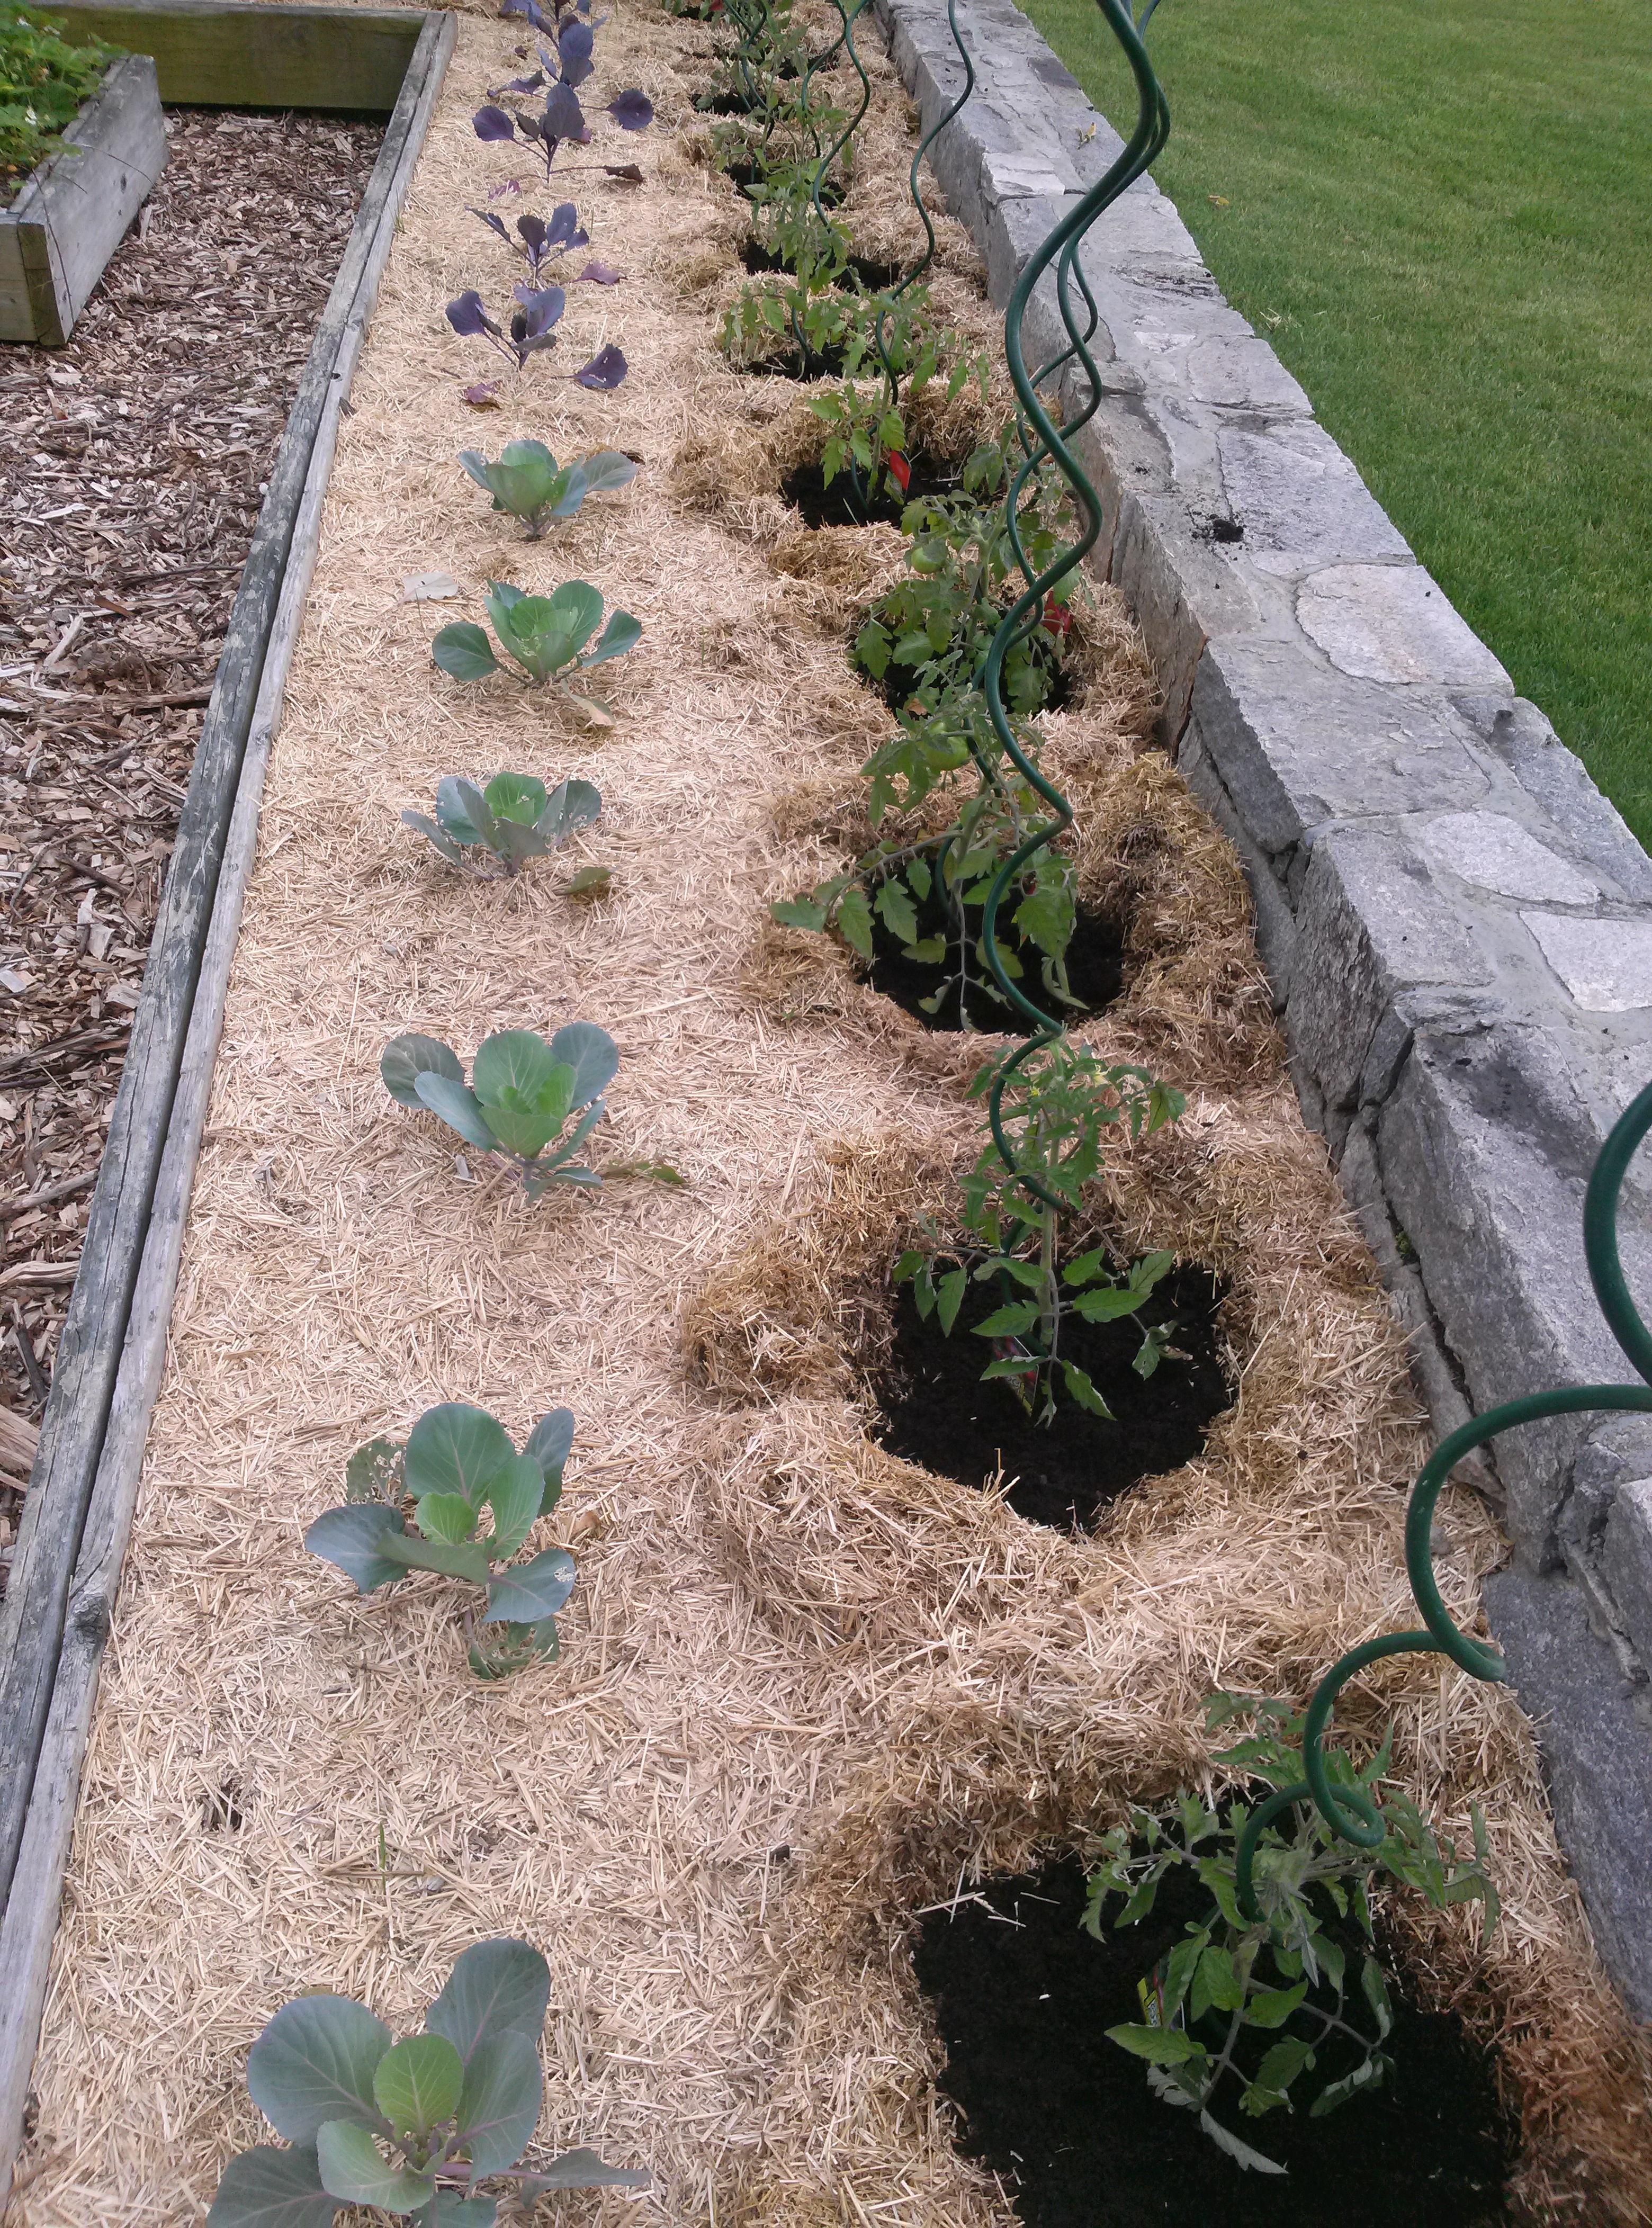
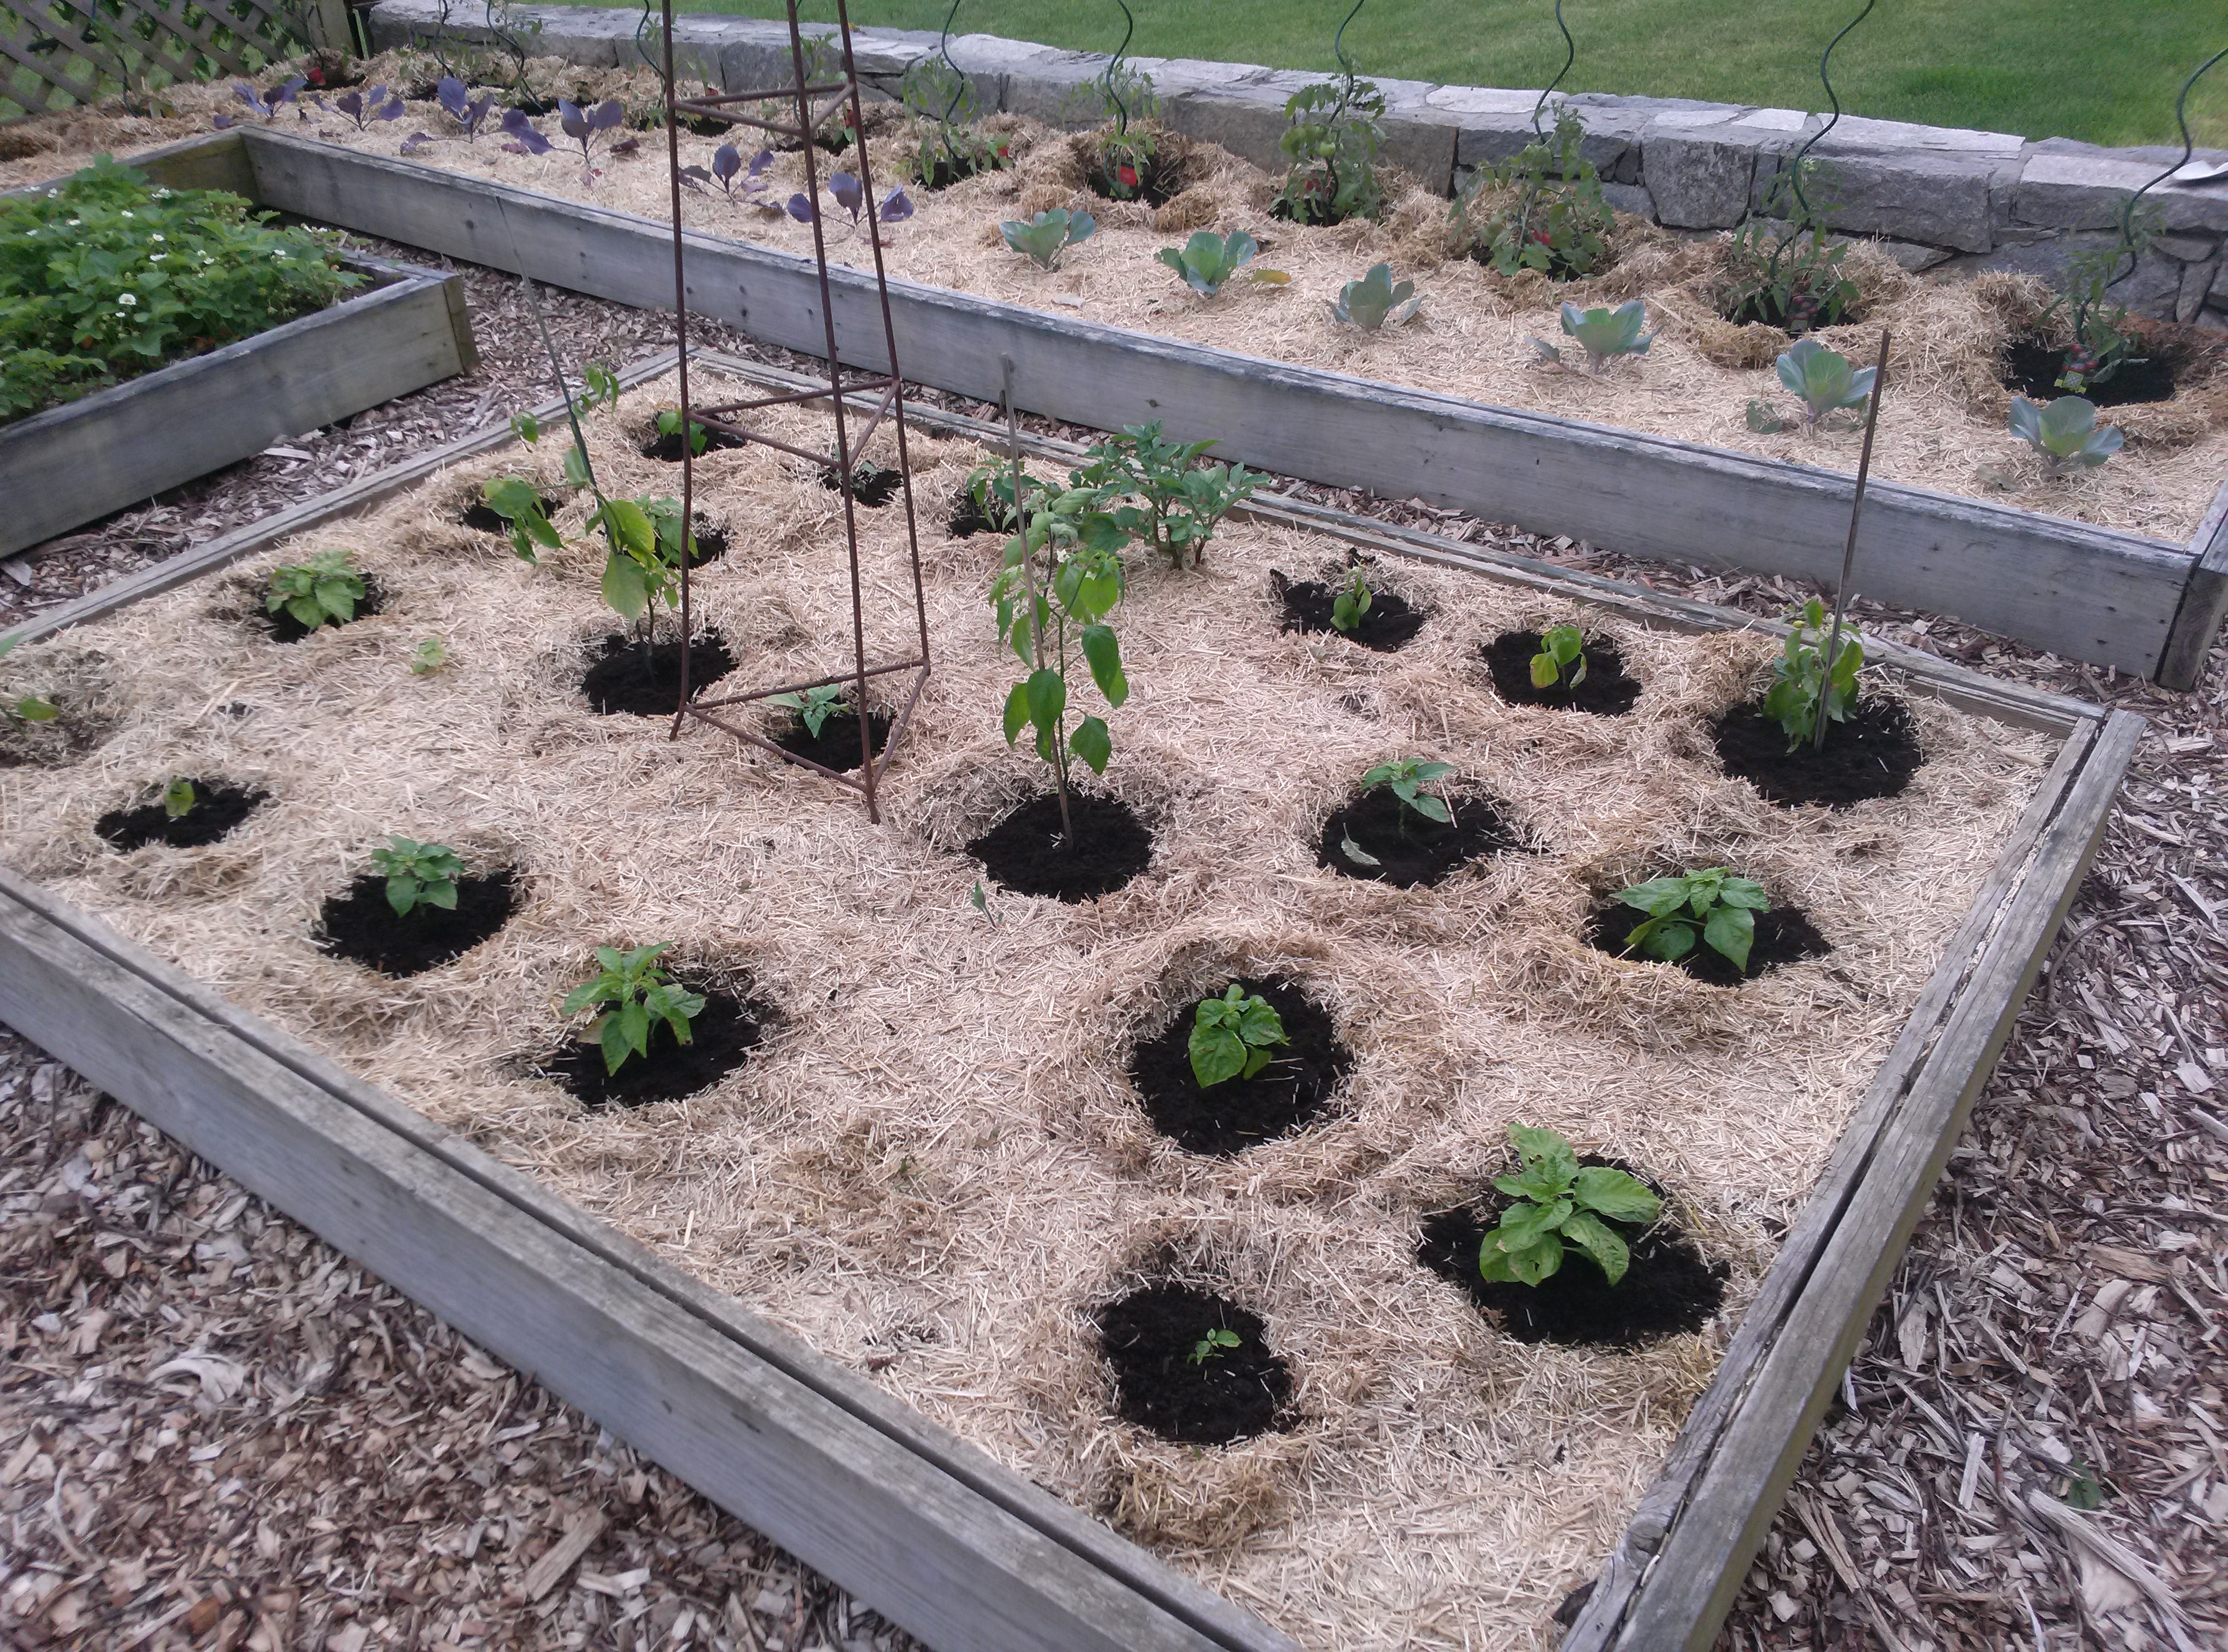
When I plan my garden in the spring I start with a list of what I’d like to grow.  Then I make a map of my garden and, referring to last years map, add each thing where I feel it would grow best.  When I actually do the work my plan often changes, if, for instance, I bought more tomatoes than will fit in the allotted space.  Sometimes I cluster, other years I might mix it up, say putting the carrots in with the beets or planting every other tomato and pepper.  My garden is quite small, so I often cram.  Every year I plant some things from seed, like beets, and beans, and carrots, and some things from plants that I purchase, like tomatoes and squash and melon.  The only things I start from seed indoors myself are pepper plants and this mostly because I have more of a selection than I can find at the greenhouse.  Deciding to choose heirloom and non GMO plants means that I have to either find a source for heirloom plants, or grow them myself.  While there is a local CSA that I believe sells plants in the spring, I didn’t want to limit my choices, and since I have had some luck with peppers, I decided to go ahead and start my entire garden from seed.  That means all the tomatoes, melons, squash, eggplant, cucumber, spices, cabbage and peppers.  Yikes!

Last month I finally made my choices from the Bakers Creek Heirloom Seed Company catalog.  I highly recommend this company to anyone who is a vegetable fanatic.  Their selection is unbelievable and their knowledge extensive. Their website has tons of valuable information and it’s just fun to browse.   Check it out at www.rareseeds.com   After days and weeks of poring over the descriptions and photographs of exotic and divine vegetables (am I the only one who finds vegetables alluring?) I ordered 38 types of seeds.  10 types of tomato alone, with names like Green Zebra and Black Prince. Where I’ll put them is still a mystery.  I made a schedule by counting back in weeks from the average last frost date (May 20th).  I borrowed some growing lamps and purchased seed pots and starter mix.  I rearranged my bathroom and tub area to fit the seed trays.  I planted the onions and the eggplant.

IMG_0069  IMG_0073

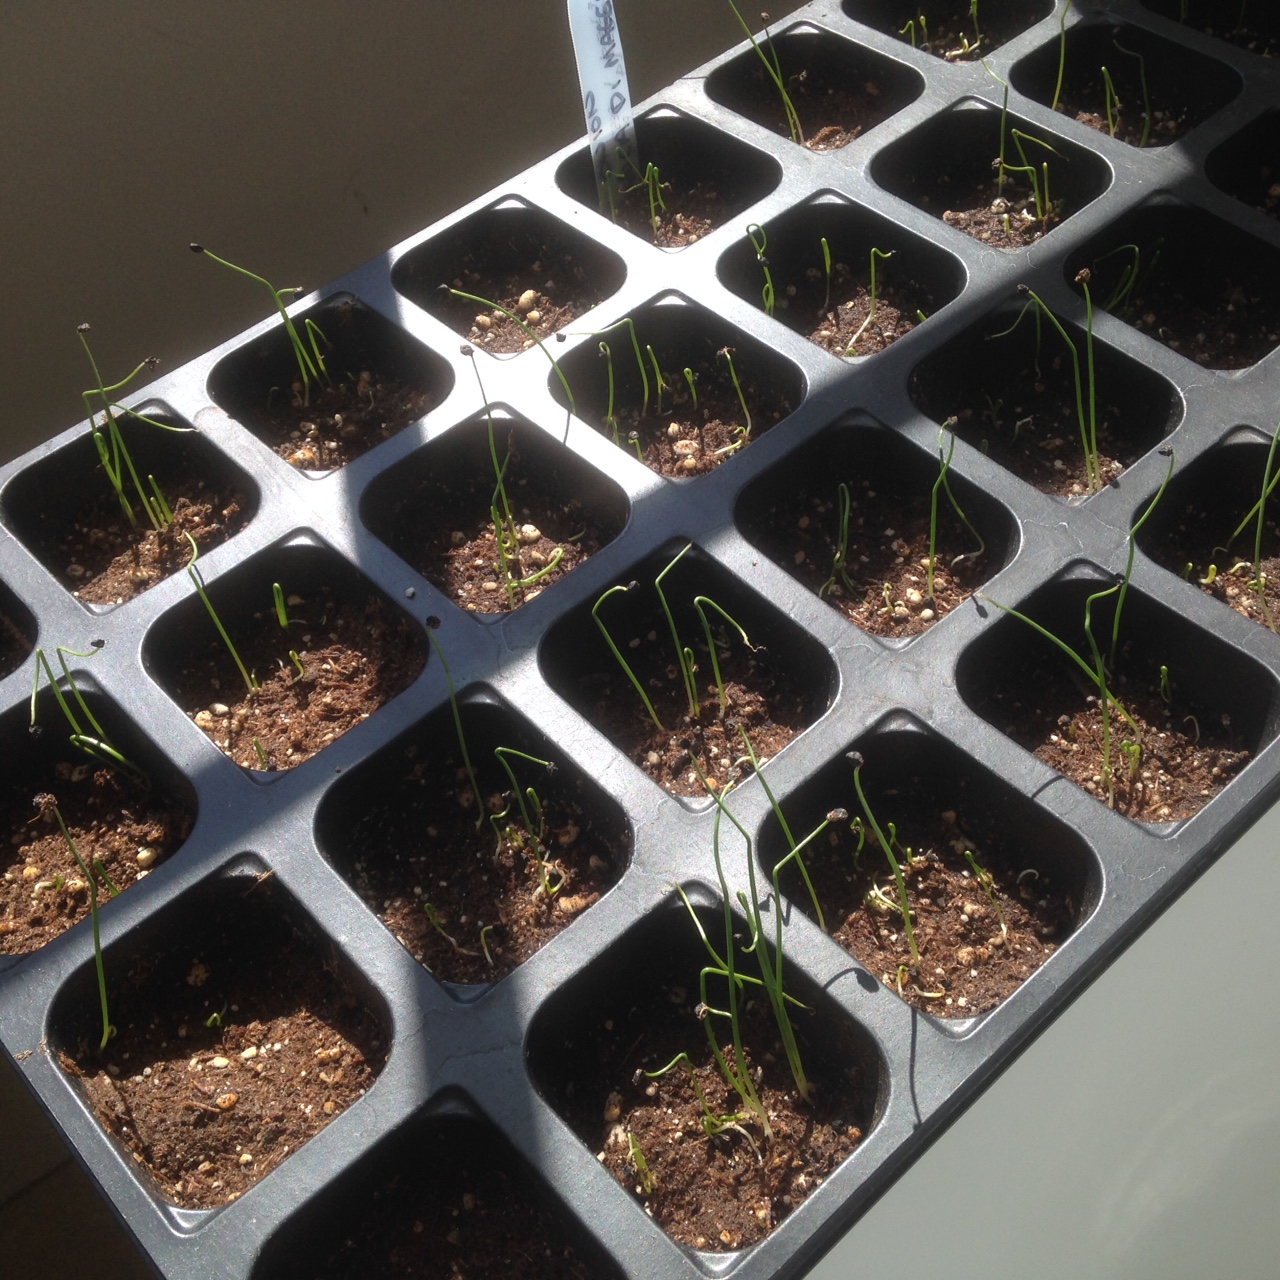
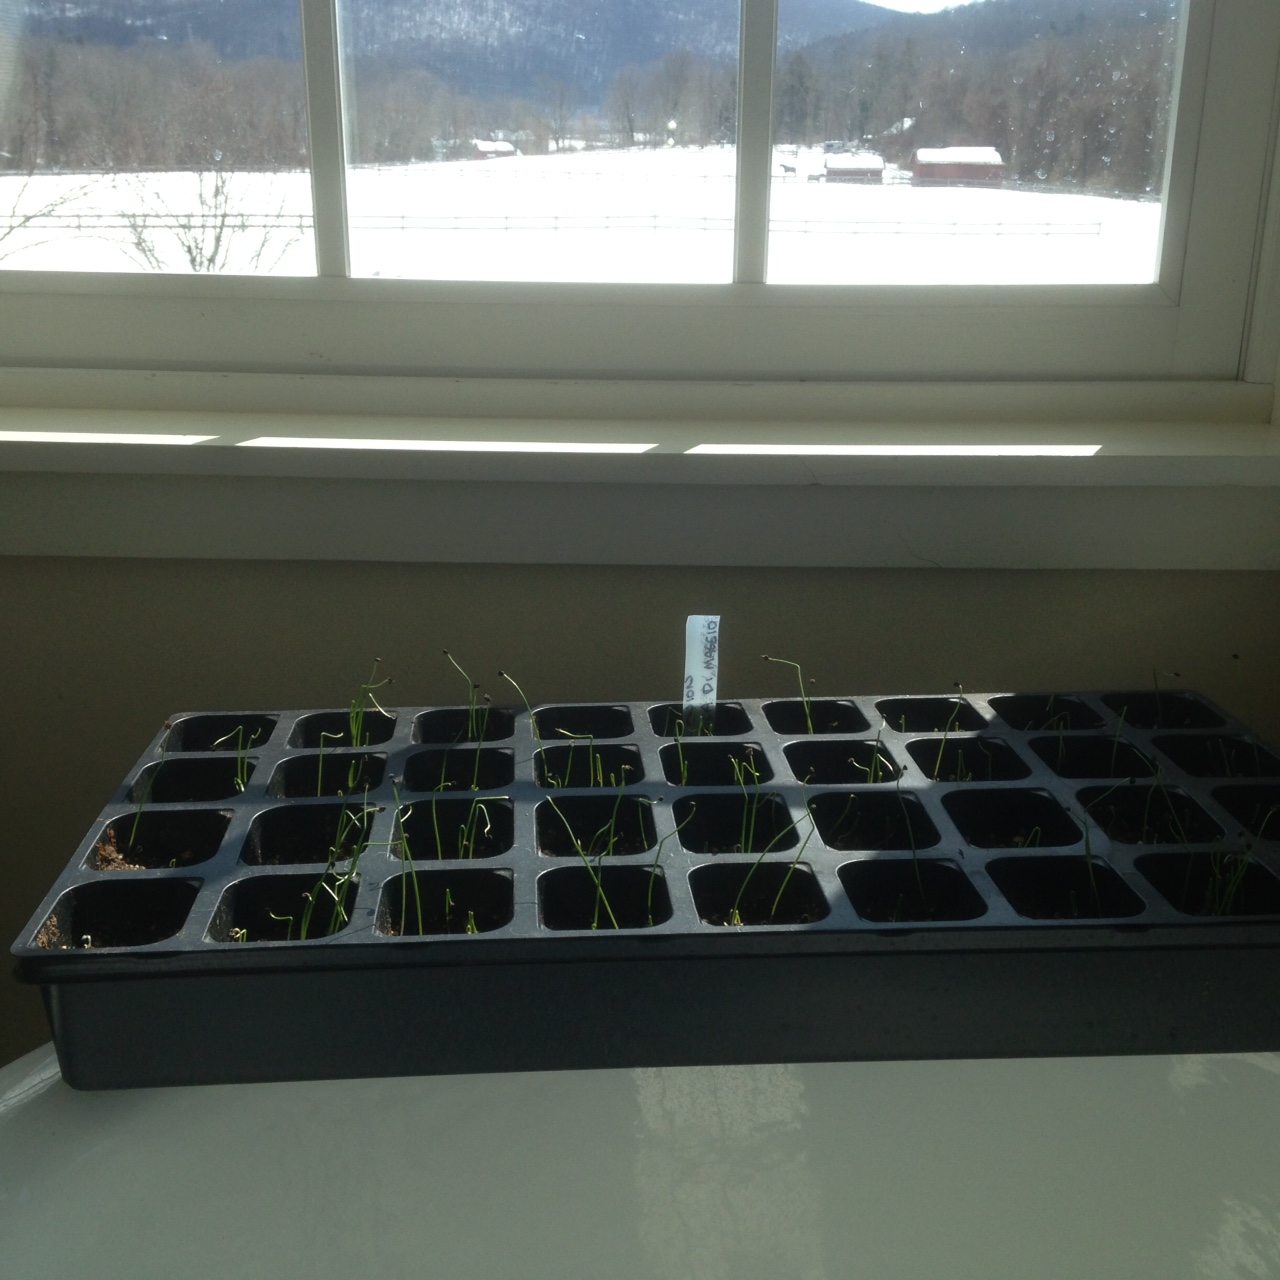
While I tell myself that it’s the best thing to do, I remain nervous about starting all the seeds myself.  I’m not a very technical person but I’m smart enough to know that if I was, I’d have a better chance of growing healthy plants.  There is a science to it that I have yet to figure out.  My policy of flying by the seat of my pants and hoping things work out for the best might not serve me so well in this instance.  If I were so inclined, I would spend some time figuring out optimal light cycles, temperatures, nitrogen mixes and hardening practices for different types of plants.  Then again, it’s just nature, after all, and there really is no stopping it.  The worst case scenario is that I have to source the plants after all.  It’s not like I’ll never eat another homegrown tomato if my seeds fail to thrive.  And there is hope!  Even though there is still 2 feet of snow on the ground, my 300 onions are already an inch tall.

I’d love to hear from anyone with any advice or expertise on starting plants indoors.  My set-up is not very complicated, but advice on light times, bulbs, best starter mix, or just about anything would be much appreciated.  Happy growing!

Fall Harvest, peppers and tomatoes

Wow, it’s been a long time since I wrote!  I had a very busy summer in the garden.  This New England summer was very mild, and the cooler than usual weather made for a lush and productive garden.  It was an exceptional year for tomatoes, and as we head into October I am still picking.  Most of my tomato plants got the blight, as usual, but this year it was so late as to not affect the fruit.  In fact as the days get shorter the plants are having a last comeback and still producing.  To prevent the fruit from splitting on the vine, I pick them under-ripe and mature them on the counter or in paper bags for a few days.  The flavor is a bit tangier than the full sun ripened fruit, but they are still delicious.  I will still have many green ones on the vine when the first frost comes in, so I’ve been perfecting my recipe for green tomato salsa in advance.

Green Tomato Salsa

This time of year is almost as exciting for me as the spring.  It is as much a time of abundance and good eating as the peak of summer.  This may be because I usually plant a garden heavy on fall producing veggies like kale, peppers and potatoes, parsnips, beets and carrots, but it’s also a time for preparing foods for the winter.  I’m spending my days chopping, stewing and freezing tomatoes, roasting hot and mild peppers and making chili sauces to spice up the long winter.  I’ve got quite a few things going on in the kitchen as well as the garden.

The peppers had a nice year.  I planted a mixed variety and like always, quickly lost track of what I planted where.  While this might bother some, I find it exciting to watch the unknown plants grow and see how they eventually reveal themselves.  This year we had a cayenne variety, jalapenos, poblanos, banana peppers, green chilies and regular old green bells.  The mix was great, as some we used for stuffing, some for fresh sauces, some for cooked sauces, some roasted and jarred, and some fresh with dip.  As peppers are perennial, I have even planted some in pots to bring inside and have for the winter. This is a first for me, but I have been reading up on it and I’ll let you know how it goes.

IMAG0460

Another first for me is fermenting cayenne peppers for sauce.  I’ve made plenty of hot sauce over the years, but I’ve never  fermented the chilies before hand.  It is exciting to watch them bubbling away on the top of the fridge.  I have them soaking in a sugary Reisling mixed with 2 % salt.  It can take anywhere from 4 to 6 weeks for the fermentation to be completed, so I just bide my time and watch the process in fascination. I’m making up my own recipe, but there are quite a few good websites on the process, and here’s one I like.  http://talesofakitchen.com/raw/fermented-hot-chili-sauce/

IMAG0462


Remember to always wear gloves when handling hot chilies.  Even the milder chilies can get under rings and nails and cause irritation and burning.  Lingering chili oil can make itself known when you try to take out your contacts.  Never never wipe your face or eyes.  I have learned these lessons the hard way and I always wear the kind of rubber gloves you find in the doctors office.  They fit close and keep the capsasin off the skin.   Also, instead of using a cutting board and knife, try snipping the chilies with scissors right into the bowl.  This will keep the oil out of the cutting board and therefore out of the next thing you cut on it.


One of my favorite things to do with the abundance of peppers is to make green chili sauce.  I first had it prepared by a very good friend and former roommate Rachael Risley (nee. Coulehan), who makes it with a slow cooked pork shoulder.  As it’s very difficult to get organic free range pork of any kind, let alone a shoulder roast, we usually make it with chicken.  Served with cornbread or tortilla chips, it’s a hearty and satisfying dish perfect for the cooler fall temps.  I make the sauce first, pour it over shredded or cubed chicken and bake it with cheese like a casserole.  The trick to really good sauce is to roast the peppers first, skin and seed them and then make the sauce. Chopped and sauteed, they just don’t have the rich flavor that roasting adds. It is an extra step, but well worth the effort.

IMAG0463

Blister the chilies on high heat, flipping once to get both sides.  Put the chilies in a glass bowl, cover with a plate and let cool.  This will steam the chilies and make it easier to remove the skins.  When cool, remove the skin, seeds and ribs, reserving the liquid in the bowl.  Set aside.

Green Chile Sauce

2 tbs olive oil

2 large onions, chopped

2 cloves garlic, chopped

2 tbs flour

2 cups broth

a dozen or so roasted and seeded green chilies, about 2 cups (any variety, but mostly not too hot)

Salt and pepper to taste

In a medium sauce pot, saute the onions in the olive oil until fragrant, about 10 minutes.  Add the garlic and saute two minutes more. Stir in the flour.  Add the broth and cook until thick and bubbly.  Add the chilies and cook for 5 minutes more.  With an immersion blender puree the mixture, leaving some peppers and onions whole.  If you don’t have an immersion blender, add 3/4 of the mixture to a blender, cover with a dish cloth to allow steam to escape and blend on high 1 minute.  Return to pan.  Add salt and pepper to taste.  Serve over chopped or shredded chicken, pork or enchiladas.  Enjoy!


Time to Pick The Garlic

IMAG0368

I use a lot of garlic.  There is nothing like that fragrant allium for flavoring all kinds of dishes, from meats and pastas to vegetables of every sort.  Very easy to grow, it’s planted in the late fall and harvested in the summer.  Not bothered by pests, there is nothing much to it, really.  Unless, of course you forget all about it.  I had so much garlic from the previous year that I forgotten about the garlic patch until it made itself know to me by sprouting again last September as I was putting my garden to bed. Uh-oh.  September is not the time to harvest garlic.  So I left them.  They withered and died and sprouted again the next spring, but this time instead of single stalks from individual cloves, I had many many sprouts from whole heads of garlic. Bushes of garlic.  This year I determined to harvest them at the right time.  Plus I was out of garlic.  

Garlic should be picked when the stalks are still green but beginning to brown.  It’s not rocket science, but it does need to be done.  If you pick it too early, the paper is hard and difficult to peel, and the heads won’t be fully formed.  Too late and you risk the bulbs separating, the paper will be too thin and then they won’t store well.  July is a good time to do it.  Although it’s tempting to grab those sturdy stalks and yank, unless you loosen the ground first they will break and then you’ll be digging around with your trowel and risk damaging the bulb.  I dig a big scoop out of the dirt in front of the garlic, and then bend it toward the loosened earth until it comes free.  Because I had left mine so long in the ground and the bulbs had sprouted close together, most of the garlic was very small.  Perfect for a garlic braid!  I made sure to pick every one; the ones I get next year will be the ones I plant this fall!  

Garlic is excellent fresh, but it must be cured in order to keep.  This is best done out of the sun, in a cool, well ventilated area, and takes a few weeks until the papery stalks dry.  Leave the stalks on for this, and cut them only when you transfer the cured garlic to its storage area.  I keep mine in a basket in our cool basement.  Keep it away from moisture unless you want it to sprout in the basket.  

Last night we had beet greens braised with garlic cloves.  The fresh cloves are much milder than the cured.  It was really delicious and a good way to get in those healthy greens.  

SIMPLE GARLICY GREENS

1 large bunch of beet greens, or whatever hearty green you have to hand, collard, mustard, kale…

1 head of garlic, preferably fresh

1 cup of flavorful broth, vegetable, or chicken


Wash and chop the greens and add them to a large stock pot.  (add as much as will fit.  They cook down to nothing)  Peel and crush, not chop, the cloves of 1 head of garlic.  Add to the greens and pour the broth over.  Cover and simmer 20 min, longer for sturdier greens.  Enjoy!


To Pick or Not to Pick; Fried Green Tomatoes

IMAG0367


Everything in the garden has a season.  Most often just when we are entirely sick of one vegetable, another begins to ripen, giving us a change for a while until we are sick of that one too.  Some we never get tired of eating and they are gone all too soon, like peas and strawberries, but others come in hard and fast, in abundance, and we have to eat them, freeze them, pickle or jar them, or just give them away as fast as we can. Take green beans, for instance. We have been eating radishes, lettuces, kale and cucumbers for weeks now, and I have been watching the delicate purple flowers of the beans develop anxiously.  Haricot verts thinner than a cu-tip, lightly steamed and gobbled up with just a touch of salt are simply divine.   But in just a few days of picking I start to notice the ones I missed on the first few rounds are now the size of a pencil, and no longer bright green but dusky and even purplish.  I sweep through the bean patch, picking everything I see, and haul in about 3 gallons of beans.  Some we eat fresh. Some we pickle.  Some we freeze.  The next day….more beans.  Ugh!  But I know there is an end in sight, and I’ll be happy to use the ones I put up in soups and salads throughout the long months of winter.  Today, though, I’m sick of beans.

Not so tomatoes.  I could eat a fresh tomato every day of my life and be a happy person for it. Anyone who has had a tomato fresh out of someones garden, still warm from the afternoon sun, knows there is little resemblance to a store bought tomato.  The abundance of flavor, the fresh tangy sweetness and juicy texture;  It’s as good as a fresh peach, and each summer we wait and wait for the tomatoes to ripen.  We eat the best ones fresh with sea salt, or a bit of good balsamic vinegar glaze, and the rest, the ones marred by bugs, rot, or blemishes, go into the freezer.  We never seem to have enough to last throughout the winter, and each summer, as the beautiful fruits get larger and begin to ripen on the vine I wonder, Should I pick them yet?

The dilemma is this.  If I pick them green, they won’t get to ripen into the luscious red fruits that I love.  If I don’t pick them green, I won’t get to have fried green tomatoes.

Fried Green Tomatoes are traditionally thought to be deeply southern dish and one I had never tried until my (Italian) mother in law decided to grow a garden.  The recipe’s inclusion in cookbooks actually date back to the early 1830’s in the United States and are possibly of Jewish origin, first seen in the Midwest.  In any case they are prepared throughout the US and everyone who has tried them know they are well worth the effort.  In the end, I picked!

IMAG0363

FRIED GREEN TOMATOES

serves 4

4 Green hard tomatoes

1 egg

1/2 cup milk

approximately 1 1/2 cups breadcrumbs or cornmeal, seasoned with salt and pepper

Vegetable oil

Remoulade to serve

IMAG0365

Slice the tomatoes into 1/4 inch thick rounds, slicing off and discarding the top and bottoms (the breadcrumbs don’t stick to them) Mix the egg and milk together with a whisk.  Heat a cast iron skillet to medium heat and add about a 1/4 inch of oil.  Dip the tomatoes in the egg mixture and coat them with the breadcrumbs.  

IMAG0364

Fry the tomatoes in a single layer, flipping once when the breadcrumbs turn nicely brown.  Drain on paper towels and keep in a warm oven.  Serve with a remoulade of your choice.  I made mine from mayonnaise, catsup, lemon juice and tabasco. Enjoy!

IMAG0366

Berry Season

Summer’s heat is upon us, with temperatures climbing towards the 90’s, and with the heat comes the season of the berry. Blueberries and black raspberries are the first out of the gate in early July, changing almost overnight from pale green and rose to deep blue and black, respectively.

Wild black raspberries are one of my favorite summer treats. Of all the things I forage for in the wild, these luscious gems are a truly one of my favorites. Sweet yet tart, they are best eaten right away, or as soon as you can get them home and into a bowl of cream. They are very delicate and don’t hold up well to storage, unless you plan to freeze them. If you intend to make anything other than jam with the frozen ones, it’s best to freeze them in a single layer on a sheet. Otherwise they will end up as juice in a bag.

Picking black raspberries is no picnic, as they say, and this is one treat you have to work for. They mostly grow along hedgerows and by the sides of dirt roads, and are often laced with stinging nettle and Multi-flora rose brambles, neither of which feels good on bare skin. They like shade and the first ones to ripen are often under other plants. Plan your berry picking foray to include boots and long pants, as well as a wide brimmed hat to protect against the ever present gnats. A long sleeved shirt and some bug repellent go a long way toward making it a pleasant experience. Berries ripen over time, so if you want any quantity for jam or jelly, plan on picking every two days while they are in season.

Picking fresh blueberries is somewhat easier, especially if you have a well tended patch, as we do. I was just in the nick of time in getting mine covered against the birds this summer, as the day after I put up the netting they began to turn blue. Experience has taught me that the berries I deem to be “almost ripe” are perfectly edible to the host of birds hovering just over my shoulder waiting for me to leave. We have lost entire crops of the succulent morsels by waiting one too many days to put up the nets. The protective tent only helps so much though; almost every day I shoo out a hungry fellow that has managed to find a hole or sneak under.

Blueberries are very easy to maintain. They don’t require spraying and are not bothered by pests. They need little pruning and seem to winter well. We have not had any problems with the deer eating them. Harvest seems to depend more on the weather than any other factor and this year they are ripening early. Ours have grown slowly over time, but are abundant producers and we average about 5 gallons a year from 10 bushes. Pie, and more pie, is our first choice for stored berries, especially in the winter months. They freeze well, but I can’t tell you how long they keep because they don’t last long!

Berries are one of natures super-foods, and wild berries even more so. Packed with antioxidants, vitamins and fiber, they not only taste delicious but are really good for you. Everyone should save a spot in their garden for a blueberry bush or two, and if you don’t have a garden, try growing them in pots. It’s well worth the effort, for your taste buds as well as your health.

The Season of Bounty

Image

It’s that time of the year when a quick evening browse around the garden with a cocktail yields a colorful basket of produce.  For a little while this early summer, I could get away with gathering into my upturned shirt, but with the warmer days and rainy afternoons, the harvest has begun in earnest, and I try to remember to bring out a basket along with my drink.  Garlic and green onions, early tomatoes, blueberries and strawberries, carrots, early beets, peas and peppers are all coming in by the handful.  I always try to balance my desire for fresh produce with the realization that if I leave it a while longer, it will grow bigger, but there is nothing like the taste of sweet baby carrots and tender beets steamed with a bat of butter on a steamy summer evening.  My favorite dish of the early summer is, of course, a simple salad of fresh newly picked veggies.  The thinly sliced Peruvian white habanero adds a super kick to this tasty dinner.Image

I am surprised to see the blueberries ripen so early this year, as I usually think of late July as blueberry season, but I predicted this to be the year of the berry, and it seems I have called it right.  Even the tangy and delectable wild black raspberries in the hedgerow are beginning to ripen early, and I got a sticky purple handful this morning for my trouble.  Unfortunately, as they grown amongst the nettles, I also got a prickly wrist.

On another note, for those of you who read “the Doctor is in”  I’m happy to report that my pepper plants are all thriving.  Many of them lost all their dark green foliage to the cold snap we had in May, but the smaller, lighter green leaves are beginning to thicken out the plants, and on many there are the first blooms.  Some did better than others and are already fruiting, hence the spicy salad, but most peppers like the heat, and will produce best from late July into early September.  During this pepper heyday, you will find me in the kitchen, gloves on, chopping peppers for hot sauces and salsas as fast as I can.

Strawberry Fields Forever

Image

June is here and delights are beginning to come in from the garden.  Among the radish and peas, the lettuces and green onion are the strawberries, the most wonderful of all fruits and the one that really makes it feel like summer .  Of all the berries, the strawberries are the earliest and, in my opinion, the tastiest.  At least I say that until early July, when the blueberries are ripening, and then early august when we taste the delectable raspberries and blackberries.  But for now we indulge in the sweet, tangy, indescribably yummy strawberry.

I have a small berry patch that I often think takes up too much real estate in my tiny kitchen garden.  Most of the year it looks stringy and sad, almost as if the plants are dead or dying, but not so.   Come May, out come the shoots and flowers that, ever so agonizingly slowly, turn into hard green fruits and then ripen into luscious berries.  I have everbearing plants, which means they produce fruit all summer, although not as prolifically as they do in June.  Come August, they are growing wild and trying to climb down the sides of the raised beds and into the paths.  They are so hearty and vigorous they can root into the deep pine chips I use as mulch on the pathways.  Each year I cut back the runners and plant some back into the bed in the bare spaces, replace some older plants, and reluctantly throw out the rest.  They are so hearty, in fact, that one year I ripped them all up and, not able to throw them out, kept them in a bag in my garage.  Then, regretting my decision, I replanted half of them back into another bed, where they took, and bore berries the same year.

As hearty as they are, strawberries are a funny plant.  They only produce for a few years, and will shoot out runners that can overtake the garden rapidly.  They use an enormous amount of nutrients and therefore should be moved every 3 years or so to a different spot in the garden. They are best heavily mulched, which both keeps the berries out of the mud,and protects the crowns from cold.  They like water, but not too much, and must be in well draining soil.  Weather will affect the crop and determine ripening times; with warmth and abundant sunshine they ripen quickly, rain and clouds cause some delay.  Some varieties do well in containers, and are a good choice for those with not much space, but they must be watered regularly.

Besides eating them fresh on granola or yogurt, one of our favorite things to do with berries is to make ice cream.  Following is a simple and delicious recipe that can’t be beat.  Image

1 pint fresh berries

1 1/2 cups cream, divided

3 egg yolks

2/3 cup sugar

Wash and crush the berries with a potato masher until pulpy.

Heat 1 cup cream in a saucepan over medium heat until bubbles form on the sides of the pan.

Mix together egg yolks 1/2 cup cream, and sugar in a medium bowl

Add the hot cream to the yolk mixture, whisking constantly, and then return the mixture to the pan.  Over medium low heat, whisk the mixture until it becomes thickened, 5-10 minutes.  DO NOT BOIL.  Allow the mixture to cool completely.

When custard is cool, add to an ice cream churn and follow the manufacturer’s directions.  YUM!

Grilled Fresh trout with onions

Image

As anyone who lives in the North East knows, a few days ago the weather was unbearably hot and humid.  Very unusual for May and, to tell you the truth, it was making me a bit crabby.  With the hot breath of the sun bearing down on us for so long the boys and I decided to see if our favorite neighbor had opened their pool, but no luck.  It was still sealed up tight, with a thick layer of leaves to top it off.  Discouraged, we headed back home, grumbling and moaning, until we remembered our favorite weekday watering hole.  That is not to say our favorite drinking location, but our best dipping pool and trout sanctuary.  We turned the truck around and headed the few miles down the road to Kent Falls.

Kent Falls is a State Park in northern Kent that in the summer is a very popular picnic spot.  In fact it is the most visited State Park in Connecticut, due in part to the fact that it is so very accessible.   It is right off the state road and has lots of parking, a stream and a wide open field for picnicking.  It’s greatest attraction, however, is an incredibly beautiful series of waterfalls that drop steeply into delectably clear pools perfect for bathing.  The water is cold, sparkling and divine.  There are stairs beside the falls that lead up to the top, with a wire fence that declares in multiple places along the route in very clear language “NO SWIMMING”.  Swimming is permitted, although not legally sanctioned, in the two pools nearest the bottom, and on the average summer weekend day the pool is filled to overflowing with frolicking children and their parents splashing around in the cold water.

Image

This is usually not a problem for us, as we almost never go on the weekends.  From Memorial Day to Labor Day the park charges a fee to enter on Saturday and Sunday, so we typically stick to afternoons during the week.   On some occasions, though, we have arrived at the park to find the pool occupied with swimmers, and while my children aren’t averse to swimming, they are first and foremost fishermen.  Kent Falls is not a swimming hole but a designated trout park dedicated to fishermen like my boys, so say the park rules.  This become a problem for us when we have come to fish and others want to swim.  We are usually in the minority.  For many years I have counseled the boys about the necessity to work together with others and to compromise, but how do you explain to a child that they can’t do what they want because others are breaking the rules.  How do you explain that if LOTS of people are breaking the rules, than they have the priority?  It doesn’t seem right.  But then again, if you had driven 2 hours to see the falls, and your children were frolicking in the water with a dozen others, and two boys came with rods and told everyone to clear out because they wanted to fish and the law was on their side, how would you feel?  It is a delicate situation and one we try to avoid.

Regardless of that ethical dilemma, when we arrived at the Falls that day, no one was in the pool, and I got to swim in the wonderfully cold water and lower my  temperature and irritability level at the same time while the boys caught minnows in the stream to use as bait.  While I knit in the shade, they proceeded to catch several beautiful trout in a matter of minutes.  We kept three, all about 13″, thanking them for their lives and cleaning them in the bushes.  Below you will find how I prepared them.

Fresh Trout with Onions. 

3 or more fresh whole trout

salt and pepper

olive oil

1 large onion

1 tbs capers

1/4 cup white wine

1 large lemon

After cleaning the trout, salt the inside flesh to taste.  Wrap each trout in tinfoil and set the grill to medium low.  Place each trout on the grill and cook for about 6 minutes a side.

Meanwhile slice onion in half and into thin strips.  Saute the onions in olive oil until sort and beginning to brown.  Squeeze the lemon onto the onions, add the white wine and the capers and saute until the liquid has evaporated. Salt and pepper to taste.

Remove the trout from the grill and open the tinfoil packets.  With a fork gently lift off the skin of the trout and remove the flesh from the bones.  The flesh should be flaky. Place on a platter and top with the onions.  Serve and enjoy!

Image

Boozing in the Garden

Image

As much as I like my cocktail hour, I’m not talking about me here!  I’m talking about slugs, and how they love beer.  I went through two bottles last night alone filling up my little plastic dishes in order to attract those nasty little slimers that sneak around and gobble up anything they can climb on.  They had gotten into my cabbage, my strawberries, my beets and peas, my radishes.  All those telltale blemishes on my delicate veggies!  If you don’t put a stop to them, they multiply, but you never notice cause they are hard to see and mostly come out at night or in the rain. They don’t like direct sunlight.  But suddenly they are everywhere and most of the vegetables have either holes in their leaves or pieces gnawed out of the fruits.  Fortunately, there is a simple way to knock them out, literally.  Just place some shallow dishes of beer around the garden and the slugs flock to them, suck up that frothy concoction and pass out, drowning themselves.  You don’t even need good beer; save the microbrew for yourself and pick up a six pack of PBR for the slugs.  They aren’t choosy when it comes to drinking.

Image

The Doctor is in!

This morning I went out to look at my garden, as is my custom most mornings after the bus has come and gone and I have a chance to finish my coffee.  Everything looked in order from afar, but as I honed in for a closer inspection, trying to sneak up on those pesky tomato suckers, I noticed my plants looked in somewhat ill health.  Not exactly sick, but queasy.  Now, I knew I took a risk by planting them in the dirt before Mothers Day, but the forecast looked good for an early planting, and I had been fastidious about hardening them off.  We did get a cold snap last week, but not a frost in our area, and they had looked fine the morning after.  The leaves were sort of yellowish, curling at the edges, with some brown spots on them.   What could it be?  Blight?  Bugs? Too much water? Not enough?  As I fondled each plant in turn, murmuring over them and worrying like the mother of a sick child (I have, after all, nurtured these babies since January!), It occurred to me that I might need some help.

I knew just where to get it, too.  I hurriedly plucked the worst looking of the leaves off pepper and tomato, hopped in my truck and beat feet (My dad’s expression) to the local greenhouse to talk with my good friend who runs the garden center.  She has been a resource for me over years, and one I have come to value and respect.  I knew together we could figure out what ailed my lovelies.  After a trot around the greenhouse with my fistfull of wilted leaves looking for my friend, who turned out not to be working that day, I decided to take a chance and ask someone else.  I found another woman and after a quick inspection she informed me that my plants weren’t that sick at all, but had a case of chill stemming from wet feet.  We had a chat, and she suggested in the nicest of ways that perhaps I had mulched too deeply, or perhaps too close to the stems.  The previous cold, combined with a wet wind and lots of rain has weakened the plants because the roots couldn’t breath.  She prescribed a treatment of kelp and seaweed mulch lightly applied to the area around the roots, and the mulch pulled back 6 inches.  It turns out everyone at that greenhouse knows stuff!  I rushed home to apply her advice.  Below is the result.  I’ll let you know in a week if my darling peppers and lovely tomatoes have recovered their former vigor.  ImageImage