Wild Meat

An average day

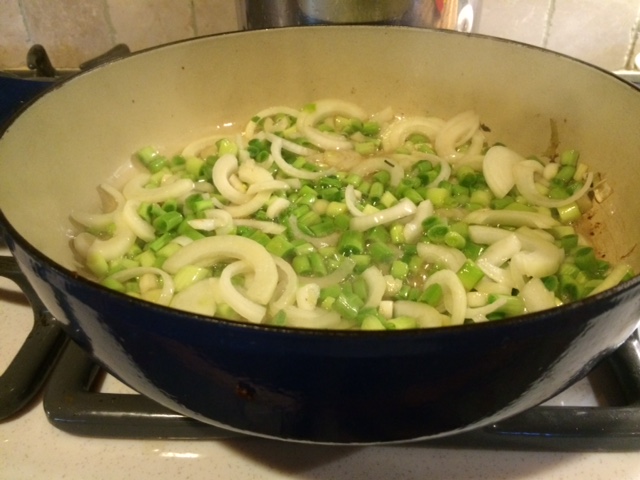
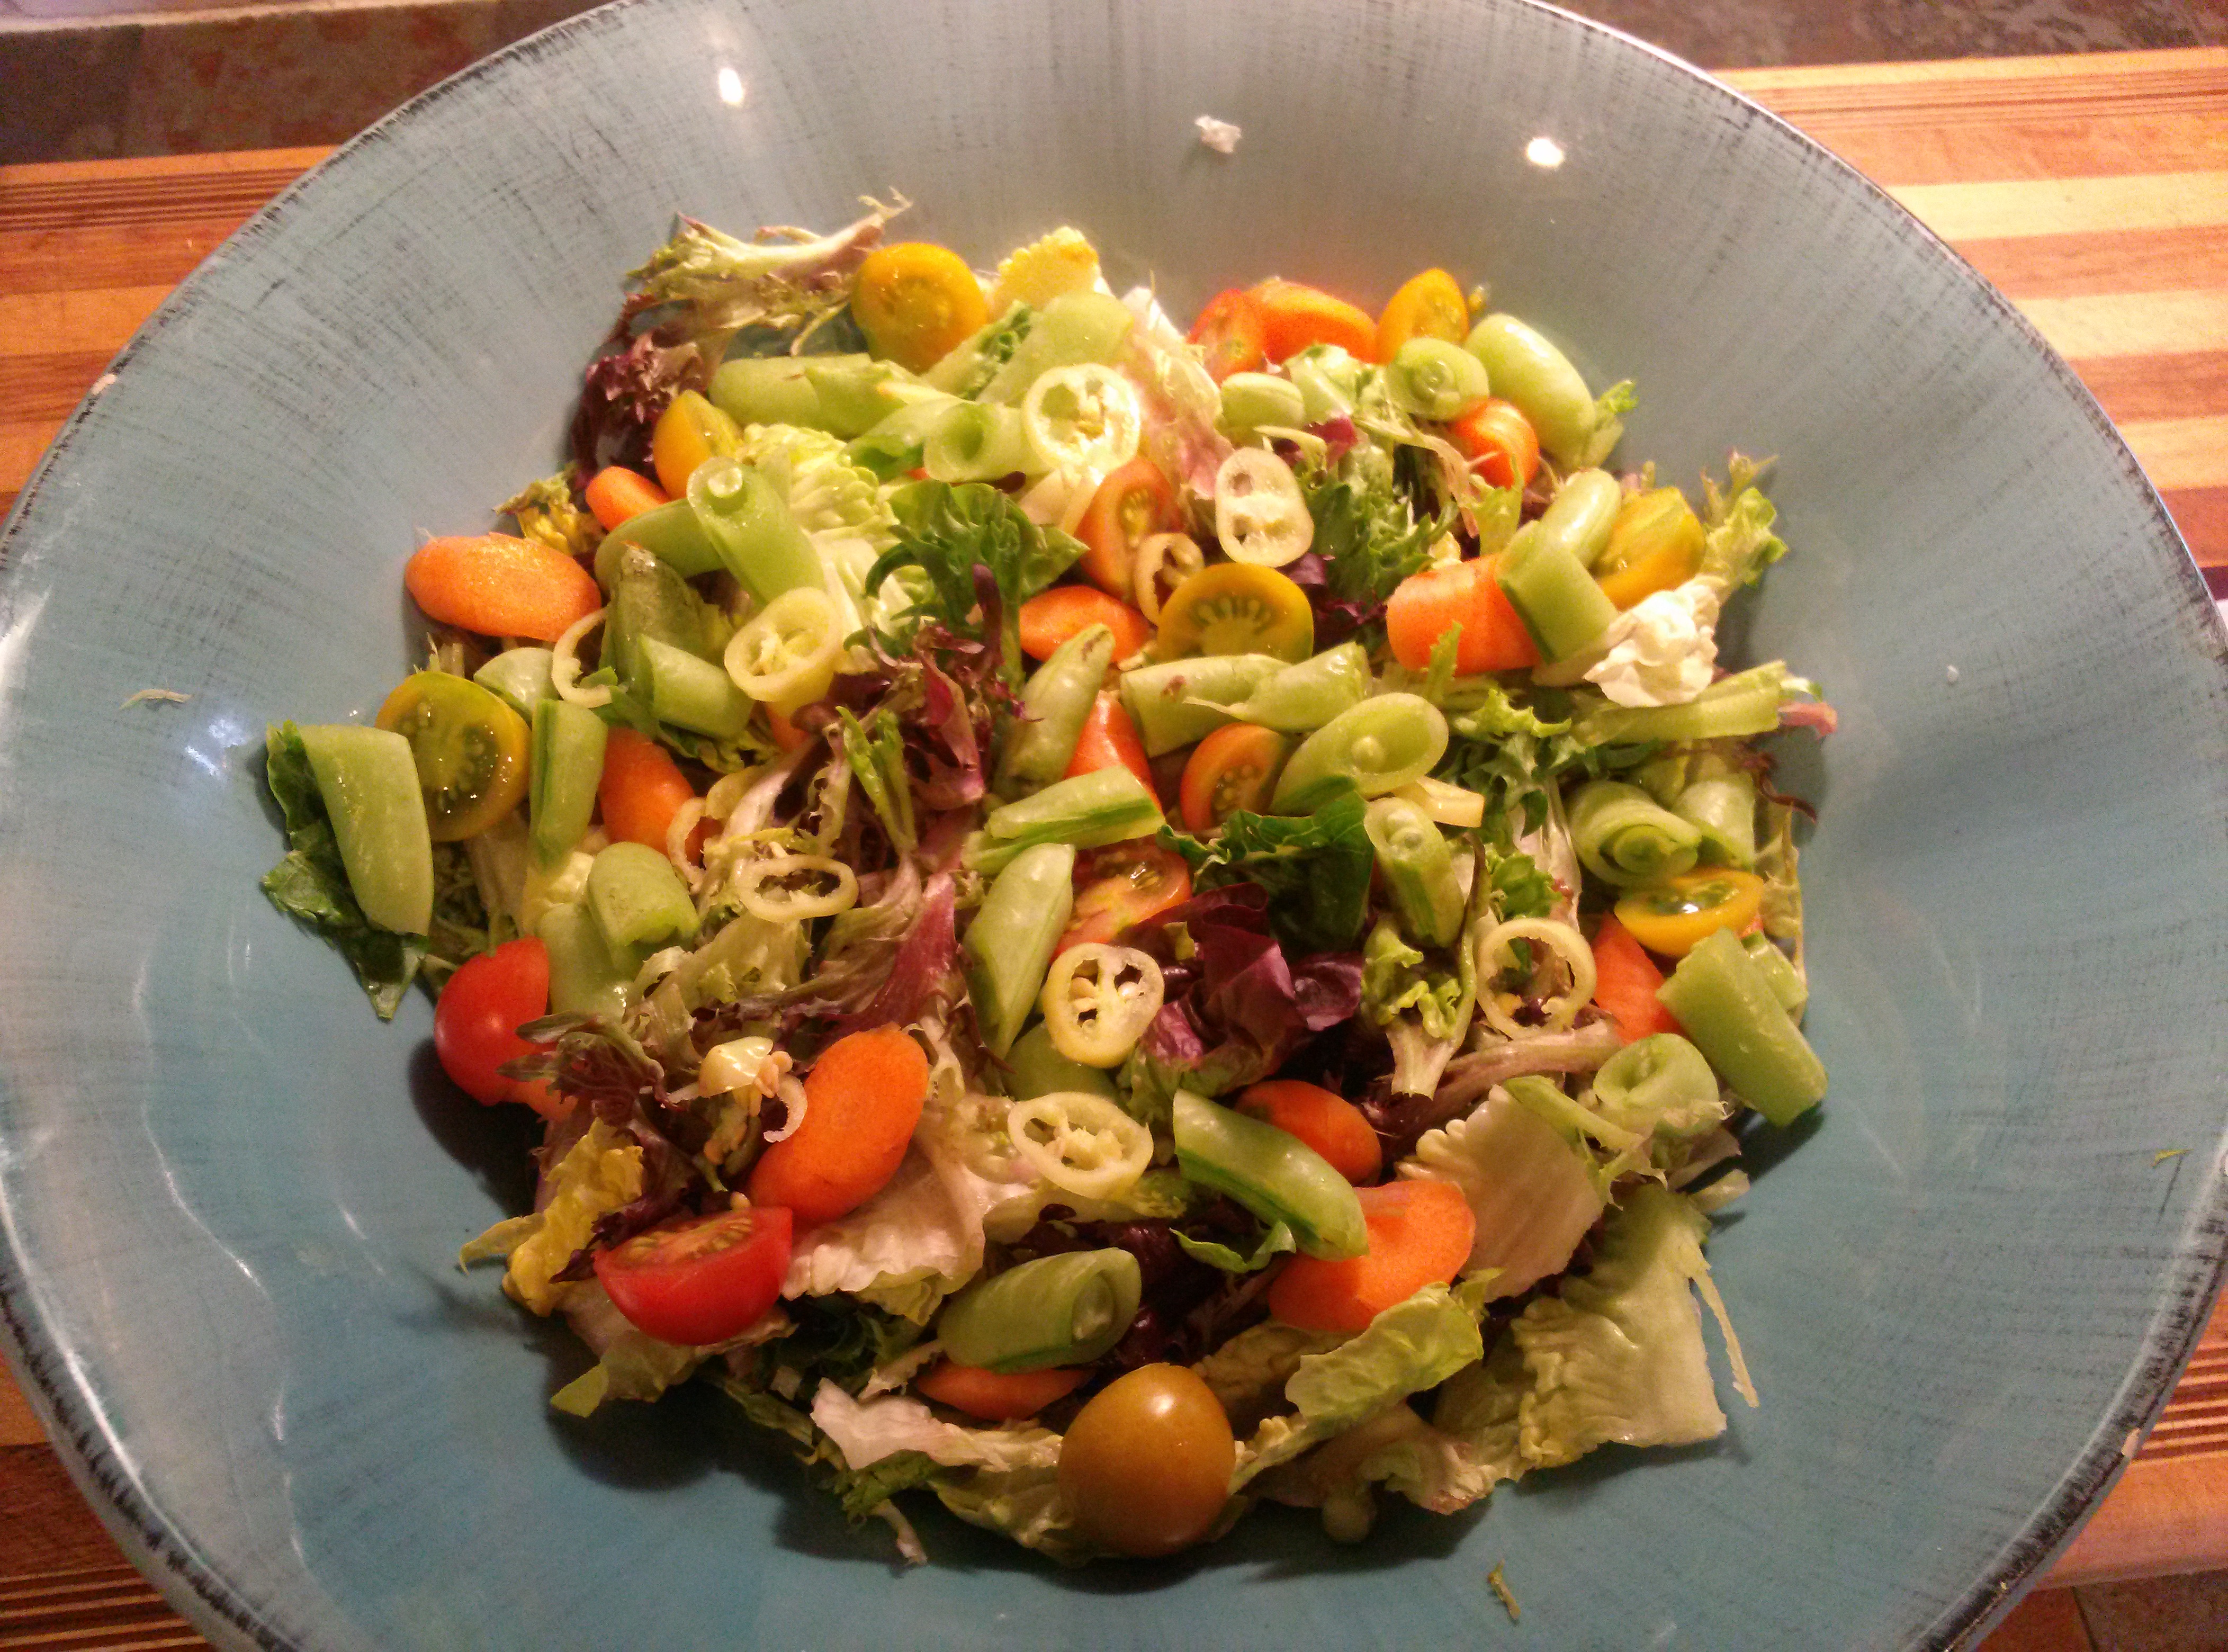
How many types of plants do you eat in a day? I tried to count the daily variety of plants in my diet, and the number is on average around 15 a day. I included a couple of pieces of fruit, a salad with 6 vegetables, and a diner that includes 5 more, for example a side dish, onions, garlic etc. I guess if I included spices it would be higher. I didn’t count things like flour or sugar, as those things aren’t really like wheat or cane anymore. So lets call it 20 on a good day.

Recently I’ve been reading about things like polyphenols, curcuminoids, flavonoids and things like food combining for bioavailability. Spell check doesn’t even contain these words yet, because they are new terminology for new things no one even knew about 3 years ago, and they go way beyond your daily vitamins. You won’t find them on your USDA food plate. Suffice it to say, there is a whole lot going on behind the scenes when it comes to our relationship with food and health. My take away so far is….we don’t know the half of it.

What I do know is that in almost every instance, a variety of things is healthier than a whole bunch of only one thing, in the garden, in the kitchen, in life. I know that things grown in a natural manner are healthier than things grown artificially. I know that, when we eat something, our bodies take on the benefits of that thing, in the form of nutrients and energy and satisfaction, and, I’m certain, in ways we have yet to discover. So wouldn’t it stand to reason that eating a wide variety of foods, the widest possible variety, would give you the broadest spectrum for health and wellness?

A wild ruminant can consume over 200 species of plant life in a day. 200! And they eat tons of things that you couldn’t even chew, let alone digest, like lichen and tree bark. Imagine what unknown flavonoids could be lurking in those funny red berries you saw in the woods last fall (that you should never eat without properly identifying!) Maybe the deer will eat them.

I think we really have no idea what’s going on at all when it comes to our food relationships.

That said, I’m going to stagger my odds and try to capitalize on those 200 plants. I’m going to eat the deer that eats them.

Below you will find many other healthful reasons to eat venison. If you are wondering where to get some, ask any hunter. We love to share! Don’t know a hunter? Go to a gun store and ask. Believe it or not, hunters are really friendly people.

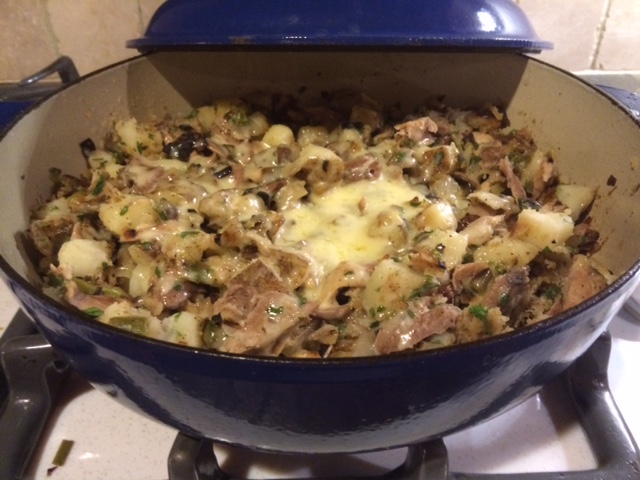
On the table is Corned Venison, in honor of St. Patrick’s day next weekend. I poached this recipe directly from honest-food.net, my favorite wild game chef. Thank you Hank Shaw!

Corned Venison

Prep Time 20 mins, Cook Time 3 hrs, Total Time 3 hrs 20 mins 

1/2 gallon water

1/2 cup kosher salt

1/3 cup sugar

1/2 ounce Instacure No. 1 (sodium nitrite) Don’t leave this out! You can order if from Amazon

1 tablespoon cracked black pepper

1 tablespoon toasted coriander seeds

6 bay leaves, crushed

1 tablespoon mustard seeds

1 tablespoon dried thyme

1 teaspoon caraway seeds

1 cinnamon stick

5 chopped garlic cloves

A 3 to 5 pound venison roast

Instructions

  1. Add everything but the roast to a pot and bring it to a boil. Turn off the heat and cover, then let it cool to room temperature while covered. This will take a few hours. Meanwhile, trim any silverskin you find off the roast. Leave the fat. Once the brine is cool, find a container just about large enough to hold the roast, place the meat inside and cover with the brine. You might have extra, which you can discard.
  2. Make sure the roast is completely submerged in the brine; I use a clean stone to weigh the meat down. You can also just flip the meat every day. Cover and put in the fridge for 5 to 7 days, depending on the roast’s size. A 2-pound roast might only need 4 days. The longer you soak, the saltier it will get — but you want the salt and nitrate to work its way to the center of the roast, and that takes time. Err on extra days, not fewer days.
  3. After the alloted time has passed, you have corned venison. To cook and eat, rinse off the meat, then put the roast in a pot just large enough to hold it and cover with fresh water. You don’t want too large a pot or the fresh water will leach out too much flavor from the meat — it’s an osmosis thing. partially cover the pot and simmer gently — don’t boil — for at least 3 hours and up to 5 hours. The meat itself will be cooked in an hour or less, but you want the sinews and connective tissue in the roast to soften and that takes time.
  4. Eat hot or cold. It is absolutely fantastic with good mustard and some sauerkraut on a sandwich.

One final tip: When you are done with the corned venison, leave it in the cooking broth. Store that in the fridge. Why? The broth keeps the venison moist. Without fat, if you leave it out of the brine it can get very dry and even crumbly.

Potty Talk

My dogs love to eat poop.

My dogs especially love to eat frozen poop. Poopcicles.

My dogs love to eat frozen poop and wipe their faces on the back seat of my Subaru.

NAUGHTY!

OK, stay with me people. This actually is about gardening and food and seasonal living. Sort of.

So lets think about poop for a minute. I’m talking about horse poop, although I’m sure they would eat cow poop too, if we had a cow. The horses eat the grass. They digest the grass. That keeps them warm. Then the horses poop out the grass. It goes onto the ground and the worms come to eat it, and they digest it, and they poop too. (yep, Everybody Poops) THAT goes into the ground, making healthy soil, and the grass grows healthier. And the horses eat the healthy grass. The magic that is happening in this very specialized system that I have grossly oversimplified is called …..Drum roll please….Bacteria.


Enter the Dogs. What is actually going on here is the dogs are capitalizing on a healthy system. They are trying to get something they need into their diet by eating the poop of other animals. It’s not because the poop tastes good, although it might. I wouldn’t know. Dogs, being carnivores, don’t have a ton of naturally occurring good bacteria in their guts, but horses do. That’s why we put their poop on our gardens. The dog eat the horses’ poop to get the good digestive bacteria.

This is where it comes from!

Can you see where I’m going with this?

I just finished reading The Mind Gut Connection, by Emeran Mayer. I strongly recommend that anyone anywhere sick with anything read it immediately. Even though I know you all will, I’ll give you a synopsis anyway.

  • The gut is larger than the brain and every bit as complex.
  • The gut has trillions of microbes, including bacteria, in it. The microbes are our personal ecosystem.
  • The Microbes (actually the metabolites they produce), interface with our brains. They control most of our hormones, as well as our immune responses. They can also produce cytokines when they are unhappy, which cause inflammation.
  • Personal microbial stability = good health and emotional wellness.
  • Things that kill our personal gut microbes are bad for us. (pesticides, antibiotics, corn syrup, commercial wheat gluten, emulsifiers etc. etc.)
  • Things that are good for our microbes are good for us. (organic produce, fermented food, wild foods)
  • We must ‘farm’ our microbes to keep them healthy.

I’m not saying we should be eating poop, although that’s fast becoming a treatment for certain illnesses. Just consider, the next time you stop for a doughnut and a caramel mocha latte, what is happening to your gut bacteria. The next time you have to take a Z-pak, realize that it’s wiping out all the good guys along with the bad. No wonder it gives you the runs.

I know we all get sick, and the best treatment for severe bacterial illness is strong antibiotics. But remember that a healthy gut can (and does) wage war on invasive bacteria. Your personal army of microbes, if you keep it strong and healthy, will prevent you from getting sick in the first place.

Once you’re there and you’ve been coughing for weeks, fever of 103, chest x-ray, and you’re gulping down those steroids and antibiotics and sucking on the nebulizer, it’s time to do some serious bacterial rebuilding. If you just plain refuse to eat poop (just kidding!) there are other ways to rebuild your internal microbial army. They are called FERMENTED FOODS.

Kim chi, sauerkraut, pickles, yogurt, fermented cheese, kefir, kombucha, miso, tempeh, sourdough. These are some of the common ones available at the grocery store. Get them and eat them every day. Or ferment your own. It couldn’t be simpler. Put some vegetables in a crock with some salt. Cover them with water. Wait 4 weeks. Eat. It is actually that easy.

So go forth my friends, and colonize your guts with healthy bacteria. Farm your internal microbes. Eat well, live well, be happy.

Morning Score

This morning, as I walked up the cool dewy driveway to feed the horses, I noticed something in their pasture that hadn’t been there yesterday.  The pasture grows rocks;  I know because I pick them up and toss them over the fence regularly, yet there still seem to be plenty around.  This didn’t look quite like rocks though, or any of the other paraphernalia the horses lose in the pasture, so I walked down to investigate.

IMG_1159

Hooray!  It was what I was hoping they might be…some puffball mushrooms.  They must have blossomed in the field after the hard, much needed rain we had yesterday afternoon. The horse had stepped on some of them, but I managed to salvage some good mushrooms  “for the pot”.  I didn’t have my camera with me, so I can’t show you, but there was clear swath of darker color in the grass where the fungus was growing, like a big comma, and there was a sweep of puffballs, the fruit of the fungus, blooming right down the center.

As I walked back home with my loot I got to reflecting about mushrooms, for which I have a deep fondness.  They often grow in dead or dying material. In other words, they are a product of decay.  It amazes me that nature is structured in such a way  that life flows naturally from death.  Take compost, for instance.  I have a compost pile into which I tossed a rotting pumpkin last year, as well as all my other garden waste.  This year I can’t see my compost pile for the hybrid squash/pumpkin Audrey III growing there.  Abundance from decay.  And yet we still see death as a finality.

IMG_1160

Back in the kitchen putting away the mushrooms, I was chagrined to remember that I have two dozen jalapenos, 10 ripe tomatoes, 4 cabbages, 6 cucumbers, 2 giant zucchini the size of my arm, 3 peppers, a basket of green beans and a watermelon already stuffed in the fridge.  Why can’t I find a score of puffball mushrooms in February, when there is nary a fresh thing in sight?  So I’ll make some hot sauce, roast the tomatoes for the freezer (a yummy trick I learned from my mother-in-law)  whip up  some coleslaw for dinner, jar some pickles, freeze the green beans, and leave the zucchini in my neighbors car, but I am definitely having a mushroom omelet for breakfast.

MUSHROOM OMELET

2/3 cup mushrooms of any kind, diced

2 fresh local eggs (3 if you are hungry)

2 tsp. butter divided

1 oz. goat cheese

Salt and pepper

Heat a nonstick pan on medium low heat.   Crack the eggs in a bowl and scramble lightly with a fork.  Saute the mushrooms in 1/2 the butter until tender and most of the water has evaporated.  If the mushrooms dry out before they are cooked through, add a tablespoon of water to the pan and cook until it’s dry again.  Add the eggs and the rest of the butter and cover for 2-3 min.  When the eggs are mostly cooked, add the cheese to one side and gently fold the eggs onto the cheese. Turn off the heat. Cover again for a few more minutes until eggs are cooked through.

IMG_1163

Pretending, and other stuff.

Hello friends

You may have wondered whatever happened to me and my sometimes blog.  Well, I’ll tell you.  Last spring I was offered my dream job.  I was hired to design, build and manage a teaching garden for the Marvelwood School, a small Connecticut private school that both my sons attend.  I get to spend part of each day planning, organizing and actually digging in the dirt.  It was a very successful first season, and it just keeps getting better.  I was offered the use of a small greenhouse on the campus so I can continue puttering about with growing things this winter.  I’ll tell you a little secret…I’m experimenting with aquaponics too!  I already have 8 little goldfish working hard to produce nitrogen for my sprouts.  Well, they actually produce ammonia that will turn into nitrites that will turn into…that’s a story for another day, though.  Today we’re gonna talk about a freakishly warm December.

It’s freakishly warm, right?  What the heck!  I waited until late late late in November to plant garlic, which I usually plant in the end of October, and still the garlic has sprouted and is 4 inches tall.   Further disturbing evidence of this unusual weather is the fact that my parsley is actually growing.  I have been pulling it in fist-fulls to use in the kitchen, but still it grows.  Hard not to when it’s 60 degrees out.  IMG_0679

I have still been able to plant narcissus bulbs, as the ground isn’t nearly frozen yet, and whenever I hit one that’s already there I find it has sprouted and is trying to pop out of the earth.  My strawberries have actual flowers, for crying out loud!  What gives?  Anyone?  Even I, who loves growing things, am ready for the season to end.  Enough already.

I’m trying to pretend it’s winter.  Despite the fact that they are still green and healthy, I pulled out my leeks today.  IMG_0677They last almost as long in the fridge as in the ground, and I keep telling myself there has to be a hard freeze soon, so I might as well get them out now.  Of course I was wearing a T-shirt while I dug, so it really was pretend.  I could have probably left them in another month.

I decided to make a real one pot winter style meal tonight with some of the leeks and other put-up foods to try to get in the winter mood.  I used the parsley, some potatoes and onions I have in the cellar, and some pheasant leg meat I had left over from a broth I made.  IMG_0682

I also had the good fortune to trade a venison sirloin for some guanciale with my good friend Sarah.  For those of you who are scratching your head (like me the first time I heard of it), it’s a pork jowl.  That’s right…pig cheeks.  and I’m here to tell you that it’s one tasty item!  It’s an Italian specialty food traditionally used in carbonara, and it is super yummy.  More delicate than pancetta, and with a stronger taste than bacon, it ramps up the flavor of any dish.  Here I sauteed it until crisp, removed it with a slotted spoon and cooked the leeks and onions in the fat left in the pan.

IMG_0683

IMG_0684

The potatoes I diced and cooked until soft in salted water, added them to the leeks and fried them until a little crispy.  After that I added the removed guanciale, the parsley, the pheasant, salt and pepper to taste, a pinch of cayenne and finally shredded Havarti on the whole thing, covered it and turned off the heat.  Meanwhile I had a nice winter cocktail to get me in the holiday spirit.  Nothing wrong with rum and eggnog, am I right?

IMG_0685

The final product was a stick to your ribs one-dish meal that made everyone happy.  It’s still about 50 degrees out, but I’m going to go decorate my Christmas tree and pretend.  Happy Holidays!

IMG_0686


Sprouts and Kraut

IMG_0112

Eight days have passed since I tucked my tiny fragile jalapeno seeds into their specially prepared pre-moistened fist sized cloth pods nestled in a self contained semi-hydroponic plastic covered temperature regulated solar nest.   Along with my tucking I did some quick praying to speed their journey toward new life, prolific growth and eventually their ultimate demise in my sauce pan. It sounds a bit hard-hearted when I put it that way.  Today when I ducked under the lights to peak below the plastic I was rewarded with six new pepper sprouts. Hurrah!

IMG_0111

The sad news is that it’s been eight days for my eggplant seeds as well, and not one of the precious babies has responded to my careful attempts to coax  them into existence.  What is it exactly that makes a seed grow into a plant?  I mean, I know all the things a seed needs, as far as moisture, soil, sunlight, etc etc, but what actually makes it have new life?  What mystery is at work that causes some seeds to crack open and begin splitting cells to form the complex structures and mechanisms  for photosynthesis?  This for me, and I dare say for gardeners everywhere, is one of the fascinations of gardening.

But what about those seeds that don’t sprout? Could I have done something differently?  Are they just “bad seeds”?  Who can tell me this?  Instead of worrying about them, I have decided to go against my nature, be patience, have some faith, and wait another week.

On another note, after several failed attempts to set up a lacto-fermentation system for my sauerkraut, (I’m too cheap to purchase a proper crock and weights) I finally settled on a glass jar with a smaller glass inside to act as a weight pressing on a piece of plastic that I cut to fit the jar.  The benefit of glass is that I can monitor the moisture level so that no dangerous bacteria can breach the salted water and spoil the cabbage. Plus it’s fun to watch the bubbles!   The trick is to make sure that all of the food is below the level of the water so no nasty bacteria can land on a stray floater, travel down and spoil the food.  The brine acts like a barrier.  Meanwhile chemistry dictates that the Lactobacillus bacteria, which is on most surfaces already, is changing the sugars into lactic acid, a natural preservative, probiotic and probable anti-carcinogen. (or something like that). If you want to try it yourself, there are plenty of good sauerkraut receipts online.  In 4 to 6 weeks we’ll be chomping away at the heavenly kraut, increasing the beneficial bacteria in our digestive systems and preventing cancer at the same time.  Another Hurrah!

IMG_0113

Berry Season

Summer’s heat is upon us, with temperatures climbing towards the 90’s, and with the heat comes the season of the berry. Blueberries and black raspberries are the first out of the gate in early July, changing almost overnight from pale green and rose to deep blue and black, respectively.

Wild black raspberries are one of my favorite summer treats. Of all the things I forage for in the wild, these luscious gems are a truly one of my favorites. Sweet yet tart, they are best eaten right away, or as soon as you can get them home and into a bowl of cream. They are very delicate and don’t hold up well to storage, unless you plan to freeze them. If you intend to make anything other than jam with the frozen ones, it’s best to freeze them in a single layer on a sheet. Otherwise they will end up as juice in a bag.

Picking black raspberries is no picnic, as they say, and this is one treat you have to work for. They mostly grow along hedgerows and by the sides of dirt roads, and are often laced with stinging nettle and Multi-flora rose brambles, neither of which feels good on bare skin. They like shade and the first ones to ripen are often under other plants. Plan your berry picking foray to include boots and long pants, as well as a wide brimmed hat to protect against the ever present gnats. A long sleeved shirt and some bug repellent go a long way toward making it a pleasant experience. Berries ripen over time, so if you want any quantity for jam or jelly, plan on picking every two days while they are in season.

Picking fresh blueberries is somewhat easier, especially if you have a well tended patch, as we do. I was just in the nick of time in getting mine covered against the birds this summer, as the day after I put up the netting they began to turn blue. Experience has taught me that the berries I deem to be “almost ripe” are perfectly edible to the host of birds hovering just over my shoulder waiting for me to leave. We have lost entire crops of the succulent morsels by waiting one too many days to put up the nets. The protective tent only helps so much though; almost every day I shoo out a hungry fellow that has managed to find a hole or sneak under.

Blueberries are very easy to maintain. They don’t require spraying and are not bothered by pests. They need little pruning and seem to winter well. We have not had any problems with the deer eating them. Harvest seems to depend more on the weather than any other factor and this year they are ripening early. Ours have grown slowly over time, but are abundant producers and we average about 5 gallons a year from 10 bushes. Pie, and more pie, is our first choice for stored berries, especially in the winter months. They freeze well, but I can’t tell you how long they keep because they don’t last long!

Berries are one of natures super-foods, and wild berries even more so. Packed with antioxidants, vitamins and fiber, they not only taste delicious but are really good for you. Everyone should save a spot in their garden for a blueberry bush or two, and if you don’t have a garden, try growing them in pots. It’s well worth the effort, for your taste buds as well as your health.

Pheasant Season

As I’ve mentioned, fall is one of my very favorite seasons, in part because beginning in late October and running through Christmas, Connecticut hosts a hunting season for pheasant.  Throughout the state there are controlled releases of birds on state land at irregular times during the week.  These are then hunted by upland bird hunters, usually with dogs to help them find, or flush, the birds.  Peasant is by far my all-time favorite animal to hunt, and I look forward to the beginning of the season all year.  They not only are a blast to hunt, but they make a delicious addition to the November menu!

Image

I first hunted pheasant, as well as chukar and grouse, with my dad.  I was perhaps in my twenties (I can’t remember because it was SO very long ago!) when he invited me along on a private hunt.  At a private club, the way it works is that when you arrive you determine how many birds you want to hunt, usually 2-4 per person, and the guides will set them out for you in the hunting area.  The birds are raised in huge pens nearby.  You relax for a while and then off you go to find the birds.  We didn’t have our own dogs then, so we used the dogs that came with the guide service.  This may seem to some like an unfair advantage over the birds, but let me assure you it is not.  Pheasant are not like wild chickens.  They are crafty and very fast and can often outsmart a dog by leaving a confusing scent trail, running in circles, or just generally blending into their environment the way God made them.  It is neither easy to find the wily creatures after they are freed nor is it easy to fell them, although I must say that pheasant are slower in the air then the average game bird. That’s one of the reasons I like to hunt them!  I need all the advantage I can get.

Back then with my dad I was an average shot.  I remember missing the first bird, but I got some that day.  Over the years when I lived in Colorado, my husband and I would often head south and east to Blanca in the fall and hunt birds there.  I was never a crack shot, like he was, but I hit most of what I aimed at.  Recently, when we were back in Connecticut, he and I decided to tune up our game by going over to Millbrook  New York and spending the day at the Orvis shooting grounds called Sandanona.   http://www.orvis.com/sandanona  They have a world class sporting clay course for wing shooters.  This was a real treat for us, and not something we could do very often.  100 clays at 20 stations each to practice on.  By the end of the day we had sore shoulders and tired arms, but we were smiling. He was smiling somewhat more than me, as he had schooled me at each station, hitting  approximately 70% of his targets to my somewhat less then 50%.  Needless to say I was a bit discouraged.  So the following Christmas, after a whole bird season of listening to me gripe about what a bad shot I was, my darling husband gifted me a trip to the Sandanona shooting school, where I would be taught the proper techniques and principles of wing shooting in a half day class with an expert.  I couldn’t wait.

The class was super fun, and I learned a ton about how to shoot.  I learned that my gun doesn’t really fit my body.  It’s too short, and canted too little to line up with my eye when I draw it up.  But I love my gun.  My dad gave it to me and I’ll never get rid of it.  I learned that even though I am right handed, I am “left eye dominant”, which means that my left eye leads and my right eye follows.  I learned that because of this I should be shooting left handed.  So I tried that.  It’s like walking with shoes on the wrong feet tied together. Not even safe.  I learned that I could compensate by using a patch over my left eye, to force my right eye to work.  I tried that and actually fell down. With a loaded gun. My shooting went below 30%.  I spent the next season practicing closing my left eye instead of my right while I draw.  Draw, close, aim, fire.  I hit a few birds, but didn’t even make my bag limit for the season.

What now?  I’m trying to get back to a place where I can forget my limitations and just shoot.  Where I can let instinct take over for ability.  I need to un-think shooting.  I’m trying to be OK with the fact that, for whatever reason, I’m just not a very good shot, and I’m trying to remember that even though I love to shoot, what I really love is to walk in the woods on crisp fall days with my husband and my son and my dog.

Here is a recipe for one of our very favorite fall meals.  If you want leftovers, you had better make 2.  It takes a bit of work, but is well worth the effort.  FYI the easiest way to get the meat off a pheasant is to cut the skin of the breast and peel it back, and then filet the breasts off the bone.  Then continue to pull the skin down over the thighs, exposing the legs.  Break the leg joints at the end of the ‘drumstick’ and again at the hip.  Use a knife to separate the legs from the body.

Pheasant Pot Pie

6 cups water

1 pheasant, breasted, and legs skinned

salt and pepper to taste

1 tsp parsley

1 tsp. thyme

1 bay leaf

1 cup diced potatoes

1 cup diced turnips

1 cup diced carrots

1 cup diced leeks

1/2 cup frozen peas

1/2 cup chopped onion

4 tbs butter

3 tbs flour

1-2 bullion cubes

1 pie crust.

In a stock pot, bring the water to boil and add the pheasant and the spices.  Reduce heat to low and simmer the pheasant for 20 minutes or until cooked through.   Allow to cool, reserving the liquid.  Meanwhile, chop the vegetables and mix in a large bowl.  In a heavy cast iron pan over medium heat melt the butter and then add the flour, stirring constantly until the roux begins to darken.  Stir in the bullion.  Add about 1 1/2 to 2 cups of the reserved liquid broth to the roux and stir until you have a smooth gravy.  Freeze the remainder of the broth for future use.  Mix the gravy into the vegetables.  Cut the pheasant into bite sized pieces and mix into the vegetables.  Put all of it into a pie plate or a 9″ round cake pan,mounding to fit.  Cover it all with the pie crust, sealing the edges to the pan.  Bake in a 350 oven for 1 hour.  Serve warm with a nice salad.

November Soup

I’m a big fan of soup.  I serve it year round, from hearty stews in the dead of winter to a cooling gazpacho or an avocado bisque in the heat of July.  When chillier winds start to blow in November, soup is definitely on the menu.  It’s cozy warmth really help to bring the family together around the table when the darkness comes early.  And they smell so good too! 

Tonight’s soup is a perfect dish for early fall, as the ingredients are what is naturally on hand.  Parsnips from the garden and apples from the orchard make this soup a creamy delight.  Non-dairy, and not too sweet, it’s scented with cumin and coriander.  Perfect as an accompaniment to a roast or stuffed chops,  or serve it on it’s own, with a hearty bread like sourdough or cheddar biscuits and a green salad.  With only a couple of ingredients it’s super simple to make and can be made ahead.  It will keep in the fridge for a few days, too.

For a nicer flavor, roast the parsnips in the oven for about 40 minutes on 350.  You can peel them first or just leave them as they are.  It will slightly caramelize the sugars and make for a richer soup.  Any variety of apples will do, but my favorites are good old Mackintosh or Gala.

Parsnip and Apple Soup

2 tbs good Olive Oil

1 large onion, chopped

2 firm apples, peeled and chopped

8 to 15 parsnips, depending on the size. (more for 1″ or less at the crown)

3 1/2 cups (or more depending on desired consistency) of chicken or vegetable broth

Sprinkle of cumin

Sprinkle of coriander

Salt and pepper to taste

Saute the onion in the olive oil until tender.  Add the apples and a dash of salt and and cook, stirring occasionally, until the apples are soft.  Add the parsnips and the broth and cook for 20 minutes if you roasted the parsnips first, 40 minutes if not.  Allow to cool and puree the mixture in a blender, or use a hand blender right in the pot.  Sprinkle with the spices and stir.  Serve alone or with finely chopped parsley or a dollop of yogurt. Enjoy!

The Season of Bounty

Image

It’s that time of the year when a quick evening browse around the garden with a cocktail yields a colorful basket of produce.  For a little while this early summer, I could get away with gathering into my upturned shirt, but with the warmer days and rainy afternoons, the harvest has begun in earnest, and I try to remember to bring out a basket along with my drink.  Garlic and green onions, early tomatoes, blueberries and strawberries, carrots, early beets, peas and peppers are all coming in by the handful.  I always try to balance my desire for fresh produce with the realization that if I leave it a while longer, it will grow bigger, but there is nothing like the taste of sweet baby carrots and tender beets steamed with a bat of butter on a steamy summer evening.  My favorite dish of the early summer is, of course, a simple salad of fresh newly picked veggies.  The thinly sliced Peruvian white habanero adds a super kick to this tasty dinner.Image

I am surprised to see the blueberries ripen so early this year, as I usually think of late July as blueberry season, but I predicted this to be the year of the berry, and it seems I have called it right.  Even the tangy and delectable wild black raspberries in the hedgerow are beginning to ripen early, and I got a sticky purple handful this morning for my trouble.  Unfortunately, as they grown amongst the nettles, I also got a prickly wrist.

On another note, for those of you who read “the Doctor is in”  I’m happy to report that my pepper plants are all thriving.  Many of them lost all their dark green foliage to the cold snap we had in May, but the smaller, lighter green leaves are beginning to thicken out the plants, and on many there are the first blooms.  Some did better than others and are already fruiting, hence the spicy salad, but most peppers like the heat, and will produce best from late July into early September.  During this pepper heyday, you will find me in the kitchen, gloves on, chopping peppers for hot sauces and salsas as fast as I can.

Kitchen Essentials and Venison Sausage

Eating locally and seasonally in Connecticut is a hard task unless you plan ahead.  Making things and storing them for future times is essential to a happy cook and a well-stocked kitchen.  In order to put up produce and meat, sauces and fruits, I have some essentials in my kitchen that I could not live without.  Below you will find a list of must-haves for preparing for leaner times. 

Freezer

I can’t say enough about investing in a good chest freezer.  The simplest way to store meat, vegetables, and fruit is to freeze them as soon as possible after picking or harvesting.  It maintains the vitamins and nutrients far better than canning or other methods, and in most cases keeps the food safe for months or even years.  It is the easiest and fastest way to put up a harvest at its freshest, and to store produce for the winter months.  I have a deep chest freezer that I bought new from Sears for about 350.00, and I store thousands of dollars’ worth of fresh meat and vegetables in it every fall to last through the winter months.  If you don’t have one, don’t want to incur the cost of a new one, there are several online sites where you might shop for a used one for much less.  So much of the excess produce from my kitchen garden goes into the freezer right after picking, and it is such a delight to browse the shelves for a cooking idea knowing that my choices are ripe, delicious, healthful, and clean.    

                Canning pot or Pressure cooker.

A canning pot is a lovely thing to have, and very useful for storing jellies, sauces, broth, fish, and some veggies.  Not all veggies are suitable for canning fresh, so we can mainly prepared foods, like chili and tomato sauces, sweet butters and jellies and cooked vegetables like sauerkraut.  We use ours most often during the fall months when we make and can sweets and sauces to give as gifts during the holidays.  We also jar hot sauces and pickles of all sorts, chilies, beans, corn and tomatoes.  If you lack a proper canning pot, take some time to look for one at your local thrift or consignment store, where they can often be picked up for a few dollars.  Without one, you can still make many canning recipes in a regular sturdy pot.

                Juicer

I love my juicer.  It was given to me by a dear friend who lived off the grid.  He had a generator for electricity, but every time he tried to juice he would blow a fuse.  When he parted with the juicer, he made me promise to make him juice anytime he came to visit, and even though he still lives at about 10,000 feet, deep in the mountains of Colorado, with no phone,  I’m still waiting to make good on my promise.  The juicer is a Champion, and very old and outdated.  It is essentially a big motor connected to a shaft that drives a shredder and some plastic implements to strain the juice, but it will juice anything.  I could put a potato in and get potato juice.  I use it for fresh fruit and veggie juice during the summer months, (carrot beet apple is my favorite) and in the fall I juice leftover kale and spinach, freeze the juice and add it to soups and stews during the winter to add flavor and green nutrients. 

                Dehydrator

Anyone can use their oven for a dehydrator, but it’s just so quick and easy to use one made for the purpose that this is on my list as well.  With the dehydrator there is no need to turn the produce, as it gets evenly dry in a much shorter time than using the oven.   We use ours to dry fruit for snacks, beef jerky, dried fish to be used in soups, and most especially mushrooms.  Dried and then frozen, mushrooms can be stored for years in the freezer, but they never make it that long.  Wild mushrooms are a treasure and  we hoard them in season and use them sparingly for the rest of the year.  I’m learning more and more about the wild world of fungi and I’m excited for a season of mushrooming this summer and fall. 

                Grinder/sausage maker

When you hunt or gather the majority of your own protein, having a grinder is a blessing.  Meatloaf, hamburgers, hash, and meatballs all require the meat to be finely ground.  The added benefit is, with a small attachment, ground meat can be stuffed into casing to make delicious sausage!  I love venison sausage, and many of our friends and family have come to love it as well.  It’s one of the things we give as gifts during the holidays and it is always well received.  My husband makes a garlic cheddar sausage that is mouth-wateringly good.  The recipe follows.

                Cheddar Garlic Venison Sausage

4 Lbs. Venison, ground fine

1 ¼ Lb. Pork fat, ground fine

8-10 cloves garlic, chopped fine

½   Lb. Cheddar cheese

2+ Tbsp. Crushed red pepper, depending on your spice tolerance

½ cup white wine

2 Tsp. Sugar

1+ Tbsp. coarse ground Black pepper

1 Tbsp. salt

5 feet medium sausage casing (you can get this from a butcher).

 Mix the fat and meat together and then mix in the remaining ingredients.  Mix by hand until everything is uniform.  Stuff the casings with the mixture into 4 to 5 inch lengths.  Allow to settle in the fridge for a day or two, to allow the flavors to blend.   Cook in water or stock, on a grill or pan fry over medium low heat.  These can be used like any sausage, served alone or with pasta, in a salad, or on sandwiches.  They freeze remarkably well.   Try substituting any game meat.  We made them with caribou once and they were just as delicious.